I was terrified the first time I pruned a tree. What if I cut the wrong branch? What if I killed the tree? What if I made it look terrible? These are normal fears. Pruning feels scary because it seems permanent. But here is what I learned after 10 years of pruning my own trees and shrubs: plants are more forgiving than you think.
This guide walks you through exactly how to prune trees and shrubs the right way. No confusing jargon. No advanced techniques you do not need. Just the basics that will get you pruning with confidence.
Why Prune at All?
Plants do not technically need pruning to survive. Forests do just fine without anyone walking around with Felcos. But in a garden setting, pruning matters for three reasons:
Health. Dead, diseased, or damaged branches invite pests and rot. Removing them keeps the rest of the plant healthy. Branches that cross and rub against each other create wounds that let disease in. Thinning out dense growth improves air circulation, which prevents fungal problems.
Shape. Without pruning, many shrubs turn into tangled messes. Trees develop weak branch angles that split in storms. Pruning guides growth into a strong, balanced shape that looks good and holds up to weather.
Production. Fruit trees produce more fruit when pruned correctly. Flowering shrubs bloom more heavily after a good pruning. Roses practically demand pruning to perform their best.
September Outdoor Sale — Save Up to 52%
A new month means new ways to upgrade your patio, garden & lawn for less. We’ve rounded up popular outdoor picks with savings up to 52%. Don’t wait—these offers can change anytime!
The Tools You Need
You do not need a garage full of equipment. Three tools cover 90% of home pruning jobs:
- Bypass hand pruners – For branches up to 3/4 inch thick. My go-to is the Felco F-2, but a Corona BP 3180 works fine for most homeowners.
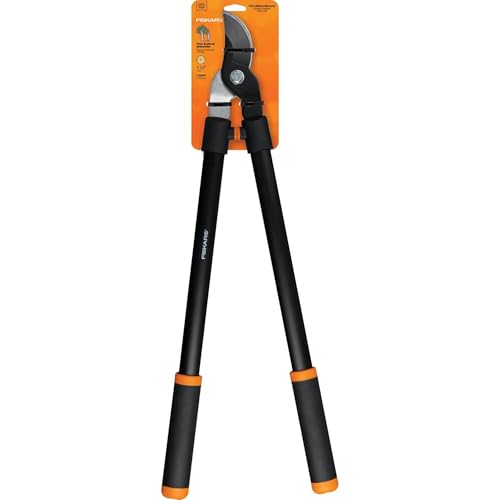
- Loppers – For branches 3/4 to 2 inches thick. The long handles give you leverage. I use Fiskars PowerGear2 loppers.
- Pruning saw – For anything thicker than 2 inches. A folding saw like the Corona RazorTooth handles branches up to 6 inches.
Add a pair of hedge shears if you have formal hedges. Add a pole saw if you have tall trees. But start with those three. Keep your tools sharp and clean. Dull tools crush branches instead of cutting them, which damages the plant.
When to Prune (Quick Reference)
Timing matters. Prune at the wrong time and you might cut off this year’s flowers or stress the plant during a vulnerable season. Here is the quick version:
- Late winter / early spring: Most deciduous trees and shrubs. The plants are dormant. You can see the branch structure clearly without leaves. Cuts heal quickly when spring growth starts.
- After flowering: Spring-blooming shrubs like lilacs, forsythia, and azaleas. These plants set their flower buds the previous summer. Prune them in winter and you cut off all the flowers.
- Summer: Light touch-up pruning. Remove dead or damaged branches whenever you see them. Pinch back leggy growth on annuals and perennials.
- Fall: Generally avoid heavy pruning. Cuts heal slowly as the plant goes dormant. Pruning stimulates new growth that will get killed by frost.
The 3-Cut Method for Branches
This is the single most important pruning technique to learn. If you cut a branch wrong, the bark tears and leaves a wound that invites disease. The 3-cut method prevents tearing.
Cut 1: The undercut. About 6 to 12 inches from the trunk, cut upward into the bottom of the branch. Cut about one-third of the way through. This cut prevents the bark from peeling down the trunk when the branch falls.
Cut 2: The removal cut. Move 2 to 3 inches further out from cut 1. Cut downward from the top of the branch until it falls off. The branch will break cleanly at cut 1 without tearing bark.
September Outdoor Sale — Save Up to 52%
A new month means new ways to upgrade your patio, garden & lawn for less. We’ve rounded up popular outdoor picks with savings up to 52%. Don’t wait—these offers can change anytime!
Cut 3: The final cut. Now you have a stub. Cut it off just outside the branch collar – that swollen ring where the branch meets the trunk. Do NOT cut flush with the trunk. Do NOT leave a long stub. Cut right at the branch collar. The collar contains specialized cells that heal the wound.

What to Cut: The 4 D’s
When you look at a tree or shrub trying to decide what to cut, remember the 4 D’s. These always get removed:
Dead. Any branch that is brown, brittle, and has no green when you scratch the bark. Dead branches do not come back. Remove them.
Diseased. Branches with fungal growth, cankers, unusual spots, or oozing sap. Cut these back to healthy wood. Clean your pruners with rubbing alcohol between cuts so you do not spread the disease.
Damaged. Branches cracked by wind, broken by snow, or chewed by animals. Snapped branches invite pests and rot.
September Outdoor Sale — Save Up to 52%
A new month means new ways to upgrade your patio, garden & lawn for less. We’ve rounded up popular outdoor picks with savings up to 52%. Don’t wait—these offers can change anytime!
Deranged. Branches growing in weird directions. Crossing branches that rub against each other. Branches growing toward the center of the tree instead of outward. Water sprouts shooting straight up from horizontal branches. Suckers growing from the base of the tree.
Once you remove the 4 D’s, you have already done the most important pruning. The rest is shaping.
How to Prune Shrubs
Shrub pruning depends on the type of shrub:
Deciduous shrubs (lose leaves in winter). Thin out about one-third of the oldest stems each year. Cut them right at ground level. This encourages new growth from the base. Do not just shear the top – that creates a dense shell of leaves with a bare, woody interior.
Evergreen shrubs (keep leaves year-round). Most evergreens do not need heavy pruning. Light shaping in early summer is usually enough. Never cut back into bare wood on most evergreens – they will not regrow from old wood. Yew is the exception. Yew can handle severe pruning.
Flowering shrubs. Spring bloomers get pruned right after flowering. Summer bloomers get pruned in late winter or early spring. When in doubt, prune right after the flowers fade.
September Outdoor Sale — Save Up to 52%
A new month means new ways to upgrade your patio, garden & lawn for less. We’ve rounded up popular outdoor picks with savings up to 52%. Don’t wait—these offers can change anytime!
How to Prune Young Trees
The first 5 years of a tree’s life are when pruning matters most. You are building the structure the tree will have for decades.
Pick a central leader (the main vertical trunk). Remove competing leaders – stems trying to become the main trunk. Branches should spiral around the trunk, not cluster at the same spot. Remove branches with narrow crotch angles (less than 45 degrees) – these are weak and will split in storms. Wide angles are strong angles.
Keep the lowest branches at a height that makes sense for your yard. If the tree is near a walkway, you want branches starting above head height. If it is in an open area, lower branches are fine.
Young trees need very little pruning besides structure. Remove maybe 10 to 15% of the branches per year. Heavy pruning stunts a young tree’s growth.
Common Pruning Mistakes
Topping trees. Cutting the top off a tree to reduce height is the worst thing you can do. The tree responds with a frenzy of weak, fast-growing shoots that are even taller and more dangerous. If a tree is too tall for its location, you planted the wrong tree. Remove it and plant a smaller species.
Flush cuts. Cutting a branch flush with the trunk removes the branch collar and creates a wound the tree struggles to heal. Always cut just outside the branch collar.
September Outdoor Sale — Save Up to 52%
A new month means new ways to upgrade your patio, garden & lawn for less. We’ve rounded up popular outdoor picks with savings up to 52%. Don’t wait—these offers can change anytime!
Pruning at the wrong time. Pruning oaks in summer can spread oak wilt disease. Pruning spring bloomers in winter removes flowers. When in doubt, prune in late winter when the plant is dormant.
Over-pruning. Never remove more than 25% of a plant’s foliage in one year. More than that stresses the plant severely. If a shrub is massively overgrown, spread the renovation pruning over 2 to 3 years.
Dirty tools. Moving from one plant to another with dirty pruners spreads disease. Keep a small bottle of rubbing alcohol and a rag in your tool bag. Wipe the blades between plants, especially if you suspect disease.
After Pruning Care
Do NOT paint pruning cuts with wound sealer. Research shows that sealants trap moisture and promote rot. Trees heal best when cuts are left to dry naturally. The exception: if you prune oaks during the growing season (which you should avoid), some arborists recommend sealing cuts to prevent oak wilt beetles.
Water the plant well after a significant pruning. The stress of losing branches increases water needs for a few weeks. A light fertilizer application in spring helps the plant push out new growth. But do not over-fertilize – too much nitrogen creates weak, leggy growth.
Frequently Asked Questions
Can I kill a plant by pruning too much?
Yes. Removing more than 30 to 40% of a plant’s foliage at once can kill it. The plant needs leaves to produce energy through photosynthesis. Remove too many leaves and the plant starves. If you need to drastically reduce a plant’s size, do it over 2 to 3 years.
September Outdoor Sale — Save Up to 52%
A new month means new ways to upgrade your patio, garden & lawn for less. We’ve rounded up popular outdoor picks with savings up to 52%. Don’t wait—these offers can change anytime!
Should I seal pruning cuts?
No. Modern research shows that pruning sealers do more harm than good. They trap moisture and prevent the tree’s natural healing process. Leave cuts exposed to air. The only exception is oaks in oak wilt areas – sealing those cuts can prevent beetle transmission.
How do I prune a shrub that has gotten too big?
Use renewal pruning. Remove one-third of the oldest, thickest stems at ground level each year for 3 years. By year 3, you have an entirely new shrub at a manageable size. Do not just shear the top into a ball – that makes the problem worse over time.
What angle should I cut at?
For heading cuts (cutting a branch back to a bud), cut at a 45-degree angle about 1/4 inch above an outward-facing bud. The angle should slope away from the bud so water runs off. For removal cuts (taking out a whole branch), cut just outside the branch collar at the angle that matches the collar.
Can I prune in the rain?
You can, but it is better to wait for dry weather. Wet conditions spread fungal and bacterial diseases more easily. If you must prune in the rain, disinfect your tools between plants.
September Outdoor Sale — Save Up to 52%
A new month means new ways to upgrade your patio, garden & lawn for less. We’ve rounded up popular outdoor picks with savings up to 52%. Don’t wait—these offers can change anytime!