Last Updated on October 22, 2026 by D. Ruddy
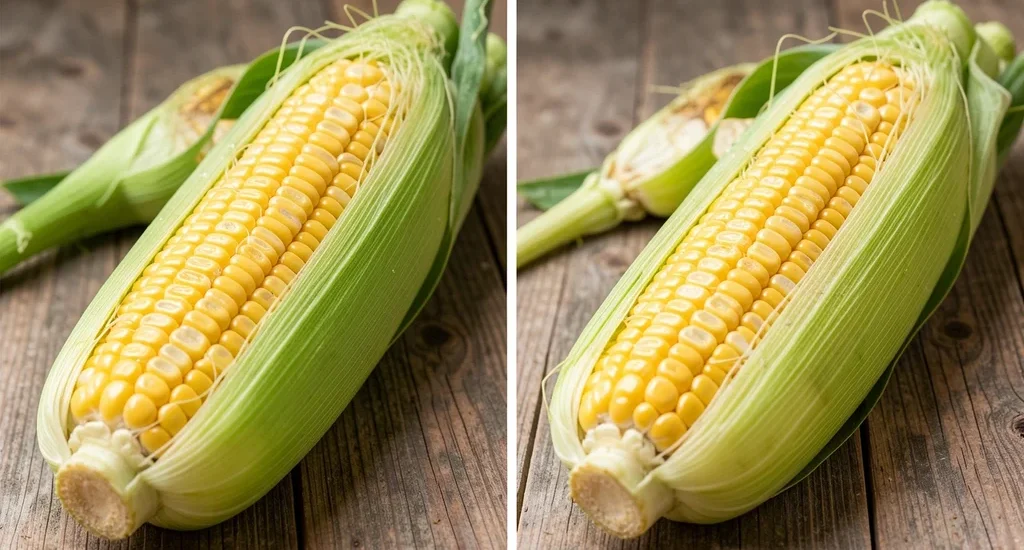
Preserving that sweet summer flavor of corn on the cob is easier than you think. The best way to freeze corn on the cob involves a few simple steps that lock in freshness and texture. Whether you have a surplus from your garden or scored a great deal at the farmers market, freezing corn properly ensures it tastes just as delicious months later.
Skip the store-bought frozen stuff and try this method at home for corn that retains its natural sweetness and juicy crunch.
The best way to freeze corn on the cob is to blanch it first in boiling water for 4-6 minutes, then cool it in ice water before draining and packing it into airtight containers or freezer bags. This preserves flavor, color, and texture for up to 12 months.
Why Blanching Is Essential Before Freezing
Blanching is the most critical step when freezing corn on the cob. This process involves briefly boiling the corn to stop enzyme activity that can cause loss of flavor, color, and texture during freezing. Without blanching, your corn may develop an off-flavor or become mushy when thawed.
According to the National Center for Home Food Preservation, blanching also helps remove dirt and bacteria from the surface of the vegetables. The heat from the boiling water kills most of the microorganisms that could cause spoilage in the freezer.
- Stops enzyme activity that degrades quality
- Preserves natural color and sweetness
- Removes surface dirt and bacteria
- Helps maintain crisp texture after thawing
- Extends freezer life to 12 months or more
Important: Never skip the blanching step. Corn that’s frozen without blanching will have a starchy, bland taste and poor texture when cooked later.
The blanching time is crucial. For standard-sized ears, 4 minutes in boiling water is sufficient. For larger ears, you may need up to 6 minutes.
The key is to start timing as soon as the corn enters the boiling water.
Step by Step Guide to Freezing Corn on the Cob
Follow this proven method for the best results when freezing corn on the cob. Each step is designed to maintain the quality of your corn from freezer to table.
- Prepare your corn
Start with fresh, high-quality corn. Husks should be green and tight, with moist stems. Remove the husks and silks completely.
Rinse the ears under cold water to remove any remaining silk strands.
- Set up your blanching station
You’ll need a large pot of boiling water and a large bowl of ice water. Use about 1 gallon of water per pound of corn. Add the corn to the boiling water in batches to avoid overcrowding, which can lower the water temperature and affect the blanching process.
- Blanch the corn
Carefully place the prepared ears into the boiling water. Make sure the water returns to a full boil quickly. For standard ears, blanch for 4 minutes.
For larger ears, extend the time to 6 minutes. This timing ensures the enzymes are inactivated without overcooking the corn.
- Cool immediately in ice water
As soon as the blanching time is up, remove the corn and plunge it into the ice water. This rapid cooling stops the cooking process immediately. The corn should cool completely in about 4-6 minutes, or when it feels cold to the touch.
- Drain and dry
Remove the corn from the ice water and drain it well. Pat the ears dry with clean kitchen towels or paper towels. Excess moisture can lead to ice crystals forming on the corn, which can affect texture.
- Package for freezing
Wrap each ear individually in plastic wrap or aluminum foil, or place them in freezer bags. For best results, use a vacuum sealer to remove as much air as possible. If using freezer bags, squeeze out as much air as you can before sealing.
- Label and freeze
Label your packages with the date and contents. Lay the wrapped corn flat in the freezer initially to save space. Once frozen solid, you can stack them to maximize freezer space.
Tip: For easier portioning, freeze individual ears separately on a baking sheet first. Once frozen, you can transfer them to a single freezer bag. This lets you grab just what you need for meals.
Choosing the Right Packaging for Freezing Corn
The packaging you choose can significantly impact the quality of your frozen corn. Proper packaging prevents freezer burn and maintains the corn’s flavor and texture.
| Packaging Method | Protection Level | Freezer Life | Best For |
|---|---|---|---|
| Vacuum-sealed bags | Excellent | 12-18 months | Long-term storage, bulk freezing |
| Heavy-duty freezer bags | Very Good | 12 months | Medium-term storage, portion control |
| Plastic wrap + foil | Good | 8-12 months | Short-term storage, individual ears |
| Aluminum foil only | Fair | 6-8 months | Temporary storage, quick freezing |
Vacuum sealing provides the best protection against freezer burn and extends the freezer life of your corn. If you don’t have a vacuum sealer, heavy-duty freezer bags are an excellent alternative. Make sure to remove as much air as possible before sealing.
How to Freeze Corn Kernels Instead of Whole Ears
If you prefer to freeze corn kernels instead of whole ears, the process is slightly different but just as effective. This method is great for recipes that call for corn kernels, like soups, stews, or casseroles.
- Blanch the whole ears
Follow the same blanching process as for whole ears (4-6 minutes in boiling water, then ice water). This ensures the kernels retain their flavor and texture.
- Cut the kernels off the cob
After cooling, use a sharp knife to cut the kernels off the cob. For easier handling, place the ear in a shallow bowl and cut downward, letting the kernels fall into the bowl. Be careful to avoid the tough core of the cob.
- Package the kernels
Measure the kernels into portion sizes that work for your recipes. A standard ear yields about 1/2 to 3/4 cup of kernels. Package them in airtight containers or freezer bags, leaving about 1/2 inch of headspace for expansion.
- Freeze flat
Lay the packages flat in the freezer to save space. Once frozen solid, you can stack them vertically like files in a drawer.
Warning: Never freeze corn kernels without blanching first. Unblanched kernels will develop a starchy taste and mushy texture when thawed and cooked.
Frozen corn kernels are incredibly versatile. You can use them directly from the freezer in cooked dishes, or thaw them in the refrigerator for salads or other cold preparations.
Common Mistakes to Avoid When Freezing Corn
Even with the best intentions, it’s easy to make mistakes when freezing corn on the cob. Being aware of these common pitfalls can help you achieve the best results.
- Skipping the blanching step
This is the most critical mistake. Without blanching, enzymes continue to break down the corn’s sugars and vitamins, leading to loss of flavor, color, and texture. The corn may also develop off-flavors during storage.
- Overcrowding the blanching pot
Adding too much corn at once can lower the water temperature, resulting in uneven blanching. This can leave some ears under-blanched, which means the enzymes aren’t fully inactivated.
- Insufficient cooling
If you don’t cool the corn completely and quickly in ice water, the cooking process continues. This can lead to overcooked, mushy corn that doesn’t retain its texture when thawed.
- Using poor-quality packaging
Thin plastic bags or containers that aren’t freezer-safe can lead to freezer burn. This causes the corn to develop a dry, tough texture and absorb odors from other foods in the freezer.
- Leaving too much air in the package
Air is the enemy of frozen foods. It causes freezer burn and can lead to ice crystals forming on the corn. Always remove as much air as possible before sealing.
- Freezing corn that’s past its prime
Start with the freshest, highest-quality corn you can find. Older corn with dry husks or brown silk will not freeze well and will have inferior flavor and texture.
According to the University of Nebraska-Lincoln Extension, proper blanching and packaging can maintain the quality of frozen corn for up to 12 months at 0°F or below. However, for the best flavor and texture, it’s recommended to use frozen corn within 8-10 months.
How to Thaw and Cook Frozen Corn on the Cob
When you’re ready to enjoy your frozen corn, proper thawing and cooking methods will help you get the best results. Here are the most effective techniques.
Thawing Methods
- Refrigerator thawing (recommended)
Transfer the frozen corn from the freezer to the refrigerator and allow it to thaw overnight. This slow thawing method helps maintain the corn’s texture and flavor. For whole ears, this typically takes about 8-12 hours.
- Cold water thawing
If you’re short on time, you can thaw the corn in cold water. Place the sealed package in a bowl of cold water, changing the water every 30 minutes. Whole ears will thaw in about 1-2 hours using this method.
- Cooking from frozen
For even more convenience, you can cook the corn directly from its frozen state. This works particularly well for boiling or steaming methods.
Cooking Methods for Frozen Corn
- Boiling
Bring a large pot of water to a boil. Add the frozen corn (thawed or unthawed) and cook for 3-5 minutes. This method works well for both whole ears and kernels.
- Steaming
Place the corn in a steamer basket over boiling water. Cover and steam for 5-7 minutes. Steaming helps preserve more of the corn’s nutrients compared to boiling.
- Microwaving
For quick preparation, place the corn in a microwave-safe dish with a small amount of water. Cover and microwave on high for 2-4 minutes, turning the ears halfway through.
- Grilling
For a smoky flavor, grill frozen corn (thawed first) over medium heat for 8-10 minutes, turning occasionally. Brush with a little oil or butter for extra flavor.
- Oven roasting
Preheat your oven to 400°F (200°C). Place thawed corn on a baking sheet and roast for 15-20 minutes, turning occasionally. This method brings out the natural sweetness of the corn.
Important: Never thaw corn at room temperature. This can allow bacteria to multiply to dangerous levels, especially in the “danger zone” between 40°F and 140°F (4°C and 60°C).
Tips for Selecting the Best Corn for Freezing
The quality of your frozen corn starts with the quality of the fresh corn you choose. Here’s how to pick the best ears for freezing.
- Check the husks
Look for green, fresh-looking husks that are tightly wrapped around the ear. Avoid corn with dry, brown, or yellowing husks, as these are signs of age.
- Examine the silk
The silk should be moist and slightly sticky, not dry or brown. Fresh silk is a good indicator of fresh corn.
- Feel the kernels
Gently press the husk to feel the kernels. They should feel plump and firm, not shriveled or hard. You can also peek inside the husk to check the kernels directly.
- Look for moisture
Fresh corn often has a slight dew or moisture on the husk. This is a good sign of freshness, especially if the corn was recently picked.
- Check the stem
The stem end should be fresh and slightly moist, not dry or brown. A fresh stem indicates the corn was recently harvested.
- Smell the corn
Fresh corn has a slightly sweet, milky smell. If it has little to no aroma, or if it smells starchy or fermented, it’s past its prime.
| Corn Quality | Husk Appearance | Silk Condition | Kernel Feel | Best For Freezing |
|---|---|---|---|---|
| Excellent | Bright green, tight | Moist, slightly sticky | Plump, firm | Yes |
| Good | Green, slightly loose | Dry but not brown | Firm | Yes, use quickly |
| Fair | Yellowing, loose | Dry, brown tips | Slightly shriveled | No |
The sweetness of corn begins to decrease as soon as it’s picked, as the sugars start converting to starch. For the best flavor, try to freeze your corn within a few hours of picking or purchasing. If that’s not possible, store the unhusked corn in the refrigerator until you’re ready to process it.
Storing Frozen Corn for Maximum Shelf Life
Proper storage is key to maintaining the quality of your frozen corn. Even with perfect blanching and packaging, poor storage conditions can lead to freezer burn and loss of quality.
- Maintain consistent freezer temperature
Keep your freezer at 0°F (-18°C) or below. Temperature fluctuations can cause ice crystals to form and melt, leading to freezer burn and texture changes.
- Organize for air circulation
Don’t overpack your freezer. Allow space between packages for air to circulate. This helps maintain a consistent temperature throughout the freezer.
- Use the first-in, first-out system
Label your packages with the date and use the oldest corn first. This rotation system ensures you’re always using corn at its peak quality.
- Avoid freezer door storage
The temperature in the freezer door fluctuates more than in the main compartment. Store your corn in the main part of the freezer for more stable conditions.
- Protect from light
If your freezer has a light that stays on when the door is closed, or if you’re using clear packaging, wrap the corn in aluminum foil or place it in an opaque container to protect it from light, which can degrade quality.
Tip: If you have a chest freezer, store your corn at the bottom where the temperature is most stable. Upright freezers should have corn stored in the back, away from the door.
According to the USDA, frozen corn on the cob maintains its best quality for about 12 months at 0°F (-18°C). After that, it’s still safe to eat but may have diminished flavor and texture.
Frequently Asked Questions
Can I freeze corn on the cob without blanching?
While you technically can freeze corn without blanching, it’s not recommended. The enzymes in the corn will continue to break down the sugars and vitamins, leading to loss of flavor, color, and texture. Blanching stops this enzyme activity, preserving the quality of your corn for much longer.
How long does frozen corn on the cob last?
Properly blanched and packaged corn on the cob will maintain its best quality for about 12 months in the freezer at 0°F (-18°C) or below. It remains safe to eat indefinitely if kept frozen, but the quality will gradually decline after the first year.
Do I need to thaw corn on the cob before cooking?
No, you don’t need to thaw corn before cooking. You can cook it directly from frozen, although thawing first may reduce cooking time slightly. For boiling or steaming, add a few extra minutes to the cooking time if using frozen corn.
Can I freeze corn on the cob with the husks on?
It’s not recommended to freeze corn with the husks on. The husks can trap moisture, leading to freezer burn and potential spoilage. Additionally, the husks take up more space in the freezer and can make the corn more difficult to package properly.
Why does my frozen corn taste starchy?
Starchy-tasting frozen corn is usually a result of either not blanching before freezing or using corn that was past its prime to begin with. The sugars in corn begin converting to starch as soon as it’s picked, so it’s important to start with fresh corn and blanch it properly to preserve its sweetness.
Final Thoughts
The best way to freeze corn on the cob involves proper selection, blanching, cooling, and packaging. By following these steps, you can preserve the sweet, juicy flavor of summer corn to enjoy all year round. Remember that blanching is non-negotiable for quality, and proper packaging prevents freezer burn.
With these techniques, your frozen corn will taste almost as good as fresh, making it a worthwhile addition to your freezer staples.