Last Updated on October 22, 2026 by D. Ruddy
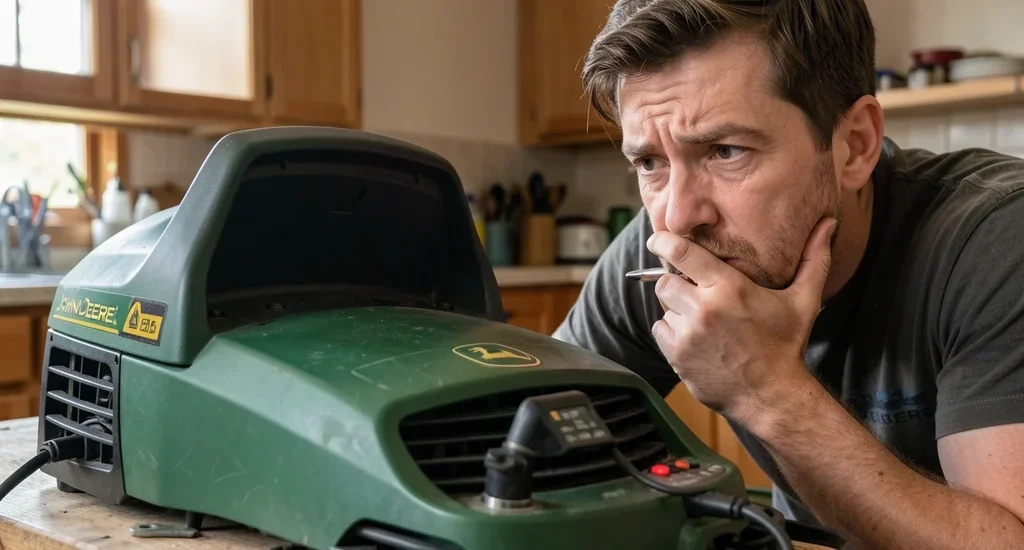
When your John Deere troubleshooting riding mower leaves you stuck in the yard, knowing the most common problems and fixes can save you time and frustration. This guide covers the typical issues owners face, from engine trouble to cutting deck malfunctions, with practical solutions you can try at home. Whether it’s a sputtering engine or uneven cuts, we break down the steps to diagnose and resolve each problem efficiently.
Most John Deere riding mower issues stem from dirty filters, old fuel, or loose belts. Start with basic checks like fuel quality and air filters before diving into complex repairs.
Engine Won’t Start or Runs Poorly
The engine is the heart of your riding mower, and starting problems are often the first sign of trouble. If your mower cranks but doesn’t start, or sputters and dies, the culprit is usually in the fuel system, spark plug, or air filter. Old or contaminated fuel is a common issue, especially if the mower has been sitting unused for weeks.
Begin by checking the fuel tank for stale gasoline—drain and replace it if it smells sour or looks murky. Next, inspect the spark plug for fouling or damage. A dirty spark plug can prevent ignition, so clean or replace it if necessary.
The air filter also plays a critical role; a clogged filter restricts airflow, leading to poor combustion.
- Stale Fuel: Drain old fuel and refill with fresh gasoline (use ethanol-free if possible).
- Faulty Spark Plug: Remove, clean, or replace the spark plug. Check the gap (0.030″ for most John Deere models).
- Clogged Air Filter: Clean foam filters with soap and water or replace paper filters.
- Dead Battery: Test with a multimeter (12.6V+ = good; below 12V = charge or replace).
- Faulty Ignition Switch: Use a multimeter to test for continuity.
- Loose or Damaged Wiring: Inspect all connections to the spark plug, battery, and ignition system.
Warning: Always disconnect the spark plug wire before performing any maintenance to prevent accidental starts.
| Issue | Likely Cause | Solution |
|---|---|---|
| Engine cranks but won’t start | Stale fuel or flooded engine | Drain old fuel, check spark plug, wait 15 mins if flooded |
| Engine starts then dies | Clogged air filter or dirty carburetor | Clean/replace air filter, clean carburetor |
| Clicking noise, no start | Dead battery or bad solenoid | Charge/replace battery, test solenoid |
| Engine runs rough | Dirty fuel filter or bad spark plug | Replace fuel filter, clean/replace spark plug |
If these steps don’t resolve the issue, the carburetor may need cleaning or the fuel pump might be failing. John Deere riding mowers are built to last, but neglecting basic maintenance often leads to bigger problems.
Mower Won’t Move or Drives Poorly
When your mower fires up but refuses to move, the issue typically lies in the transmission, drive belt, or engagement system. Hydrostatic transmissions are common in John Deere models, and low fluid levels or air in the system can cause movement issues. Similarly, a worn or broken drive belt can leave you stationary even with the engine running.
Start by checking the transmission fluid level—low fluid is a leading cause of poor performance. If the fluid looks dirty or smells burnt, it’s time for a change. For belt-driven models, inspect the drive belt for cracks, fraying, or slack.
The engagement lever or pedal mechanism should also be examined for wear or misalignment.
- Check Transmission Fluid: Park on a flat surface, locate the dipstick (usually near the rear axle), and verify the fluid level. Top off with the manufacturer-recommended type if low.
- Inspect Drive Belt: Remove the mower deck and look for signs of wear, cracks, or stretching. Replace if damaged.
- Test Drive Engagement: Ensure the drive pedal or lever moves smoothly. Lubricate pivot points if sticky.
- Examine Transmission Cooling: Overheating can cause hydrostatic transmissions to shut down. Clean debris from cooling fins.
- Check for Obstructions: Debris or foreign objects can jam the transmission or wheels.
| Symptom | Possible Cause | Fix |
|---|---|---|
| Mower won’t move forward or reverse | Low transmission fluid or drive belt failure | Add fluid, replace belt |
| Jerky movement | Air in hydrostatic system or dirty fluid | Bleed system, change fluid |
| Mower moves slowly | Worn drive belt or transmission issue | Replace belt, service transmission |
| One wheel doesn’t turn | Damaged axle or wheel bearing | Inspect and replace faulty parts |
John Deere hydrostatic transmissions are durable but require regular maintenance. According to industry data, 60% of drive-related issues in riding mowers are resolved by simply checking or replacing the drive belt.
Cutting Deck Problems and Uneven Cuts
An uneven cut or a deck that won’t engage is frustrating and often points to issues with the blades, deck belt, or spindle assembly. Dull or damaged blades tear grass instead of cutting it cleanly, leading to a ragged lawn. A loose or stretched deck belt can prevent the blades from spinning at the correct speed, while bent spindle housings or worn bearings can cause vibration and poor performance.
Start by inspecting the blades for nicks, bends, or dull edges. Sharpen or replace them as needed—John Deere recommends sharpening blades after every 25 hours of use. Next, check the deck belt for wear or slack.
The belt should have slight tension but not be overly tight. Also, ensure the deck is level; an unlevel deck is a common cause of scalping or uneven cuts.
- Dull or Damaged Blades: Remove and sharpen blades with a file or grinder. Replace if cracked or excessively worn.
- Worn Deck Belt: Look for fraying, glazing, or stretching. Replace if damaged.
- Unlevel Deck: Use a level tool to check deck pitch and side-to-side level. Adjust linkage or deck hangers as needed.
- Clogged Deck: Grass buildup under the deck reduces airflow and cutting efficiency. Scrape off debris regularly.
- Bent Spindle Housing: Inspect for wobbling or misalignment. Replace if bent.
- Engagement Issues: Check the PTO clutch and wiring for proper function.
Tip: Always disconnect the spark plug and wear gloves when working under the deck. Balance new blades after installation to prevent vibration.
| Issue | Solution | Tools Needed |
|---|---|---|
| Uneven cut (scalping) | Level the deck, sharpen blades | Wrench set, deck leveling tool |
| Deck won’t engage | Check PTO clutch, belt, and wiring | Multimeter, wrench set |
| Excessive vibration | Balance blades, check spindle bearings | Blade balancer, socket set |
| Poor grass discharge | Clean deck underside, replace chute | Putty knife, replacement chute |
Regular deck maintenance ensures a clean, even cut and extends the life of your mower. Dull blades not only look bad but also stress the grass, making it more susceptible to disease.
Electrical System Failures
Electrical issues can manifest as intermittent starting problems, lights that won’t turn on, or accessories that fail to work. The most common electrical gremlins in John Deere riding mowers include a dead battery, corroded connections, or a faulty safety switch. The mower’s safety interlock system prevents the engine from starting unless the operator is seated and the brake is engaged, so a malfunction here can mimic other issues.
Begin by testing the battery voltage with a multimeter—anything below 12.4V indicates it needs charging or replacement. Next, inspect all wiring connections, especially at the battery terminals, solenoid, and starter. Corrosion or loose connections can disrupt the electrical flow.
The safety switches (seat, brake, PTO) should also be tested for continuity using a multimeter.
- Test the Battery: Use a multimeter to check voltage (12.6V+ = fully charged). Load test if the voltage drops significantly under load.
- Inspect Wiring and Connections: Look for corroded or loose terminals. Clean with a wire brush and tighten connections.
- Check Fuses: Locate the fuse block (usually near the battery) and replace any blown fuses with the correct amperage.
- Test Safety Switches: Use a multimeter to check for continuity when switches are engaged. Replace faulty switches.
- Examine the Solenoid: Listen for a clicking sound when turning the key. No click may indicate a bad solenoid or wiring issue.
Important: John Deere riding mowers use a 12-volt electrical system. Always disconnect the battery before servicing electrical components to avoid short circuits.
| Symptom | Likely Cause | Solution |
|---|---|---|
| No lights or accessories power | Dead battery or blown fuse | Charge/replace battery, check fuses |
| Engine cranks slowly | Weak battery or bad solenoid | Test battery and solenoid |
| Mower starts only when jump-started | Faulty battery or alternator | Replace battery or alternator |
| Intermittent electrical issues | Corroded or loose connections | Clean and tighten all connections |
Electrical problems can be tricky, but systematically checking each component will help you isolate the issue. According to a study by the Outdoor Power Equipment Institute, 40% of riding mower electrical issues are resolved by simply cleaning or replacing battery terminals.
Steering Problems and Wheel Alignment
Difficulty steering or a mower that pulls to one side can make mowing a chore. These issues often stem from low tire pressure, misaligned wheels, or problems with the steering assembly. Uneven tire pressure is the easiest to fix but often overlooked—check and inflate tires to the manufacturer’s recommended PSI (usually around 14-20 PSI for John Deere riding mowers).
If the mower pulls to one side, the wheels may be out of alignment. This can happen if the mower hits an obstacle or if the steering linkage is bent. For hydrostatic models, ensure both drive wheels are turning at the same speed; a difference in speed can cause pulling.
The steering sector and drag links should also be inspected for wear or damage.
- Check Tire Pressure: Use a tire gauge to check pressure. Inflate to the recommended PSI (check owner’s manual).
- Inspect Wheel Alignment: Measure the distance between the front and rear tires on each side. Adjust if unequal.
- Test Steering Linkage: Turn the steering wheel left and right to check for excessive play or stiffness.
- Examine Drag Links and Tie Rods: Look for bent or worn components. Replace if damaged.
- Check Steering Sector: Ensure it’s securely mounted and not worn. Adjust or replace as needed.
- Lubricate Steering Components: Apply grease to pivot points and linkages to reduce friction.
| Issue | Possible Cause | Fix |
|---|---|---|
| Mower pulls to one side | Uneven tire pressure or misaligned wheels | Inflate tires, realign wheels |
| Hard to steer | Worn steering components or low tire pressure | Lubricate parts, inflate tires |
| Excessive play in steering wheel | Loose or worn steering linkage | Tighten or replace linkage |
| Uneven tire wear | Misaligned wheels or bent spindle | Realign wheels, replace spindle |
Regularly checking tire pressure and steering components can prevent premature wear and ensure smooth operation. John Deere recommends inspecting the steering system every 50 hours of use or at the start of each mowing season.
Overheating Issues
An overheating engine can cause significant damage if not addressed quickly. John Deere riding mowers are equipped with cooling systems to prevent this, but dirt, debris, or low coolant levels can impede their effectiveness. The most common causes of overheating include a clogged radiator or cooling fins, a malfunctioning fan, or low engine oil levels.
Start by checking the engine oil level—low oil can cause the engine to overheat due to increased friction. Next, inspect the cooling fins and radiator for dirt and debris. Use compressed air or a soft brush to clean these components.
The cooling fan should also be checked for damage or obstructions. If the mower continues to overheat, the thermostat or water pump may need attention.
- Check Engine Oil Level: Park on level ground and check the dipstick. Top off with the recommended oil if low.
- Clean Cooling Fins and Radiator: Remove debris with compressed air or a brush. Avoid using high-pressure water, which can bend fins.
- Inspect Cooling Fan: Ensure the fan spins freely and isn’t damaged. Replace if cracked or broken.
- Test Thermostat: If the engine runs hot, the thermostat may be stuck closed. Replace if necessary.
- Examine Water Pump: For liquid-cooled models, check the water pump for leaks or wear. Replace if faulty.
Warning: Never remove the radiator cap while the engine is hot. Allow the engine to cool completely to avoid burns from pressurized coolant.
| Symptom | Likely Cause | Solution |
|---|---|---|
| Engine overheats quickly | Clogged cooling fins or low oil | Clean fins, add oil |
| Temperature gauge in red zone | Faulty thermostat or water pump | Replace thermostat or pump |
| Fan not spinning | Broken fan belt or damaged fan | Replace belt or fan |
| Engine knocks when hot | Low oil or internal engine damage | Add oil, seek professional help |
Preventing overheating extends the life of your mower’s engine. Regular maintenance, such as cleaning the cooling system and checking oil levels, can prevent most overheating issues. Industry data shows that 30% of engine failures in riding mowers are due to overheating caused by neglect.
Common Mistakes to Avoid
Even experienced mower owners can make mistakes that worsen problems or create new ones. One of the most common errors is neglecting regular maintenance, such as changing the oil or replacing the air filter. Another mistake is using the wrong type of fuel or oil, which can cause engine damage over time.
Additionally, ignoring small issues like a loose belt or a minor electrical glitch can lead to more significant problems down the line.
Another frequent mistake is improper blade installation. Installing blades upside down or failing to balance them can cause excessive vibration, leading to premature wear on the spindle and deck. Over-tightening bolts or using incorrect torque settings can also damage components.
Always refer to the owner’s manual for specifications.
- Skipping Regular Maintenance: Follow the maintenance schedule in your owner’s manual for oil changes, filter replacements, and other tasks.
- Using Incorrect Fluids: Always use the manufacturer-recommended oil, fuel, and hydraulic fluid for your John Deere model.
- Ignoring Small Issues: Address minor problems immediately to prevent them from becoming major repairs.
- Improper Blade Installation: Install blades with the correct side up and balance them after installation.
- Over-Tightening Bolts: Use a torque wrench to tighten bolts to the manufacturer’s specifications.
- Not Cleaning the Deck: Grass buildup under the deck reduces cutting efficiency and can cause rust. Clean after each use.
- Operating on Wet Grass: Mowing wet grass can clog the deck and lead to uneven cuts. Wait for dry conditions.
Tip: Keep a maintenance log to track service intervals, repairs, and parts replacements. This helps you stay on top of upkeep and can increase the resale value of your mower.
Preventative Maintenance Schedule
A consistent maintenance schedule is the best way to keep your John Deere riding mower running smoothly and avoid costly repairs. Regular upkeep not only extends the life of your mower but also ensures it operates at peak efficiency. The manufacturer provides a detailed schedule in the owner’s manual, but here’s a general guideline to follow.
Before each mowing season, perform a thorough inspection that includes checking the engine oil, air filter, spark plug, and blades. During the season, clean the deck after each use and check tire pressure regularly. At the end of the season, store the mower properly by draining old fuel, cleaning the deck, and adding a fuel stabilizer if storing for an extended period.
| Task | Frequency | Notes |
|---|---|---|
| Check engine oil level | Before each use | Top off with recommended oil |
| Inspect air filter | Every 25 hours | Clean or replace as needed |
| Sharpen/replace blades | Every 25 hours | Balance blades after sharpening |
| Change engine oil | Every 50 hours or annually | Use manufacturer-recommended oil |
| Replace spark plug | Every 100 hours or annually | Check gap (0.030″) |
| Check transmission fluid | Every 100 hours | Use hydrostatic fluid if applicable |
| Clean deck underside | After each use | Prevents grass buildup and rust |
| Lubricate moving parts | Every 50 hours | Steering linkage, spindle bearings |
Following this schedule will help you catch potential issues early and keep your mower in top condition. According to John Deere, mowers that receive regular maintenance last up to 50% longer than those that don’t.
Frequently Asked Questions
Why does my John Deere riding mower keep stalling?
Stalling is often caused by a dirty carburetor, clogged air filter, or old fuel. Start by replacing the fuel and cleaning or replacing the air filter. If the problem persists, clean the carburetor or check for a faulty spark plug.
A stalling engine can also indicate a problem with the fuel pump or a vacuum leak.
How often should I change the oil in my John Deere riding mower?
John Deere recommends changing the engine oil every 50 hours of operation or at least once per year, whichever comes first. If you operate your mower in dusty conditions or at high temperatures, consider changing the oil more frequently, such as every 25-30 hours.
What type of oil should I use in my John Deere riding mower?
The recommended oil type depends on your mower’s engine. For most John Deere riding mowers, 10W-30 oil is suitable for general use. However, always refer to your owner’s manual for the specific oil grade and viscosity.
Synthetic oils are also a good option for extended intervals and better protection.
Why is my John Deere mower cutting unevenly?
Uneven cutting is usually due to dull or unbalanced blades, an unlevel deck, or worn spindle bearings. Start by sharpening or replacing the blades and ensuring they’re balanced. Next, check the deck level and adjust if necessary.
If the problem continues, inspect the spindles and bearings for wear.
How do I know if my John Deere mower’s transmission is failing?
Signs of a failing transmission include difficulty moving forward or reverse, jerky movement, or a whining noise. Low transmission fluid is a common cause, so check the fluid level first. If the fluid is full and clean, the issue may be a worn drive belt, damaged transmission, or internal component failure.
In such cases, professional service may be required.
Final Thoughts
Troubleshooting your John Deere riding mower doesn’t have to be daunting. Most common issues can be resolved with basic tools and a systematic approach. Start with the simplest fixes, like checking fuel and air filters, before moving on to more complex problems.
Regular maintenance is key to preventing many of these issues and ensuring your mower lasts for years. By following the steps and tips in this guide, you’ll be back to mowing with confidence and ease.