

Last Updated on October 22, 2026 by D. Ruddy
Preserving fresh fruit by removing its moisture is a simple way to enjoy sweet, chewy snacks year-round. Learning how to dehydrate fruit properly ensures you retain flavor, nutrients, and color while preventing spoilage. Whether you use an oven, dehydrator, or air fryer, the process is straightforward with the right techniques.
This guide covers everything from prep work to storage so you can make perfect dried fruit every time.
You can dehydrate fruit in a food dehydrator, oven, or air fryer by slicing evenly, arranging in a single layer, and drying at 135°F (57°C) for 6-12 hours until leathery with no moisture. Store in airtight containers for up to a year.
What You Need to Get Started
Before you begin, gather the right tools and ingredients. The quality of your equipment directly affects the results, so choose wisely based on what you already own.
At minimum, you need a way to slice fruit thinly and evenly—a mandoline or sharp chef’s knife works best. Uneven slices lead to inconsistent drying, with some pieces overdone and others still moist. You also need a drying method: a food dehydrator is ideal, but an oven or air fryer works too with some adjustments.
For prep, have lemon juice or ascorbic acid on hand to prevent browning, especially for apples, pears, and bananas. A large bowl for soaking slices, paper towels for patting dry, and airtight storage containers are also essential. If using an oven, parchment paper or silicone mats prevent sticking.
- Cutting tools: Chef’s knife, mandoline slicer, or paring knife for precision
- Drying equipment: Food dehydrator (recommended), oven, or air fryer
- Prep items: Lemon juice, water, bowl, paper towels
- Storage: Airtight glass jars, vacuum-sealed bags, or Mylar bags with oxygen absorbers
- Optional: Ascorbic acid (vitamin C powder), fruit peeler, mesh liners for small pieces
Tip: If you plan to dehydrate often, invest in a dehydrator with adjustable temperature control. Models like the Excalibur or Nesco FD-75A offer even airflow and consistent results.
Choosing the Best Fruit for Dehydration
Not all fruits dehydrate equally. Some hold their flavor and texture beautifully, while others turn chewy or lose their appeal. The best candidates have high sugar content and low moisture, but even watery fruits can work with the right approach.
Apples, bananas, and pears are beginner-friendly because they slice easily and dry uniformly. Citrus fruits like oranges and lemons make excellent dried slices for snacks or garnishes, but their high acidity means they may need a longer drying time. Berries—strawberries, blueberries, raspberries—require a bit more care due to their small size and delicate texture.
Tropical fruits such as mangoes, pineapples, and kiwis dehydrate into sweet, sticky treats that taste like candy. Stone fruits like peaches, plums, and apricots also work well but should be pitted and sliced thinly. Avoid fruits with very high water content like watermelon—these are harder to dehydrate fully without turning to mush.
| Fruit | Prep Method | Drying Time | Best Uses |
|---|---|---|---|
| Apples | Core, slice 1/8″ thick, soak in lemon water | 6-8 hours | Snacks, pies, trail mix |
| Bananas | Peel, slice 1/4″ thick, optional lemon dip | 8-10 hours | Smoothies, cereal topping, chips |
| Strawberries | Hull, slice in half or quarters | 8-12 hours | Yogurt topping, granola, baking |
| Mangoes | Peel, pit, slice 1/8″ thick | 8-10 hours | Snacks, tropical trail mix |
| Pineapple | Peel, core, slice into rings or chunks | 10-12 hours | Candied treats, cocktails |
According to the National Center for Home Food Preservation, fruits with pH levels below 4.6 (like apples, berries, and citrus) are safest for dehydration as they resist bacterial growth. Higher-pH fruits should be dried thoroughly to prevent mold.
Step by Step How to Dehydrate Fruit
Follow these steps for foolproof results, whether you’re using a dehydrator, oven, or air fryer. The process is nearly identical across methods, with only minor temperature and time adjustments.
Step 1: Wash and Prepare the Fruit
Start by washing all fruit thoroughly under cool running water to remove dirt, wax, or pesticide residue. For thicker-skinned fruits like apples or pears, use a produce brush. Pat dry with a clean towel to remove excess moisture, which speeds up the drying process.
Next, peel fruits if desired—though leaving the skin on preserves fiber and nutrients. For apples and pears, coring is essential to remove the tough center. Use an apple corer or carefully slice around the core with a knife.
For fruits like mangoes or pineapples, remove the pit or core before slicing.
Step 2: Slice Evenly for Consistent Drying
Slice fruit into uniform pieces, ideally 1/8 to 1/4 inch thick. Thinner slices dry faster but can become brittle, while thicker slices take longer and may not dry evenly. For best results, use a mandoline for consistent thickness, especially with firm fruits like apples or potatoes.
Cut larger fruits into manageable pieces. Halve or quarter strawberries, slice bananas into coins, and cut mangoes into thin strips. Small fruits like blueberries can be dehydrated whole, though slicing them in half speeds up the process.
For citrus, slice into thin rounds for chips or peel and segment for chewy dried fruit.
Warning: Always use a sharp knife and stable cutting surface to avoid injuries. A dull knife requires more force and is more likely to slip.
Step 3: Pretreat to Preserve Color and Flavor
Many fruits, especially apples, pears, bananas, and peaches, oxidize and turn brown when exposed to air. To prevent this, pretreat the slices with an acid solution. The most common method is a lemon juice bath: mix 1 tablespoon of lemon juice with 1 cup of water, then soak the fruit slices for 3-5 minutes before draining and patting dry.
For a more neutral flavor, use ascorbic acid (vitamin C powder). Dissolve 1 teaspoon of ascorbic acid in 1 cup of water and soak the fruit for 3-5 minutes. This method is particularly useful for large batches.
Other options include pineapple juice (which contains natural enzymes that prevent browning) or a commercial anti-browning spray.
- Lemon juice bath: 1 tbsp lemon juice + 1 cup water, soak 3-5 mins
- Ascorbic acid: 1 tsp powder + 1 cup water, soak 3-5 mins
- Pineapple juice: Soak slices for 5-10 mins (adds mild sweetness)
- Honey water: 1 tbsp honey + 1 cup water (adds sweetness, good for berries)
- Steam blanching: For 30-60 seconds (works well for apples and pears)
Step 4: Arrange on Trays Without Overlapping
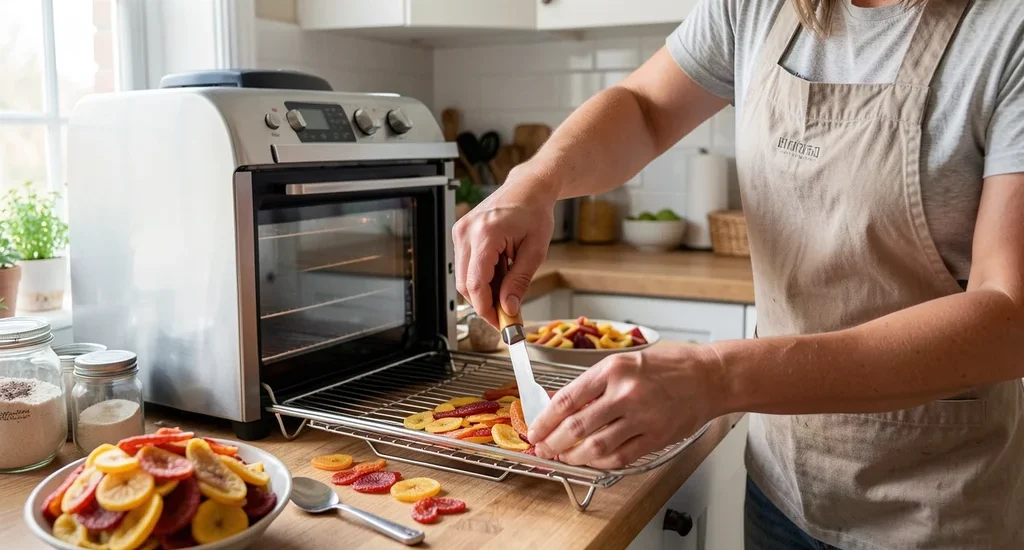
Place the pretreated fruit slices on your dehydrator trays, oven racks, or air fryer baskets in a single layer, ensuring they do not touch or overlap. Overlapping causes uneven drying and can lead to mold growth in the areas where pieces stick together.
For dehydrators, arrange slices in a way that allows maximum airflow. Most dehydrators have trays with mesh or solid sheets—use mesh for better circulation. If using an oven, place slices on parchment paper or silicone mats on baking sheets, leaving at least 1 inch of space between pieces.
For air fryers, use the mesh insert if available, or place slices in a single layer in the basket.
Important: If dehydrating small fruits like blueberries or grapes, use a mesh liner or parchment paper with holes to prevent them from falling through the tray gaps.
Step 5: Set the Right Temperature and Time
The ideal temperature for dehydrating fruit is 135°F (57°C). This is hot enough to remove moisture efficiently but low enough to preserve nutrients, color, and flavor. Higher temperatures can cook the fruit, making it hard or caramelized rather than properly dehydrated.
Drying times vary based on the fruit, thickness of slices, humidity levels, and your equipment. Most fruits take between 6 to 12 hours to fully dehydrate. Check progress periodically after the first few hours.
Fruit is done when it’s leathery and pliable with no visible moisture—it should not feel sticky or wet.
| Drying Method | Temperature | Time Range | Notes |
|---|---|---|---|
| Food Dehydrator | 135°F (57°C) | 6-12 hours | Most consistent results; even airflow |
| Oven | 140°F (60°C) | 8-14 hours | Prop door open 1-2 inches for airflow; rotate trays |
| Air Fryer | 135°F (57°C) | 4-8 hours | Best for small batches; check frequently |
Step 6: Test for Doneness
To check if fruit is fully dehydrated, remove a piece from the tray and let it cool to room temperature. Properly dried fruit should be leathery and slightly pliable but not sticky. If you squeeze a piece, no moisture should come out.
For thicker pieces like banana slices, they should be dry to the touch with no soft spots.
If the fruit is still moist, return it to the dehydrator for another 1-2 hours and check again. Under-dehydrated fruit can mold during storage, so it’s better to err on the side of slightly over-drying. Keep in mind that fruit will continue to lose a small amount of moisture as it cools, so remove it when it’s just slightly underdone.
Step 7: Cool and Store Properly
Once fully dehydrated, let the fruit cool completely on a wire rack. This prevents condensation from forming inside storage containers, which can lead to mold. Cooling usually takes 30-60 minutes, depending on the batch size.
Store dried fruit in airtight containers such as glass jars, vacuum-sealed bags, or Mylar bags with oxygen absorbers. For long-term storage, keep containers in a cool, dark, and dry place like a pantry or root cellar. Properly stored dehydrated fruit can last 6 months to a year at room temperature, or up to 2 years if frozen.
Tip: For added protection against moisture and pests, place a silica gel packet or a bay leaf in your storage containers. Bay leaves repel insects naturally.
Dehydrating Fruit in an Oven
If you don’t have a dehydrator, your oven can work just as well with a few adjustments. The key is maintaining a low, consistent temperature and ensuring proper airflow.
Start by preheating your oven to its lowest setting, ideally 140°F (60°C). If your oven doesn’t go that low, set it to the next highest temperature (usually 170°F) and prop the door open 1-2 inches with a wooden spoon or oven-safe item to allow moisture to escape. This prevents the fruit from cooking and helps maintain a lower internal temperature.
Arrange fruit slices on baking sheets lined with parchment paper or silicone mats, leaving at least 1 inch of space between pieces for airflow. Place the sheets on the center rack for even heat distribution. If your oven has hot spots, rotate the trays every 2-3 hours to ensure consistent drying.
Oven drying typically takes longer than a dehydrator—expect 8 to 14 hours depending on the fruit and slice thickness. Check progress periodically, especially toward the end of the estimated time. Since ovens vary, start checking after 6 hours for thinly sliced fruits like apples or strawberries.
- Pros of oven drying:
- No additional equipment needed
- Good for large batches
- Works well for most fruits
- Cons of oven drying:
- Less consistent airflow than dehydrators
- Longer drying times
- Higher energy use for extended periods
- Requires frequent monitoring
Important: Avoid using the oven’s convection setting for dehydrating. The fan can cause uneven drying and may blow lightweight fruit pieces around.
Using an Air Fryer for Small Batches
Air fryers are a great option for dehydrating small batches of fruit quickly. Their compact size and efficient airflow make them ideal for testing new fruits or making quick snacks.
To dehydrate in an air fryer, set the temperature to 135°F (57°C) if your model allows it. Some air fryers have a dedicated dehydrate function—use this if available. If your air fryer doesn’t go below 170°F, it’s not ideal for dehydration, as the higher temperature can cook the fruit rather than dry it.
Arrange fruit slices in a single layer in the air fryer basket, ensuring they do not overlap. Work in batches if needed to avoid crowding. Small fruits like berries can go in whole, but larger fruits should be sliced thinly for even drying.
Air fryers dry fruit faster than dehydrators or ovens due to their powerful fans. Expect drying times of 4 to 8 hours, depending on the fruit and slice thickness. Check progress every hour, especially toward the end, as air fryers can dry fruit quickly once most moisture is removed.
| Fruit | Air Fryer Temp | Time | Batch Size |
|---|---|---|---|
| Apples | 135°F (57°C) | 4-6 hours | 2-3 medium apples |
| Bananas | 135°F (57°C) | 5-7 hours | 3-4 bananas |
| Strawberries | 135°F (57°C) | 6-8 hours | 2 cups whole berries |
According to a study by the Journal of Food Science, air fryers can remove moisture up to 30% faster than conventional dehydrators due to their high-velocity airflow. However, the smaller capacity means they’re best for personal use rather than bulk drying.
Common Mistakes to Avoid
Even with the best intentions, small errors can ruin a batch of dehydrated fruit. Here are the most common pitfalls and how to steer clear of them.
One of the biggest mistakes is slicing fruit too thickly. Thick slices take much longer to dry and often result in fruit that’s dry on the outside but still moist inside. This uneven drying can lead to mold during storage.
Always aim for slices between 1/8 and 1/4 inch thick for consistent results.
Another frequent error is skipping the pretreatment step for fruits that brown easily. While it’s an extra step, soaking slices in lemon juice or ascorbic acid preserves color and flavor. Without this, your dried apples or bananas may turn an unappetizing brown, even if they’re perfectly safe to eat.
- Slicing too thick or unevenly: Leads to inconsistent drying and potential mold. Use a mandoline for uniform slices.
- Overlapping fruit on trays: Prevents proper airflow and causes uneven drying. Always leave space between pieces.
- Setting temperature too high: Cooks the fruit instead of drying it. Stick to 135°F (57°C) for best results.
- Not rotating trays: Especially in ovens, hot spots can cause some pieces to dry faster than others. Rotate trays every few hours.
- Under-drying: Fruit that feels dry but still has moisture can mold in storage. Always test for doneness by cooling a piece first.
- Skipping the cooling step: Putting warm fruit directly into containers causes condensation and mold. Cool completely before storing.
- Using non-airtight containers: Exposure to air and moisture shortens shelf life. Invest in quality storage containers.
Warning: Never dehydrate meat or poultry in the same batch as fruit. Cross-contamination can lead to foodborne illness. Always clean your dehydrator thoroughly between different types of foods.
Creative Ways to Use Dehydrated Fruit
Dehydrated fruit is incredibly versatile and can be used in countless recipes beyond simple snacking. Its concentrated sweetness and chewy texture make it a great addition to both sweet and savory dishes.
One of the most popular uses is in homemade trail mix. Combine dried apples, bananas, and mangoes with nuts, seeds, and a few chocolate chips for a nutritious on-the-go snack. Dehydrated fruit also works well in granola—add it after baking to preserve its texture.
For a sweet treat, dip dried fruit slices in melted chocolate and let them harden for a gourmet candy-like experience.
In baking, rehydrate dried fruit by soaking it in warm water or juice for 10-15 minutes before adding to muffins, bread, or cookies. This plumps the fruit and restores some of its original texture. Dried fruit can also be blended into a powder and used as a natural sweetener or flavor booster in smoothies, yogurt, or oatmeal.
- Trail mix: Combine with nuts, seeds, and dark chocolate for a healthy snack
- Baking: Add to muffins, bread, cookies, or cakes (rehydrate first for best texture)
- Oatmeal or cereal: Sprinkle on top for added sweetness and chewiness
- Smoothies: Blend dried fruit with yogurt and milk for a nutrient-packed drink
- Homemade jerky: Use as a base for fruit jerky by pureeing and dehydrating fruit leather
- Infused water: Add dried citrus slices or berries to water for natural flavor
- Dessert toppings: Use as a garnish for ice cream, cheesecake, or pancakes
- DIY fruit roll-ups: Puree fruit, spread thinly on parchment, and dehydrate for chewy fruit leather
Frequently Asked Questions
How long does dehydrated fruit last?
Properly stored dehydrated fruit lasts 6 months to 1 year at room temperature in airtight containers. For longer storage, keep it in the freezer where it can last up to 2 years. The shelf life depends on the fruit type, moisture content, and storage conditions.
Always check for signs of mold or off smells before consuming.
Do I need to peel fruit before dehydrating?
Peeling is optional and depends on personal preference. Leaving the skin on preserves fiber and nutrients, but some people prefer the texture of peeled fruit. For fruits with tough or bitter skins like oranges or pineapples, peeling is recommended.
For apples and pears, the skin softens during drying and adds a nice chewiness.
Can I dehydrate fruit without a dehydrator?
Yes, you can use an oven or air fryer to dehydrate fruit. An oven set to 140°F (60°C) with the door slightly open works well, though it may take longer than a dehydrator. An air fryer at 135°F (57°C) is great for small batches and dries fruit faster due to its powerful fan.
Both methods require monitoring to ensure even drying.
Why does my dehydrated fruit turn brown?
Browning is caused by oxidation when the fruit’s enzymes are exposed to air. To prevent this, pretreat slices with lemon juice, ascorbic acid, or a commercial anti-browning solution before drying. Some fruits, like apples and bananas, are more prone to browning than others.
While brown fruit is still safe to eat, pretreatment helps maintain an appealing color.
How do I know when fruit is fully dehydrated?
Fruit is fully dehydrated when it’s leathery, pliable, and has no visible moisture. To test, remove a piece from the dehydrator and let it cool. It should feel dry to the touch with no stickiness.
If you squeeze it, no moisture should come out. Under-dehydrated fruit can mold during storage, so it’s better to dry it a bit longer if you’re unsure.
Final Thoughts
Learning how to dehydrate fruit opens up a world of possibilities for preserving food, reducing waste, and creating healthy snacks. With the right techniques—proper prep, consistent slicing, and controlled drying—you can enjoy sweet, chewy fruit all year long. Start with easy fruits like apples or bananas, then experiment with tropical varieties for a fun and rewarding hobby.








