

Last Updated on October 22, 2026 by D. Ruddy
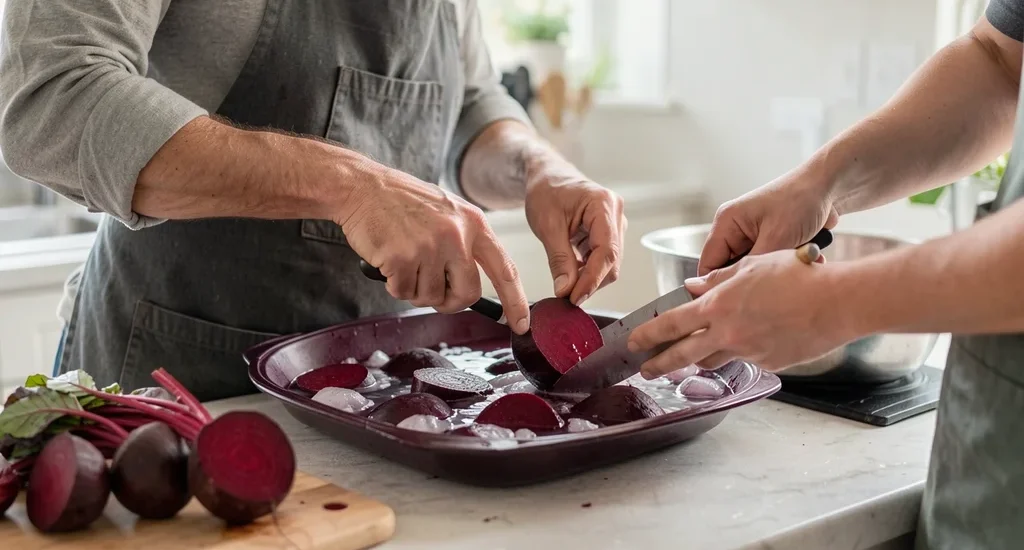
Preserving fresh beets at home starts with proper preparation, and knowing how to blanch beets for freezing ensures they retain color, texture, and nutrients. This simple process locks in flavor and makes your beets ready for soups, salads, or roasting months later. Whether you have a garden harvest or store-bought bunch, blanching is the key to freezer-friendly beets that taste just-picked.
Blanch beets in boiling water for 2-5 minutes depending on size then plunge into ice water to stop cooking. This preserves color texture and nutrients before freezing for up to 12 months.
Why Blanch Beets Before Freezing
Blanching is a crucial step that goes beyond simple washing or peeling. This brief heat treatment serves multiple purposes that directly impact the quality of your frozen beets. The process helps remove surface bacteria and enzymes that would otherwise continue breaking down the vegetables in your freezer.
Without blanching, beets can develop off-flavors, lose their vibrant color, and become mushy when thawed. The USDA confirms that blanching preserves between 50-75% of vitamin C content that would otherwise degrade during freezing. It also makes peeling easier after the initial cooking, saving you time and effort in preparation.
- Stops enzyme activity that causes spoilage and off-flavors
- Preserves color by setting the natural pigments
- Retains texture so beets don’t turn to mush
- Reduces bacterial count for safer long-term storage
- Makes peeling easier after the initial cooking process
- Maintains nutritional value better than raw freezing
According to the National Center for Home Food Preservation, properly blanched beets maintain their quality for 10-12 months in the freezer, compared to just 1-2 months for unblanched vegetables. This makes the extra 10 minutes of preparation time well worth the effort.
What You Need to Blanch Beets for Freezing
Gathering the right tools before you start ensures a smooth blanching process. You don’t need specialized equipment—just a few kitchen staples that you likely already have on hand. The key is having everything prepared and within reach before the beets hit the boiling water.
Start with fresh, firm beets. Choose medium-sized beets (about 2-3 inches in diameter) as they blanch more evenly than very large ones. Smaller beets can be left whole, while larger ones should be cut into uniform pieces for consistent cooking.
| Equipment | Purpose | Alternative |
|---|---|---|
| Large stockpot (4-6 quarts) | Enough space for water and beets to circulate | Canner or deep sauté pan |
| Slotted spoon or spider strainer | Remove beets from boiling water | Tongs or regular spoon |
| Large bowl of ice water | Stop cooking process immediately | Cold running water in sink |
| Colander | Drain beets after blanching | Strainer or perforated pan |
| Paper towels or clean kitchen towels | Dry beets before freezing | Air drying on rack |
| Freezer-safe bags or containers | Store blanched beets long-term | Vacuum sealer bags |
You’ll also need about 1 gallon of water per pound of beets for blanching. Add 1 tablespoon of white vinegar or lemon juice per gallon of water to help preserve the beets’ bright color. Have your ice bath ready before you start cooking—the beets need to go from boiling water to ice water in under 30 seconds for best results.
Tip: Use a kitchen timer for precise blanching. Even 30 seconds too long can make beets mushy, while under-blanching won’t stop the enzymes that cause spoilage.
Preparing Beets for Blanching
Proper preparation is half the battle when blanching beets. Start by selecting the freshest beets possible—look for firm roots with smooth skin and vibrant color. Avoid beets that feel soft or have wrinkled skin, as these signs indicate age and potential flavor loss.
Begin by thoroughly washing the beets under cold running water to remove any dirt or debris. Use a vegetable brush to scrub stubborn soil from the surface. Unlike many other vegetables, you don’t need to peel beets before blanching—in fact, leaving the skin on during cooking makes peeling easier afterward.
- Trim the tops – Cut off the leafy greens and stems, leaving about 1 inch of stem attached to prevent the beets from “bleeding” their color during cooking. The greens can be saved and cooked separately like spinach.
- Leave the taproot – Don’t trim the thin root at the bottom, as this also helps prevent color loss. The root will come off easily during peeling after blanching.
- Sort by size – Group similar-sized beets together. Small beets (1-2 inches) can be blanched whole, while medium beets (2-3 inches) may need 30-60 seconds more. Large beets (over 3 inches) should be cut into 1-inch chunks for even cooking.
- Uniform pieces – If cutting larger beets, aim for pieces of similar size so they cook at the same rate. Wedges or cubes both work well.
- Prevent discoloration – Work quickly to prevent cut beets from turning brown. You can hold them in a bowl of cold water with a splash of vinegar if you need to prep in batches.
According to the University of Minnesota Extension, beets should be processed within 6-12 hours of harvest for the best quality. If you’re using store-bought beets, process them as soon as possible after purchase for optimal results.
Step by Step How to Blanch Beets for Freezing
Follow these steps carefully for perfectly blanched beets every time. The key is maintaining the right water temperature and timing precisely based on the size of your beets. Have your ice bath ready before you begin, as the cooling step is just as important as the blanching itself.
Step 1: Bring Water to a Rolling Boil
Fill your stockpot with enough water to cover the beets completely—about 1 gallon per pound of beets. Add 1 tablespoon of white vinegar or lemon juice per gallon to help preserve color. Bring the water to a full, rolling boil over high heat.
While waiting for the water to boil, prepare your ice bath by filling a large bowl with equal parts ice and cold water. You’ll need enough to completely submerge all the beets you’re blanching in one batch.
Step 2: Add Beets to Boiling Water
Carefully lower the prepared beets into the boiling water using a slotted spoon or spider strainer. Make sure the water returns to a boil quickly—if it doesn’t, you may have added too many beets at once. Work in batches if necessary to maintain a vigorous boil.
If blanching whole small beets, they should be completely submerged. For cut beets, ensure the pieces aren’t sticking together, as this can cause uneven cooking.
Step 3: Blanch According to Size
Blanching times vary based on the size of your beets. Start timing as soon as the water returns to a full boil. Use these guidelines from the National Center for Home Food Preservation:
| Beet Size | Blanching Time | Notes |
|---|---|---|
| Small (1-2 inches diameter) | 2-3 minutes | Leave whole with skins on |
| Medium (2-3 inches diameter) | 3-4 minutes | Can leave whole or halve |
| Large (over 3 inches diameter) | 4-5 minutes | Cut into 1-inch chunks |
| Beet greens (if saving) | 2 minutes | Blanch separately from roots |
Set a timer for the minimum time, then test one beet for doneness. It should be slightly tender but still firm—over-blanching leads to mushy beets. The beets will continue cooking slightly during the cooling process, so err on the side of slightly underdone.
Step 4: Cool Immediately in Ice Water
As soon as the blanching time is up, use your slotted spoon to transfer the beets directly to the ice water bath. This immediate cooling stops the cooking process and helps set the color. The beets should cool completely in the ice water—this usually takes about the same amount of time as the blanching.
For large batches, you may need to refresh the ice water between loads to keep it cold enough. The water should stay below 40°F (4°C) to be effective.
Step 5: Drain and Dry
Once completely cooled, drain the beets in a colander. Gently shake off excess water, then spread the beets on clean kitchen towels or paper towels to dry. Pat them dry with additional towels if needed.
At this point, you can peel the beets if desired. The skins should slip off easily with your fingers or a paring knife. However, many people prefer to freeze them unpeeled and peel after thawing, as the skin helps protect the flesh during freezing.
Step 6: Package for Freezing
Divide the blanched beets into portion sizes you’ll use in recipes. For whole small beets, you can freeze them as-is. For cut beets, spread them in a single layer on a baking sheet to freeze individually before packaging—this prevents them from sticking together.
Use freezer-safe bags or containers, removing as much air as possible to prevent freezer burn. Label with the date and contents. According to the USDA, properly blanched and frozen beets maintain best quality for 10-12 months at 0°F (-18°C) or below.
Important: Never freeze beets in glass containers with straight sides, as the liquid expansion can cause them to crack. Use wide-mouth jars or freezer-safe plastic containers instead.
Peeling Beets Before or After Blanching
One of the most common questions about blanching beets is whether to peel them before or after the process. Both methods work, but each has advantages depending on your preferences and how you plan to use the beets later.
Peeling after blanching is generally easier and more common. The brief cooking softens the skin, making it slip off with minimal effort. This method also helps preserve more of the beet’s flesh, as you’re not removing as much with the skin before cooking.
The skin acts as a protective barrier during blanching, helping the beets retain their shape and color.
Peeling Before Blanching
- Cleaner blanching water – Less sediment from skins in the water
- Immediate use – Ready to eat or cook right after blanching
- Better for pickling – Allows brining to penetrate evenly
- More precise cuts – Easier to cut uniform pieces without skin
Peeling After Blanching
- Easier process – Skins slip off with gentle pressure
- Better protection – Skin helps maintain shape during cooking
- Less waste – More flesh remains intact
- Color preservation – Helps prevent color bleeding
If you choose to peel before blanching, use a vegetable peeler and work quickly to prevent the beets from drying out or discoloring. Wear kitchen gloves if you’re concerned about staining your hands—the pigments in beets are notoriously strong and can leave temporary stains on skin.
Best Ways to Freeze Blanched Beets
How you package your blanched beets for freezing can significantly impact their quality when you’re ready to use them. The right packaging method prevents freezer burn, maintains texture, and makes the beets easier to use in recipes without thawing the entire batch.
For most home cooks, freezer bags are the simplest and most space-efficient option. However, the method you choose might vary based on how you plan to use the beets later. Here’s a comparison of the most effective freezing methods:
| Method | Best For | Shelf Life | Pros | Cons |
|---|---|---|---|---|
| Freezer bags (squeeze out air) | Whole beets, large batches | 10-12 months | Space-efficient, easy to label | Can get freezer burn if not sealed well |
| Vacuum sealed bags | Long-term storage, portion control | 12-18 months | Best protection, longest shelf life | Requires special equipment |
| Freezer containers with lids | Cut beets, ready-to-use portions | 10-12 months | Stackable, reusable, see contents | Bulky, can crack in extreme cold |
| Tray freezing (single layer) | Individual pieces, stir-fry use | 10-12 months | Prevents clumping, use as needed | Takes up more space initially |
For the tray freezing method, spread blanched and cooled beet pieces in a single layer on a baking sheet lined with parchment paper. Freeze until solid (about 2 hours), then transfer to freezer bags. This method is ideal if you want to use individual beet pieces in stir-fries or salads without thawing the entire batch.
Warning: Never use thin plastic bags or containers not designed for freezer use. These can become brittle and crack, allowing air to reach your beets and causing freezer burn.
Common Mistakes to Avoid When Blanching Beets
Even with the best intentions, it’s easy to make mistakes when blanching beets for freezing. These errors can affect the color, texture, and overall quality of your frozen beets. Being aware of these common pitfalls will help you achieve the best possible results every time.
One of the most frequent mistakes is under-blanching. Many people assume that a quick dip in boiling water is enough, but this doesn’t adequately stop the enzyme activity that leads to spoilage. On the other hand, over-blanching can make your beets mushy and dull in color.
Finding the sweet spot in timing is crucial.
- Not using enough water – The water level should be high enough to completely cover the beets, even when they’re added. If the water doesn’t return to a boil quickly after adding the beets, you’ve added too many at once. Work in smaller batches if needed.
- Skipping the ice bath – This step is just as important as the blanching itself. Without immediate cooling, the beets continue cooking, leading to overcooked, mushy results. The ice water also helps set the color, keeping your beets vibrant.
- Using dull knives for cutting – If you’re cutting beets before blanching, a dull knife can crush the cells, leading to more color bleeding and uneven cooking. Always use a sharp knife for clean cuts.
- Ignoring size differences – Mixing small and large beets in the same batch leads to uneven cooking. Small beets will be overdone by the time larger ones are properly blanched. Sort by size before starting.
- Overcrowding the pot – Adding too many beets at once lowers the water temperature too much, leading to uneven blanching. Leave room for the water to circulate around each beet.
- Not drying beets before freezing – Excess moisture leads to ice crystals forming on the surface, which can cause freezer burn. Always pat beets dry before packaging.
- Using warm containers for freezing – Let blanched beets cool completely before packaging. Adding warm beets to freezer bags can create condensation, leading to ice crystals and potential freezer burn.
Another common issue is not labeling your packages. Without labels, it’s easy to forget what’s in your freezer or how long it’s been there. Always label with the contents and date, and consider adding the quantity if you have multiple similar packages.
How to Thaw and Use Frozen Beets
Properly blanched and frozen beets can be used in many of the same ways as fresh beets, with a few considerations. The thawing method you choose depends on how you plan to use them in your recipe. Understanding the best approaches will help you get the most out of your frozen beets.
For most cooked dishes like soups, stews, or roasted beet recipes, you can add frozen beets directly to the pot without thawing. This works particularly well for dishes with longer cooking times, as the beets will have time to heat through completely. However, for dishes where you want the beets to retain some texture, like salads or side dishes, thawing first is recommended.
Thawing Methods
- Refrigerator thawing – The safest method. Place the package of beets in the refrigerator 8-12 hours before use. This slow thaw prevents texture changes and maintains quality. Best for when you’re planning ahead.
- Cold water thawing – For quicker thawing, place the sealed package in a bowl of cold water. Change the water every 30 minutes. Small packages may thaw in an hour or less. Never use warm water, as this can lead to uneven thawing and potential bacterial growth.
- Microwave thawing – Use the defrost setting for small quantities. Be careful not to overheat, as this can make the beets mushy. This method works best for beets you’ll be cooking immediately after thawing.
- Direct cooking from frozen – Add frozen beets directly to soups, stews, or casseroles. Increase the cooking time by about 50% to ensure they heat through completely.
Best Uses for Frozen Beets
- Soups and stews – Frozen beets work perfectly in borscht, beet soup, or vegetable stews. Add them directly from frozen and adjust the cooking time as needed.
- Roasted beets – Thaw beets completely, pat dry, then toss with oil and seasonings before roasting. Roast at 400°F (200°C) for 20-25 minutes, or until heated through and slightly caramelized.
- Purees and dips – Frozen beets are ideal for making beet hummus, borscht, or other pureed dishes. The freezing process softens them slightly, making blending easier.
- Pickled beets – Thaw beets completely, then slice or leave whole before adding to your pickling brine. The blanching process actually helps them absorb the flavors better.
- Smoothies – Add frozen beet chunks directly to your blender for a nutrient-packed smoothie. The cold beets help keep the drink chilled without needing extra ice.
- Baking – Use thawed, drained beets in beet cakes, brownies, or muffins. Make sure to drain them well to avoid excess moisture in your baked goods.
Tip: To reduce the earthy flavor that some people find strong in beets, add a splash of vinegar or lemon juice to the cooking water when using frozen beets in recipes. This helps balance the flavor profile.
Frequently Asked Questions
Do I need to peel beets before blanching for freezing?
No, you don’t need to peel beets before blanching. In fact, leaving the skin on during blanching helps protect the beets and makes peeling easier afterward. The skin will slip off easily with your fingers or a paring knife once the beets are blanched and cooled.
However, you can peel before blanching if you prefer, especially if you’re cutting them into pieces first.
How long do blanched beets last in the freezer?
Properly blanched and frozen beets maintain best quality for 10-12 months at 0°F (-18°C) or below, according to the USDA. They remain safe to eat beyond that time, but the quality may start to deteriorate. For the best flavor and texture, try to use them within the first 8-10 months.
Always label your packages with the date so you can keep track of storage time.
Can I freeze beets without blanching?
While you technically can freeze beets without blanching, it’s not recommended for long-term storage. Without blanching, enzymes in the beets continue to break down the vegetables, leading to loss of color, texture, and flavor. Unblanched beets may only maintain good quality for 1-2 months in the freezer.
Blanching is a quick process that significantly extends the storage life and preserves the quality of your beets.
Why did my frozen beets turn brown or dull in color?
Beets can lose their vibrant color for several reasons. The most common is under-blanching, which doesn’t adequately stop the enzyme activity that breaks down the pigments. Over-blanching can also cause color loss.
Other factors include not using enough water, crowding the pot, or not cooling the beets quickly enough in ice water. Adding a tablespoon of vinegar or lemon juice to the blanching water can help preserve the color. Using the freshest beets possible also helps maintain their bright hue.
Can I freeze beet greens along with the beets?
Yes, you can freeze beet greens, but they should be blanched separately from the beet roots. Beet greens only need about 2 minutes of blanching time, compared to 2-5 minutes for the roots. Blanch the greens in boiling water, then cool in ice water, drain, and package separately.
Frozen beet greens can be used in soups, stews, or sautéed as a side dish. They maintain good quality in the freezer for about 10-12 months.
Final Thoughts
Mastering how to blanch beets for freezing opens up a world of possibilities for preserving this nutrient-packed vegetable. The process is simple but requires attention to detail—proper timing, immediate cooling, and careful packaging make all the difference in maintaining quality. Whether you’re preserving a garden harvest or taking advantage of seasonal sales, properly blanched and frozen beets will reward you with vibrant color, great texture, and full flavor for months to come.
Start with fresh beets, follow the steps carefully, and you’ll have a freezer stocked with versatile ingredients ready for your favorite recipes.








