

Last Updated on October 22, 2026 by D. Ruddy
Properly preserving your harvest ensures fresh, crisp carrots all season long. How to store carrots for winter is a common concern for gardeners and home cooks looking to extend the life of their root vegetables. The right methods prevent spoilage, retain nutrients, and keep that garden-fresh flavor intact for months.
Whether you have a small batch or a large harvest, these techniques will help you enjoy your carrots well into the colder months.
You can store carrots for winter by removing the greens, brushing off dirt, and keeping them in a cool, humid environment like a root cellar, refrigerator, or buried in sand. Properly stored carrots can last 4-6 months.
Why Proper Carrot Storage Matters
Carrots are a staple in many kitchens, but their storage needs are often misunderstood. Unlike some vegetables that can sit on a counter for days, carrots require specific conditions to prevent them from turning soft, bitter, or moldy. The right storage methods slow down respiration, the natural process where vegetables break down sugars and release moisture.
Improper storage leads to several problems. Carrots left in warm or dry conditions quickly lose moisture, becoming rubbery and unappetizing. Exposure to ethylene gas from fruits like apples or bananas can cause bitterness.
According to the University of Minnesota Extension, carrots stored at temperatures above 40°F (4°C) will develop a tough, woody texture within weeks.
Here’s what happens when you store carrots correctly:
- Retains crispness by maintaining high humidity levels (90-95%)
- Preserves sweetness as cold temperatures convert starches to sugars
- Prevents sprouting by keeping them in darkness
- Minimizes waste by extending shelf life to 4-6 months
- Maintains nutritional value, especially beta-carotene content
Tip: Carrots stored in ideal conditions can actually become sweeter over time as the cold triggers the conversion of starches to sugars.
Preparing Carrots for Winter Storage
Proper preparation is the foundation of successful long-term storage. The process begins the moment you pull carrots from the ground. Each step removes potential sources of spoilage and creates optimal conditions for preservation.
Start by harvesting at the right time. Carrots intended for storage should be fully mature but not overgrown. The ideal size is about 1-1.5 inches in diameter.
Larger carrots tend to be woody, while very small ones may not store as well. Choose a dry day for harvesting to minimize moisture on the roots.
Follow this step-by-step preparation process:
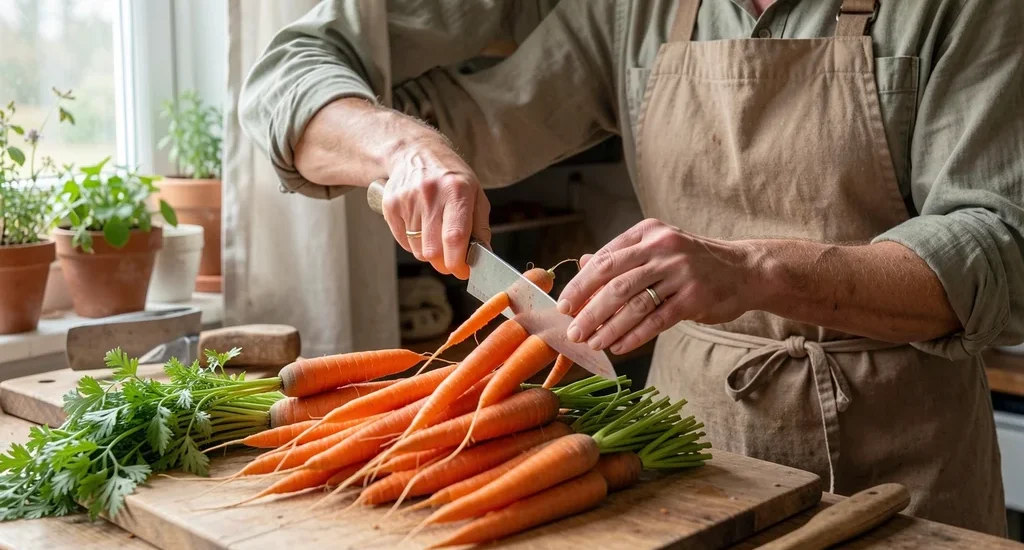
- Remove the greens immediately – The leafy tops continue to draw moisture from the roots. Cut them off about 1-2 inches above the carrot crown using clean, sharp scissors or pruners. Never twist them off, as this can damage the root.
- Brush off excess dirt – Gently remove as much soil as possible with your hands or a soft brush. Do not wash carrots with water, as this introduces moisture that promotes rot.
- Allow to dry – Spread carrots in a single layer in a well-ventilated area for 24-48 hours. This helps any surface moisture evaporate.
- Inspect for damage – Sort through your harvest and set aside any carrots with cuts, bruises, or soft spots. These won’t store well and should be used first.
- Do not trim the roots – Leave the thin tail intact, as trimming can create entry points for bacteria.
| Preparation Step | Purpose | Common Mistake |
|---|---|---|
| Removing greens | Prevents moisture loss from roots | Leaving tops attached |
| Brushing off dirt | Reduces rot-causing bacteria | Washing with water |
| Drying period | Allows surface moisture to evaporate | Skipping this step |
The preparation process significantly impacts storage success. According to the National Center for Home Food Preservation, properly prepared carrots have a 30-50% higher success rate in long-term storage compared to unprepared ones.
Best Methods for Storing Carrots Over Winter
Several storage methods work well for winter carrot preservation, each with its own advantages. The best approach depends on your available space, climate, and the quantity of carrots you need to store. All effective methods share three key requirements: cool temperatures, high humidity, and darkness.
The most traditional and effective method is root cellar storage. Root cellars provide the ideal environment: temperatures between 32-40°F (0-4°C) and humidity levels of 90-95%. This mimics the natural underground conditions where carrots grow, slowing their metabolic processes to a near standstill.
Here are the most effective storage methods, ranked by effectiveness:
1. Root Cellar Storage – The Gold Standard
A properly designed root cellar is the best way to store carrots long-term. This method has been used for centuries and can keep carrots fresh for 5-6 months. The key is maintaining consistent temperature and humidity levels.
For best results:
- Use wooden crates or boxes with good airflow
- Layer carrots with slightly damp sand, sawdust, or peat moss
- Ensure each carrot is not touching its neighbors
- Store in complete darkness
- Check monthly for any signs of spoilage
| Pros | Cons |
|---|---|
| Longest storage life (5-6 months) | Requires a properly built root cellar |
| Maintains best flavor and texture | Not everyone has access to one |
| Can store large quantities | Requires regular monitoring |
Best For: Gardeners with access to a root cellar who want to store large quantities of carrots for the longest possible time.
2. Refrigerator Storage – Most Accessible
For those without a root cellar, the refrigerator offers an excellent alternative. While the storage life is shorter (3-4 months), this method works well for smaller quantities and is the most convenient for regular kitchen use.
To maximize refrigerator storage:
- Place carrots in the crisper drawer, which maintains higher humidity
- Store in perforated plastic bags or wrap in damp paper towels
- Keep away from ethylene-producing fruits (apples, bananas, pears)
- Check every 2-3 weeks for any soft or moldy carrots
- Use the oldest carrots first to maintain rotation
Important: The crisper drawer is specifically designed for high-humidity storage. Using it can extend carrot life by 2-4 weeks compared to regular refrigerator shelves.
Best For: Households with limited storage space who want convenient access to carrots for regular cooking.
3. Sand or Sawdust Storage – Simple and Effective
This method works well for those who want to store carrots without specialized equipment. The sand or sawdust acts as an insulator and maintains humidity around the carrots. It’s particularly effective in basements or garages where temperatures stay cool but not freezing.
How to set up sand storage:
- Choose clean, fine sand (play sand works well) or untreated sawdust
- Use a sturdy container like a wooden box, plastic tote, or even a clean trash can
- Create layers: 2 inches of sand, then a layer of carrots not touching each other, then more sand
- Repeat until the container is full, ending with a sand layer on top
- Store in a cool (32-40°F), dark place
| Material | Pros | Cons |
|---|---|---|
| Sand | Excellent humidity retention, widely available | Heavy, can be messy |
| Sawdust | Lightweight, good insulation | Must be untreated, can dry out |
| Peat moss | Natural, retains moisture well | More expensive, may contain pests |
Best For: Those with cool storage areas (like basements) who want a low-tech, reliable storage solution.
4. Freezing – For Long-Term Convenience
While fresh storage methods are preferred, freezing offers an excellent way to preserve carrots for even longer periods (up to 12 months) while maintaining most of their nutritional value. This method is ideal for those who want to have carrots on hand for cooking without worrying about spoilage.
Proper freezing technique:
- Blanch first – This is crucial for preserving color, texture, and flavor. Bring a pot of water to boil and prepare an ice bath.
- Cut uniformly – Slice carrots into coins, sticks, or dice for even freezing and easier cooking later.
- Blanch for 2-5 minutes – Small pieces need 2 minutes, larger pieces up to 5 minutes. This stops enzyme activity that causes deterioration.
- Cool immediately – Plunge blanched carrots into ice water to stop the cooking process.
- Dry thoroughly – Pat dry with clean towels or let air dry to prevent ice crystals from forming clumps.
- Package properly – Use airtight freezer bags or containers, removing as much air as possible. Vacuum sealing works best.
- Label and date – Keep track of storage time (carrots are best used within 10-12 months).
Best For: Those who want maximum convenience and don’t mind a slightly softer texture (best for cooked dishes rather than raw eating).
5. Canning – Shelf-Stable Preservation
Canning is another long-term storage option that creates shelf-stable carrots ready for quick use. This method works well for those who want to preserve carrots without relying on electricity or special storage conditions.
There are two canning methods:
- Pressure canning – Required for low-acid vegetables like carrots to prevent botulism. Processes at 10-11 psi for 25-30 minutes for pints, 30-35 minutes for quarts.
- Pickled carrots – Uses a vinegar brine to create an acidic environment safe for water bath canning. Results in a tangy flavor great for snacks or salads.
Warning: Never water bath can plain carrots. They are low-acid vegetables that require pressure canning to be safe from botulism.
Best For: Those who want room-temperature storage and enjoy canned vegetables or pickled products.
Common Mistakes to Avoid
Even with the best intentions, small mistakes can ruin an entire batch of stored carrots. Being aware of these common pitfalls helps ensure your winter carrot supply stays fresh and delicious. Many storage failures result from overlooking simple but critical details.
One of the most frequent mistakes is storing carrots with their greens still attached. The tops continue to respire and draw moisture from the roots, leading to premature wilting. Another common error is washing carrots before storage, which introduces moisture that encourages mold growth and rot.
Avoid these critical mistakes:
- Storing in warm locations – Temperatures above 40°F (4°C) significantly shorten storage life. The warmer the environment, the faster carrots will deteriorate. A study by the USDA found that carrots stored at 50°F (10°C) last only 2-3 weeks compared to 4-6 months at proper temperatures.
- Exposure to light – Light causes carrots to turn green and develop a bitter taste. Always store in complete darkness or use opaque containers.
- Mixing with ethylene producers – Fruits like apples, bananas, and pears release ethylene gas, which causes carrots to become bitter. Keep them separate.
- Using airtight containers without moisture – While carrots need high humidity, they also need some airflow. Completely airtight containers without any moisture control lead to condensation and rot.
- Ignoring regular checks – Failing to inspect stored carrots monthly means you might not catch spoilage until it’s spread to the entire batch. Remove any soft, moldy, or sprouting carrots immediately.
- Storing damaged carrots – Any carrots with cuts, bruises, or soft spots should be used immediately, as these areas are prone to mold and bacteria growth.
- Inconsistent temperatures – Fluctuating temperatures cause condensation, which leads to rot. Aim for steady cold conditions.
| Mistake | Impact | Solution |
|---|---|---|
| Leaving greens on | Moisture loss, premature wilting | Cut off tops immediately after harvest |
| Washing before storage | Increased rot risk | Brush off dirt, don’t wash |
| Storing with fruits | Bitterness from ethylene gas | Keep separate from ethylene producers |
| Using plastic bags without ventilation | Condensation and mold | Use perforated bags or damp towels |
According to a survey by the National Gardening Association, 60% of home gardeners report losing at least a portion of their root vegetable harvest due to improper storage conditions. Being aware of these common mistakes can significantly increase your success rate.
Optimal Storage Conditions
The key to successful winter carrot storage lies in maintaining the right environment. Carrots are alive even after harvest, and their storage life depends on slowing down their natural processes. Understanding and controlling these conditions makes the difference between carrots that last months and those that spoil in weeks.
Temperature is the most critical factor. Carrots store best between 32-40°F (0-4°C). Below 32°F, they may freeze and become mushy when thawed.
Above 40°F, they respire too quickly, using up their stored sugars and becoming woody or bitter. The ideal temperature is right at 34-36°F (1-2°C).
Humidity is equally important. Carrots are about 88% water, and they need high humidity (90-95%) to prevent moisture loss. When carrots lose moisture, they become soft and rubbery.
You can maintain humidity by:
- Using materials that retain moisture (sand, sawdust, peat moss)
- Storing in the crisper drawer of your refrigerator
- Placing a bowl of water near your storage area
- Using damp (not wet) packing materials
- Avoiding direct contact with water to prevent rot
Darkness is the third essential condition. Light exposure causes carrots to produce chlorophyll, turning them green and bitter. It also triggers sprouting, which diverts energy from the root to new growth.
Always store carrots in complete darkness or use opaque containers.
| Condition | Ideal Range | Impact of Deviation |
|---|---|---|
| Temperature | 32-40°F (0-4°C) | Above 40°F: rapid deterioration; Below 32°F: freezing damage |
| Humidity | 90-95% | Below 90%: moisture loss, rubbery texture |
| Light | Complete darkness | Any light: greening, bitterness, sprouting |
| Airflow | Minimal but present | No airflow: condensation, mold; Too much: drying out |
Tip: A simple way to monitor humidity is to place a small hygrometer in your storage area. These inexpensive devices can help you maintain the ideal 90-95% humidity range for carrot storage.
How to Revive Soft Carrots
Even with the best storage methods, you might occasionally find carrots that have lost some of their crispness. Before discarding them, try these revival techniques. Often, carrots that seem limp can be restored to their former glory with a little care.
The most effective method is the ice water soak. This works because carrots absorb water through their cells, rehydrating from the inside out. The cold water also firms up the cell walls, restoring crispness.
According to food scientists at the University of California, Davis, this method can restore up to 80% of a carrot’s original texture.
Try these revival techniques:
- Ice water soak – Fill a bowl with ice water and submerge the carrots completely. Let them soak for 15-30 minutes. This works best for carrots that are slightly soft but not slimy or moldy.
- Cold water soak – If you don’t have ice, use the coldest water from your tap. Soak for 30-60 minutes, changing the water if it becomes cloudy.
- Peel and rehydrate – For carrots that are soft but not spoiled, peeling them and then soaking can be more effective, as it removes any dried outer layer that might be blocking water absorption.
- Trim and revive – If just the ends are soft, trim them off and soak the remaining carrot. The good parts will often revive while you use the trimmed pieces immediately.
- Use in cooked dishes – If carrots don’t revive completely, they can still be used in soups, stews, or roasted dishes where texture is less critical.
Note that these methods only work for carrots that have dried out, not for those that have started to rot or develop mold. If carrots have any off smells, slimy texture, or visible mold, they should be discarded.
Warning: Never attempt to revive carrots that show any signs of spoilage. Consuming moldy or rotten carrots can cause foodborne illness.
Storing Carrots Without a Root Cellar
Not everyone has access to a traditional root cellar, but that doesn’t mean you can’t successfully store carrots for winter. Many alternative methods work nearly as well, using spaces and materials you likely already have at home. The key is finding the coolest, most humid spots in your home and adapting them for carrot storage.
Modern homes present some challenges for root vegetable storage. Central heating keeps indoor temperatures too warm, and many basements are now finished living spaces rather than the cool, damp storage areas of the past. However, with some creativity, you can create suitable storage conditions.
Here are effective non-root cellar storage options:
- Unheated garage or shed – If you have an attached garage that stays cool but doesn’t freeze, this can work well. Use insulated containers to protect from temperature swings. Monitor temperatures to ensure they stay between 32-40°F.
- Basement corner – Find the coolest part of your basement, often near the foundation walls. Use sand or sawdust in containers as described earlier. A basement typically maintains temperatures in the 50-60°F range, which is warmer than ideal but can work for shorter storage periods (2-3 months).
- Buried storage – In climates where the ground doesn’t freeze deeply, you can bury a container in the ground. Use a waterproof container with drainage holes, fill with carrots layered in sand, and bury it 1-2 feet deep in a shaded area. This mimics a root cellar.
- Insulated cooler – A high-quality cooler can maintain cool temperatures if placed in a cool area like a basement or garage. Add ice packs if needed to maintain the right temperature range.
- Under the porch – If you have a covered porch that stays cool and protected from freezing, you can store carrots in insulated containers here. This works particularly well in mild winter climates.
- Second refrigerator – If you have an extra refrigerator (perhaps in a garage or basement), this can be an excellent storage solution. Set it to the coldest setting and use the crisper drawers.
| Location | Temperature Range | Storage Duration | Best For |
|---|---|---|---|
| Unheated garage | 32-50°F (0-10°C) | 3-4 months | Mild winter climates |
| Basement | 50-60°F (10-15°C) | 2-3 months | Short-term storage |
| Buried container | 32-40°F (0-4°C) | 4-5 months | Climates with mild winters |
| Insulated cooler | 32-45°F (0-7°C) | 3-4 months | Portable solution |
Important: For any alternative storage location, use a thermometer to monitor temperatures regularly. Temperatures above 40°F will significantly reduce storage life.
Frequently Asked Questions
Can I store carrots in the freezer without blanching?
No, blanching is essential before freezing carrots. This process stops enzyme activity that would otherwise cause loss of flavor, color, and texture during frozen storage. Carrots frozen without blanching will become mushy and develop off flavors within a few months.
The blanching process only takes a few minutes and significantly improves the quality of your frozen carrots.
How do I know if stored carrots have gone bad?
Discard carrots if they develop any of these signs: soft or mushy texture, visible mold (white, black, or green fuzzy spots), an off or sour smell, or a slimy film on the surface. Carrots that have started to sprout can still be used if the root itself is firm and shows no other signs of spoilage – simply cut off the sprouted top and use the rest.
Can I store baby carrots the same way as regular carrots?
Yes, baby carrots (whether true immature carrots or the commercially cut “baby-cut” variety) can be stored using the same methods as regular carrots. However, note that baby-cut carrots from stores are often peeled and may have a slightly shorter storage life. For these, refrigerator storage in water works particularly well to maintain crispness.
Always remove any packaging before storing.
Is it better to store carrots with or without the skin?
Store carrots with their skin on. The outer layer provides a natural protective barrier against moisture loss and bacteria. Peeling before storage significantly reduces their storage life.
Only peel carrots right before using them. If you must peel some for immediate use, store the peeled carrots in water in the refrigerator and use within a week.
How often should I check on stored carrots?
For root cellar or similar storage methods, check your carrots every 3-4 weeks. Remove any that show signs of spoilage immediately to prevent it from spreading. For refrigerator storage, check every 2-3 weeks.
Regular inspection is crucial because one spoiled carrot can quickly affect others in close proximity.
Final Thoughts
How to store carrots for winter comes down to controlling temperature, humidity, and light while avoiding common mistakes. Whether you choose a root cellar, refrigerator, or alternative method, the key is consistency in your storage conditions. With proper preparation and the right environment, you can enjoy fresh, crisp carrots for months after harvest.
Start with the method that best fits your space and needs, and don’t forget to check on your stored carrots regularly to ensure they stay in perfect condition throughout the winter.








