

Last Updated on October 22, 2026 by D. Ruddy
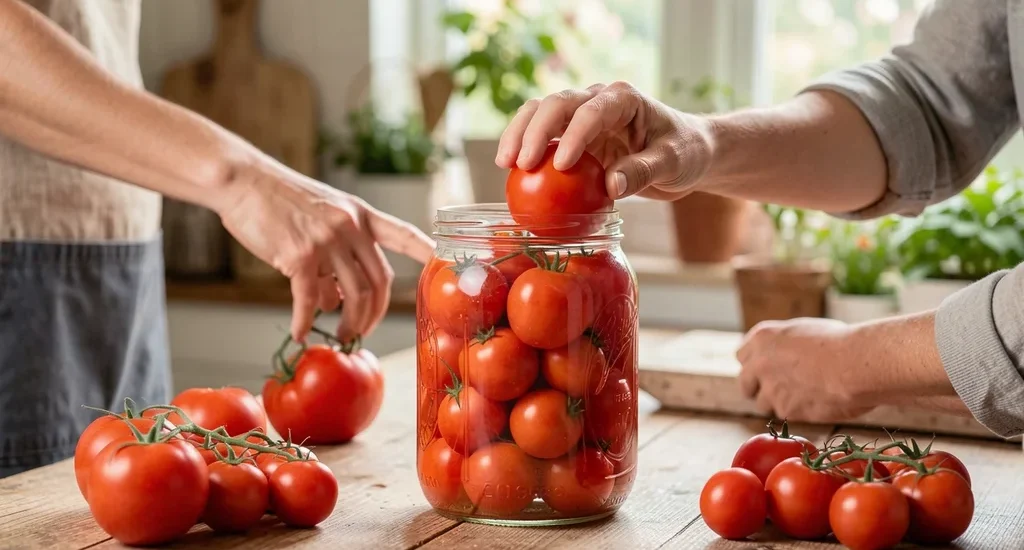
Preserving the summer harvest doesn’t have to be complicated. Canning whole tomatoes the easy way lets you lock in fresh flavor with minimal effort, whether you’re a first-timer or a seasoned canner. This guide covers everything from selecting the best tomatoes to safe processing methods, so you can enjoy garden-fresh taste year-round without the fuss.
You can safely can whole tomatoes at home with just a water bath or pressure canner. The process takes about 2-3 hours for a standard batch, and properly canned tomatoes last up to 18 months on the shelf. No special skills are required—just follow the steps closely.
Why Can Whole Tomatoes Instead of Sauce or Paste
Canning whole tomatoes gives you the most versatility in the kitchen. Unlike sauces or pastes, whole tomatoes retain their shape and texture, making them perfect for salads, stews, or quick pasta dishes. You control the additives—no preservatives, just pure tomato flavor.
Whole tomatoes also preserve the fruit’s natural juices, which are rich in vitamins A and C. According to the USDA, canned tomatoes retain up to 90% of their original nutrient content when processed properly. This makes them a healthy addition to any meal.
Here are the top reasons to can whole tomatoes:
- Flexibility: Use them in soups, salsas, or as a side dish
- Nutrient retention: Keeps most vitamins and minerals intact
- Cost-effective: Saves money by preserving seasonal abundance
- Long shelf life: Lasts over a year without refrigeration
- No additives: You decide what goes into the jar
- Flavor preservation: Maintains the fresh taste of summer tomatoes
Tip: Choose meaty tomato varieties like Roma or San Marzano for the best texture after canning. These have fewer seeds and thicker flesh, which holds up better during processing.
What You Need to Get Started
Before you begin, gather all the necessary equipment. Having everything ready will make the process smoother and more efficient. The National Center for Home Food Preservation emphasizes that using the right tools is crucial for safety and quality.
Here’s a complete checklist of what you’ll need:
| Equipment | Purpose | Estimated Cost |
|---|---|---|
| Water bath canner or pressure canner | For safe processing of jars | $30-$100 |
| Glass canning jars (pint or quart) | To store the tomatoes | $1-$3 per jar |
| Lids and bands | To seal the jars | $3-$5 per dozen |
| Jar lifter | To safely move hot jars | $5-$10 |
| Canning funnel | For easy filling of jars | $5-$8 |
| Bubble remover or plastic knife | To remove air bubbles from jars | $3-$5 |
| Ladle | For transferring tomatoes to jars | $5-$15 |
You’ll also need basic kitchen items like a large pot for blanching tomatoes, a sharp knife, cutting board, and clean towels. If you’re using a pressure canner, make sure to read the manufacturer’s instructions carefully, as pressure canning requires precise timing and pressure levels.
Selecting the Perfect Tomatoes for Canning
The quality of your canned tomatoes starts with the tomatoes you choose. Not all varieties are created equal when it comes to canning. The best tomatoes for canning are meaty, low-acid, and have thick walls with fewer seeds.
These characteristics help them hold their shape during the canning process.
Here are the top tomato varieties recommended by the University of Georgia’s Cooperative Extension for home canning:
- Roma Tomatoes: The gold standard for canning. These oval-shaped tomatoes have thick flesh and few seeds, making them ideal for whole canning. They’re also less watery, which means more tomato and less liquid in your jars.
- San Marzano: A type of Roma tomato that’s especially sweet and flavorful. These are often used for sauces but work beautifully for whole canning too.
- Beefsteak Tomatoes: Large and meaty, these are great if you want big, hearty tomato pieces in your jars. They do have more seeds, so you may need to core them carefully.
- Amish Paste: A heirloom variety that’s meaty and sweet, perfect for canning. These tomatoes are slightly larger than Romas but just as suitable.
- Celebrity Tomatoes: A disease-resistant hybrid that produces consistently good tomatoes for canning. They’re medium-sized with a good balance of flesh and juice.
When selecting tomatoes, look for ones that are fully ripe but still firm. Avoid tomatoes with bruises, cracks, or soft spots, as these can lead to spoilage. If you’re picking from your garden, harvest tomatoes in the morning when they’re at their freshest.
Warning: Never use tomatoes from dead or diseased plants, as they may contain harmful bacteria. Always inspect your tomatoes carefully before canning.
Preparing Tomatoes for Canning
Proper preparation is key to successful canning. This step ensures your tomatoes stay safe and maintain their quality during storage. The process involves washing, peeling, and optionally adding acid to ensure safety.
Follow these steps to prepare your tomatoes:
- Wash thoroughly: Rinse tomatoes under cool running water to remove dirt, debris, and any pesticide residue. Gently rub the surface with your fingers. Do not soak tomatoes, as this can waterlog them and dilute their flavor.
- Remove stems and cores: Use a sharp knife to cut out the stem end and core. This is important because the stem can harbor bacteria that could cause spoilage.
- Blanch for easy peeling (optional): While peeling is optional for whole tomatoes, many canners prefer to remove the skins for a smoother texture. To blanch, dip tomatoes in boiling water for 30-60 seconds, then immediately plunge them into ice water. The skins will slip off easily.
- Keep tomatoes whole or halve: For whole tomatoes, leave them intact. For larger varieties, you may choose to halve them. If you halve them, you can pack more into each jar.
- Add acid (critical for safety): To prevent botulism, add acid to each jar. The USDA recommends adding 2 tablespoons of bottled lemon juice or 1/2 teaspoon of citric acid per quart jar, or 1 tablespoon of lemon juice or 1/4 teaspoon of citric acid per pint jar. This is especially important if you’re using a water bath canner.
If you choose to peel your tomatoes, you’ll need about 2-3 pounds of tomatoes per quart jar. For unpeeled tomatoes, you’ll need slightly less because the skins take up some space. A general rule is that 21-25 pounds of tomatoes will yield about 7 quart jars.
| Tomato Preparation | Yield per Quart | Notes |
|---|---|---|
| Peeled whole tomatoes | 2-3 lbs | Best texture for sauces |
| Unpeeled whole tomatoes | 2-2.5 lbs | Skins may toughen during processing |
| Halved tomatoes | 2.5-3 lbs | Good for large varieties |
Step by Step Canning Process
Now comes the main event—actually canning your tomatoes. Whether you’re using a water bath canner or a pressure canner, the basic steps are similar. The main difference is the processing time and method.
Water bath canning is sufficient for acidified tomatoes, while pressure canning is required for non-acidified tomatoes to prevent botulism.
Here’s a detailed, step-by-step guide to canning whole tomatoes the easy way:
Water Bath Canning Method
- Prepare your canner: Fill your water bath canner with enough water to cover the jars by 1-2 inches. Place the canner on the stove and begin heating the water. You want the water to be hot but not boiling when you add the jars.
- Sterilize jars: While the canner is heating, sterilize your jars by boiling them for 10 minutes. Keep the jars hot until you’re ready to fill them. Lids should be simmered (not boiled) to soften the sealing compound.
- Pack tomatoes into jars: Using a canning funnel, pack the prepared tomatoes into the hot jars. Press them down gently to fit as many as possible without crushing. Leave 1/2 inch of headspace at the top of the jar.
- Add liquid: Cover the tomatoes with hot tomato juice, water, or a light syrup. You can use the juice from the tomatoes you’ve prepared or heat water to boiling and pour it over the tomatoes. Again, leave 1/2 inch of headspace.
- Add acid: Add 2 tablespoons of bottled lemon juice or 1/2 teaspoon of citric acid to each quart jar (or half that amount for pint jars). This step is crucial for safety, even if your tomatoes seem acidic.
- Remove air bubbles: Use a bubble remover or a plastic knife to gently slide along the inside of the jar to remove any trapped air bubbles. This helps prevent spoilage and ensures a good seal.
- Wipe rims and apply lids: Use a clean, damp cloth to wipe the rims of the jars to remove any residue that could prevent a proper seal. Place the lids on the jars and screw on the bands until they’re fingertip tight—don’t overtighten.
- Process the jars: Using a jar lifter, carefully place the jars into the canner. Make sure they’re covered by 1-2 inches of water. Bring the water to a full rolling boil, then start your timer. Process quart jars for 45 minutes and pint jars for 40 minutes at altitudes up to 1,000 feet. For higher altitudes, add 5 minutes for each additional 1,000 feet.
- Cool and check seals: After processing, use the jar lifter to remove the jars from the canner and place them on a towel-lined countertop. Let them cool undisturbed for 12-24 hours. After cooling, check the seals by pressing down on the center of the lid. If it doesn’t pop back, the jar is sealed. If it does pop, refrigerate the jar and use the tomatoes within a few days.
Pressure Canning Method
Pressure canning is required if you choose not to add acid to your tomatoes, as it’s the only method that can safely destroy the bacteria that cause botulism in low-acid foods. The process is similar to water bath canning, but with a few key differences.
- Prepare your pressure canner: Follow the manufacturer’s instructions for your specific pressure canner. Add 2-3 inches of water to the canner and place it on the stove to heat. Do not fill the canner more than halfway with water.
- Sterilize jars and lids: Just as with water bath canning, sterilize your jars and prepare your lids.
- Pack tomatoes into jars: Pack the tomatoes into the jars as described above, but you can omit the added acid if you prefer. However, adding acid is still recommended for the best flavor and an extra margin of safety.
- Add liquid: Cover the tomatoes with hot water or tomato juice, leaving 1 inch of headspace for quart jars and 1/2 inch for pint jars.
- Remove air bubbles and wipe rims: Follow the same steps as with water bath canning to remove air bubbles and clean the rims.
- Process the jars: Place the jars in the pressure canner using a jar lifter. Lock the lid in place and bring the canner to a boil. Allow steam to vent for 10 minutes, then close the vent and bring the pressure to the level recommended for your altitude. Process quart jars for 25 minutes and pint jars for 20 minutes at 10 pounds of pressure for weighted gauges or 11 pounds for dial gauges at altitudes up to 1,000 feet. Adjust for higher altitudes as needed.
- Cool the canner: After processing, turn off the heat and allow the canner to cool naturally. Do not attempt to cool it quickly, as this can cause the jars to break. Once the pressure has returned to zero, wait an additional 10 minutes before opening the canner.
- Cool jars and check seals: Remove the jars and place them on a towel-lined countertop to cool. Check the seals after 12-24 hours as described above.
Important: Altitude affects processing times for both water bath and pressure canning. Always adjust your processing time or pressure based on your altitude to ensure safety. Consult the USDA’s canning guidelines for specific adjustments.
Packing Methods for Whole Tomatoes
There are two main methods for packing tomatoes into jars: raw pack and hot pack. Each has its advantages, and the method you choose can affect the quality and safety of your canned tomatoes. The National Center for Home Food Preservation recommends hot packing for the best results, but both methods are acceptable.
Raw Pack Method
The raw pack method involves packing raw, unprepared tomatoes directly into the jars. This method is quicker and preserves more of the tomato’s natural texture, but it can result in more floating tomatoes and a higher risk of spoilage if not done correctly.
Here’s how to do a raw pack:
- Pack raw tomatoes into clean, hot jars, pressing them down gently to fit as many as possible.
- Leave 1/2 inch of headspace for pint jars and 1 inch for quart jars.
- Add hot tomato juice, water, or a light syrup to cover the tomatoes, maintaining the proper headspace.
- Add acid to each jar as described earlier.
- Remove air bubbles, wipe the rims, and apply the lids.
Pros of raw pack:
- Faster and simpler process
- Preserves more of the tomato’s natural texture
- Less cooking of the tomatoes before processing
Cons of raw pack:
- Higher risk of floating tomatoes
- More likely to have air pockets, which can lead to spoilage
- May result in more liquid separation during storage
Hot Pack Method
The hot pack method involves preheating the tomatoes before packing them into jars. This method helps remove air from the tomatoes, resulting in a better seal and less floating. It also helps maintain the color and flavor of the tomatoes during storage.
Here’s how to do a hot pack:
- Blanch tomatoes in boiling water for 30-60 seconds, then plunge them into ice water to cool. Peel the tomatoes if desired.
- Heat the tomatoes in a large pot of water or tomato juice to a simmer (180-185°F), but do not boil them.
- Pack the hot tomatoes into clean, hot jars, pressing them down gently to fit as many as possible.
- Cover with hot tomato juice or water, leaving 1/2 inch of headspace for pint jars and 1 inch for quart jars.
- Add acid to each jar as described earlier.
- Remove air bubbles, wipe the rims, and apply the lids.
Pros of hot pack:
- Reduces the risk of floating tomatoes
- Removes more air, resulting in a better seal
- Helps maintain color and flavor during storage
- Less likely to have liquid separation during storage
Cons of hot pack:
- More time-consuming than raw pack
- Tomatoes may be slightly softer after processing
| Packing Method | Best For | Processing Time (Quart Jars) | Floating Risk |
|---|---|---|---|
| Raw Pack | Quick and easy canning | 45 minutes (water bath) | High |
| Hot Pack | Best quality and safety | 40 minutes (water bath) | Low |
Common Mistakes to Avoid
Even experienced canners can make mistakes that affect the safety or quality of their canned tomatoes. Being aware of these common pitfalls can help you avoid them and ensure a successful canning session. The USDA reports that most cases of foodborne illness from home canning are due to improper processing or equipment failure.
Here are the most common mistakes to watch out for:
- Not using a tested recipe: It’s tempting to wing it when canning, but using untested recipes can lead to unsafe products. Always follow recipes from reputable sources like the USDA, the National Center for Home Food Preservation, or your canner’s manufacturer. These recipes have been tested to ensure they’re safe and effective.
- Skipping the acid: Tomatoes are borderline low-acid foods, which means they can support the growth of harmful bacteria like Clostridium botulinum. Always add acid to your jars, even if your tomatoes seem acidic. Bottled lemon juice or citric acid are the most reliable sources of acid for canning.
- Overfilling jars: Leaving the proper headspace is crucial for a good seal and safe canning. For whole tomatoes, leave 1/2 inch of headspace for pint jars and 1 inch for quart jars. Overfilling can cause the contents to bubble out during processing, leading to a poor seal or contamination.
- Using cracked or chipped jars: Always inspect your jars for cracks, chips, or other damage before using them. Damaged jars can break during processing, leading to a messy and potentially dangerous situation. Also, avoid using jars that have previously been used for non-food items, as they may contain harmful residues.
- Not removing air bubbles: Air bubbles trapped in the jar can lead to spoilage and a poor seal. Always use a bubble remover or a plastic knife to gently remove air bubbles from the jar before applying the lid. This step only takes a few seconds but can make a big difference in the quality of your canned tomatoes.
- Processing for too little time: Processing times are carefully calculated to ensure that all harmful bacteria are destroyed. Always follow the recommended processing time for your specific altitude and jar size. Cutting the processing time short can result in unsafe food.
- Cooling jars too quickly: After processing, it’s important to let the jars cool gradually. Placing hot jars in cold water or a drafty area can cause them to break. Always place your jars on a towel-lined countertop and let them cool undisturbed for 12-24 hours.
- Ignoring altitude adjustments: Altitude affects the boiling point of water and the pressure in a pressure canner. If you live at a high altitude, you’ll need to adjust your processing time or pressure accordingly. Consult the USDA’s canning guidelines for specific adjustments based on your altitude.
Tip: Keep a canning journal to record what worked and what didn’t in each batch. Note the tomato variety, packing method, processing time, and any issues you encountered. This will help you improve your technique over time.
Storing and Using Your Canned Tomatoes
Once your tomatoes are safely canned and cooled, it’s time to store them properly to ensure they stay fresh and delicious. Proper storage is just as important as proper canning to maintain the quality and safety of your preserved tomatoes.
Storing Canned Tomatoes
Store your canned tomatoes in a cool, dark, and dry place. The ideal temperature for storing canned foods is between 50-70°F. Avoid storing jars in direct sunlight, near heat sources, or in damp areas, as these conditions can cause the food to spoil or the lids to rust.
Here are some tips for storing your canned tomatoes:
- Check seals: Before storing, double-check that all jars are properly sealed. If you find a jar that didn’t seal, refrigerate it and use the tomatoes within a few days.
- Remove bands: After the jars have cooled and you’ve confirmed the seals, remove the screw bands. This helps prevent rust and makes it easier to check for seal failure during storage.
- Label jars: Always label your jars with the contents and the date they were canned. This will help you keep track of your inventory and use the oldest jars first. You can use masking tape and a marker, or invest in some reusable canning labels.
- Store upright: Store your jars upright to help maintain the seal. Storing jars on their sides can cause the contents to come into contact with the lid, potentially leading to spoilage.
- Rotate stock: To ensure you’re using your canned goods before they lose quality, practice the “first in, first out” rule. Place newer jars at the back of your storage area and older jars at the front.
According to the USDA, properly canned tomatoes will retain their best quality for about 12-18 months. However, they’re still safe to eat for much longer if the jars remain sealed and show no signs of spoilage. Over time, the color and texture may degrade, but the tomatoes will still be safe to consume.
Signs of Spoilage
Before using your canned tomatoes, always inspect the jar for signs of spoilage. If you notice any of the following, do not taste or use the contents—discard them immediately:
- Bulging or leaking lids: A bulging lid is a clear sign that the jar did not seal properly and bacteria may have entered. Leaking liquid around the lid is another red flag.
- Cloudy liquid: If the liquid in the jar is cloudy or has an off odor, it may be spoiled. Freshly canned tomatoes should have clear or slightly cloudy liquid with a fresh tomato smell.
- Mold: Any visible mold on the tomatoes or the lid is a sign of spoilage. Mold can appear as fuzzy spots or discoloration.
- Off odors: If the tomatoes smell sour, fermented, or otherwise off, they may be spoiled. Trust your nose—if something doesn’t smell right, it’s better to be safe than sorry.
- Rust or corrosion: While rust on the lid doesn’t necessarily mean the contents are spoiled, it can indicate that the seal has been compromised. If you see rust, inspect the jar carefully for other signs of spoilage.
Warning: If you suspect a jar of canned tomatoes is spoiled, do not taste it. Botulism is a serious and potentially fatal illness that can result from consuming spoiled canned foods. When in doubt, throw it out.
Using Canned Whole Tomatoes
One of the best things about canning whole tomatoes is their versatility in the kitchen. You can use them in a wide variety of dishes, just as you would fresh tomatoes. Here are some ideas for using your canned whole tomatoes:
- Sauces and soups: Canned whole tomatoes are perfect for making pasta sauces, tomato soup, or chili. Simply drain the tomatoes and chop or crush them as needed for your recipe.
- Stews and casseroles: Add whole canned tomatoes to stews, casseroles, or braised dishes. They’ll hold their shape and add a burst of fresh tomato flavor.
- Salads: For a quick and easy salad, drain a jar of canned tomatoes and toss them with olive oil, fresh basil, mozzarella, and a pinch of salt and pepper.
- Salsas: Use canned tomatoes as the base for fresh salsa. Combine them with onions, peppers, cilantro, lime juice, and your favorite seasonings.
- Pizza topping: Drain and chop canned tomatoes to use as a pizza topping. They’ll add a fresh, tangy flavor to your homemade pizza.
- Sandwiches and wraps: Add sliced canned tomatoes to sandwiches, wraps, or burgers for a boost of flavor and moisture.
- Breakfast dishes: Use canned tomatoes in breakfast dishes like shakshuka, omelets, or breakfast burritos.
When using canned tomatoes in recipes, keep in mind that they may be softer than fresh tomatoes. This is normal and doesn’t affect their flavor or safety. If a recipe calls for fresh tomatoes and you’re using canned, you may need to adjust the cooking time slightly to account for the softer texture.
Frequently Asked Questions
Do I need to peel tomatoes before canning them?
Peeling tomatoes before canning is optional. While peeled tomatoes have a smoother texture, unpeeled tomatoes are perfectly safe to can and may even hold their shape better during processing. The skins will soften during canning but remain intact.
If you prefer peeled tomatoes, blanching them in boiling water for 30-60 seconds makes the skins easy to remove.
Can I can tomatoes without adding acid?
It’s not recommended to can tomatoes without adding acid. Tomatoes are borderline low-acid foods, and their acidity can vary depending on the variety and growing conditions. Adding bottled lemon juice or citric acid ensures that the tomatoes are acidic enough to prevent the growth of harmful bacteria like Clostridium botulinum.
If you choose not to add acid, you must use a pressure canner to safely process the tomatoes.
How long do canned whole tomatoes last?
Properly canned and stored whole tomatoes will retain their best quality for about 12-18 months. However, they’re still safe to eat for much longer if the jars remain sealed and show no signs of spoilage. Over time, the color and texture may degrade, but the tomatoes will still be safe to consume.
For the best flavor and quality, use your canned tomatoes within 12-18 months.
Can I reuse canning lids?
Canning lids are designed for one-time use only. The sealing compound on the lid can degrade over time, and reusing lids may result in a poor seal. However, the screw bands can be reused as long as they’re in good condition.
Always inspect your lids and bands before each use, and discard any that are damaged, rusted, or dented.
Why did my canned tomatoes turn out mushy?
Mushy canned tomatoes can result from several factors, including overripe tomatoes, overprocessing, or using a raw pack method with very soft varieties. To prevent mushy tomatoes, use firm, ripe tomatoes and consider hot packing them before processing. Also, avoid overprocessing the jars, as this can cause the tomatoes to break down.
Finally, choose meaty tomato varieties like Roma or San Marzano, which hold their shape better during canning.
Final Thoughts
Canning whole tomatoes the easy way is a rewarding process that lets you enjoy summer’s bounty year-round. By selecting the right tomatoes, following proper preparation and processing steps, and storing your jars correctly, you can create safe, delicious preserved tomatoes with minimal effort. Whether you’re a beginner or an experienced canner, this method ensures you’ll have high-quality tomatoes ready for any recipe.








