Last Updated on October 22, 2026 by D. Ruddy
Preserving the fresh flavor and nutrients of green beans is easy when you know how to properly freeze them. Freezing green beans at home ensures you can enjoy their crisp texture and vibrant color for months, making it a practical solution for reducing food waste and saving money. This guide covers everything you need to know to freeze green beans like a pro, from prep to storage tips.
You can freeze green beans by blanching them first to preserve color, texture, and nutrients. Properly prepared, they will stay fresh in the freezer for up to 12 months.
What You Need To Freeze Green Beans
Before you start, gather the right tools to make the process smooth and efficient. Having everything ready ensures the green beans are processed quickly, which is key to locking in their freshness.
- Fresh green beans – Choose young, tender beans without blemishes. The fresher they are, the better the results.
- Large pot – For blanching, you need enough space to submerge the beans fully.
- Ice and water – An ice bath stops the cooking process immediately after blanching.
- Colander or slotted spoon – Helps drain the beans after blanching.
- Baking sheets – For flash freezing before final packaging.
- Freezer-safe bags or containers – Airtight storage prevents freezer burn.
- Kitchen timer – Ensures precise blanching time to avoid overcooking.
- Paper towels – For patting the beans dry before freezing.
Tip: Pick green beans that are firm and bright green. Older beans can be tough and stringy, which affects the final texture after freezing.
Step by Step Guide To Freezing Green Beans
Follow these steps carefully to ensure your green beans retain their quality. Skipping any step, especially blanching, can lead to a loss of color, texture, and flavor.
- Wash and trim the beans
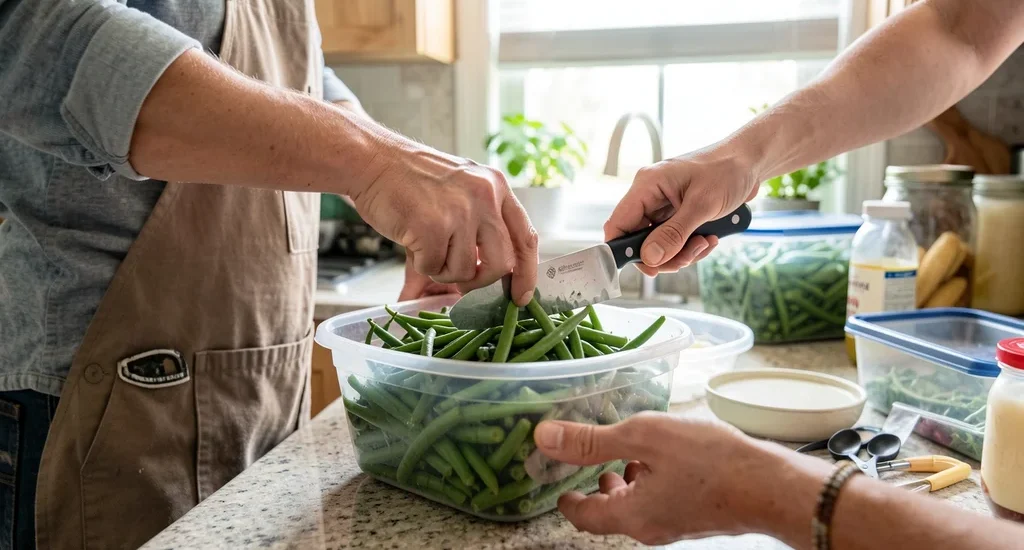
Rinse the green beans under cold water to remove dirt and debris. Trim off the stems, and if desired, cut them into bite-sized pieces for easier use later. Pat them dry with a clean towel to remove excess moisture.
- Blanch the green beans
Bring a large pot of water to a rolling boil. Add the green beans and blanch for 2-3 minutes. The exact time depends on the size of the beans: smaller beans need about 2 minutes, while larger ones may require up to 3 minutes.
- Cool in an ice bath
Immediately transfer the blanched beans to a bowl of ice water to stop the cooking process. This step is crucial for preserving their bright green color and crisp texture. Let them soak for 3-5 minutes, or until completely cooled.
- Drain and dry thoroughly
Drain the beans using a colander and pat them dry with paper towels. Removing as much moisture as possible helps prevent ice crystals from forming, which can make the beans mushy when thawed.
- Flash freeze on a baking sheet
Spread the beans in a single layer on a baking sheet lined with parchment paper. Place the sheet in the freezer for 1-2 hours, or until the beans are completely frozen. This prevents them from sticking together in clumps.
- Package for long-term storage
Transfer the frozen beans to freezer-safe bags or airtight containers. Remove as much air as possible to prevent freezer burn. Label the bags with the date for easy tracking.
Warning: Never skip the blanching step. Without it, enzymes in the beans will continue to break down their texture, color, and flavor during freezing.
How Long To Blanch Green Beans Before Freezing
Blanching time is critical for preserving the quality of green beans. The goal is to partially cook the beans to deactivate enzymes while keeping them crisp-tender.
| Bean Size | Blanching Time |
|---|---|
| Small, thin beans | 2 minutes |
| Medium beans | 2.5 minutes |
| Large, thick beans | 3 minutes |
According to the National Center for Home Food Preservation, blanching green beans for the correct duration is essential for retaining their vitamins and minerals. Over-blanching can make them mushy, while under-blanching may not stop enzyme activity effectively.
Best Containers For Freezing Green Beans
Choosing the right container can make a big difference in how well your green beans stay fresh. The best options are those that prevent air exposure and freezer burn.
- Freezer bags – Affordable and space-efficient. Use high-quality, thick bags to avoid tears. Squeeze out as much air as possible before sealing.
- Vacuum-sealed bags – The gold standard for long-term storage. A vacuum sealer removes all air, significantly extending shelf life.
- Airtight containers – Glass or plastic containers with tight-fitting lids work well. Leave about 1 inch of headspace to allow for expansion.
- Mason jars – Can be used for freezing, but they require special wide-mouth jars designed for freezing. Fill only up to the shoulder to prevent breakage.
| Container Type | Shelf Life | Pros | Cons |
|---|---|---|---|
| Freezer bags | 10-12 months | Affordable, flexible | Less durable, air exposure |
| Vacuum-sealed bags | 12-18 months | Best protection, long shelf life | Requires equipment |
| Airtight containers | 10-12 months | Reusable, sturdy | Bulky, takes space |
Common Mistakes To Avoid When Freezing Green Beans
Even small errors can ruin a batch of frozen green beans. Learn from these common pitfalls to ensure your beans turn out perfectly every time.
- Skipping the blanching step
Blanching is non-negotiable. Without it, enzymes in the beans will continue to break down their texture and flavor, leading to a mushy, discolored product.
- Over-blanching the beans
Blanching for too long can cook the beans, making them soft and limp. Stick to the recommended times based on the size of your beans.
- Not cooling the beans quickly enough
If you leave blanched beans at room temperature, they will continue to cook from residual heat. Always transfer them to an ice bath immediately.
- Packaging beans while still warm
Putting warm beans into freezer bags can create condensation, which leads to ice crystals and freezer burn. Always ensure they are completely dry and cooled before packaging.
- Using thin or poor-quality bags
Cheap freezer bags can tear or allow air to seep in, causing freezer burn. Invest in high-quality, thick bags for the best results.
Important: If you notice ice crystals forming inside the bag after a few weeks, it means air was not fully removed. Consider re-packaging the beans with a vacuum sealer.
How To Thaw And Cook Frozen Green Beans
Thawing and cooking frozen green beans is straightforward, but a few tips can help you get the best results. The method you choose depends on how you plan to use them in recipes.
- Cooking from frozen – The easiest method. Add frozen green beans directly to boiling water, soups, or stir-fries. They will cook in about 5-7 minutes, depending on the dish.
- Thawing in the refrigerator – Transfer the beans to the fridge and let them thaw overnight. This method works well if you plan to use them in salads or cold dishes.
- Microwave thawing – Place the frozen beans in a microwave-safe dish with a splash of water. Cover and microwave on the defrost setting for 3-5 minutes, stirring occasionally.
- Steaming – For a crisp-tender texture, steam the frozen beans for 5-6 minutes. This method preserves their color and nutrients better than boiling.
- Sautéing – Heat a pan with a little oil or butter, add the frozen beans, and sauté for 6-8 minutes until heated through. Season as desired.
According to the USDA, green beans can be safely cooked from frozen without thawing first. This makes them a convenient option for quick meals. However, if you are adding them to a dish that requires precise cooking times, like a casserole, thawing first may help ensure even cooking.
Can You Freeze Green Beans Without Blanching
While blanching is the recommended method, you can technically freeze green beans without it. However, there are significant trade-offs to consider.
- Texture changes – Without blanching, the beans may become mushy or limp after thawing due to enzyme activity.
- Color loss – The bright green color will fade over time, turning dull or grayish.
- Shorter shelf life – Unblanched beans will not last as long in the freezer. Expect a shelf life of only 3-4 months instead of 12.
- Flavor degradation – The beans may develop an off-flavor or bitterness over time.
| Method | Texture | Color | Shelf Life |
|---|---|---|---|
| Blanched | Firm, crisp | Bright green | 12 months |
| Unblanched | Mushy, limp | Dull, faded | 3-4 months |
Tip: If you must freeze green beans without blanching, use them within 1-2 months for the best quality. They work best in cooked dishes like soups or stews, where texture is less critical.
Frequently Asked Questions
How long do frozen green beans last in the freezer?
Properly blanched and packaged green beans can last up to 12 months in the freezer. For the best quality, use them within 8-10 months. Always label your bags with the date to keep track of their age.
Do frozen green beans taste as good as fresh?
When blanched and frozen correctly, green beans retain much of their fresh flavor and texture. While they may not be identical to fresh beans, they come very close, especially when used in cooked dishes. The key is proper preparation and storage.
Can I freeze green beans with other vegetables?
Yes, you can freeze green beans with other vegetables, but it is best to blanch each type separately based on their recommended blanching times. This ensures each vegetable is treated correctly. Once blanched and cooled, you can combine them in the same container for freezing.
Why do my frozen green beans turn brown?
Brown or discolored green beans are usually a sign of freezer burn or improper blanching. To prevent this, ensure the beans are fully dried before freezing and use airtight packaging. If the beans were not blanched long enough, enzymes may have caused the discoloration.
Can I freeze green beans in a vacuum-sealed bag?
Absolutely. Vacuum-sealing is one of the best methods for freezing green beans. It removes all air, preventing freezer burn and extending the shelf life to up to 18 months.
Just make sure the beans are completely cool and dry before vacuum-sealing.
Final Thoughts
Freezing green beans is a simple and effective way to preserve their freshness, flavor, and nutrients for months. By following the steps of washing, blanching, cooling, drying, and packaging, you can enjoy high-quality green beans whenever you need them. Avoid common mistakes like skipping the blanching step or using poor-quality containers to ensure the best results.
With the right techniques, your frozen green beans will taste almost as good as fresh.