

Last Updated on October 22, 2026 by D. Ruddy
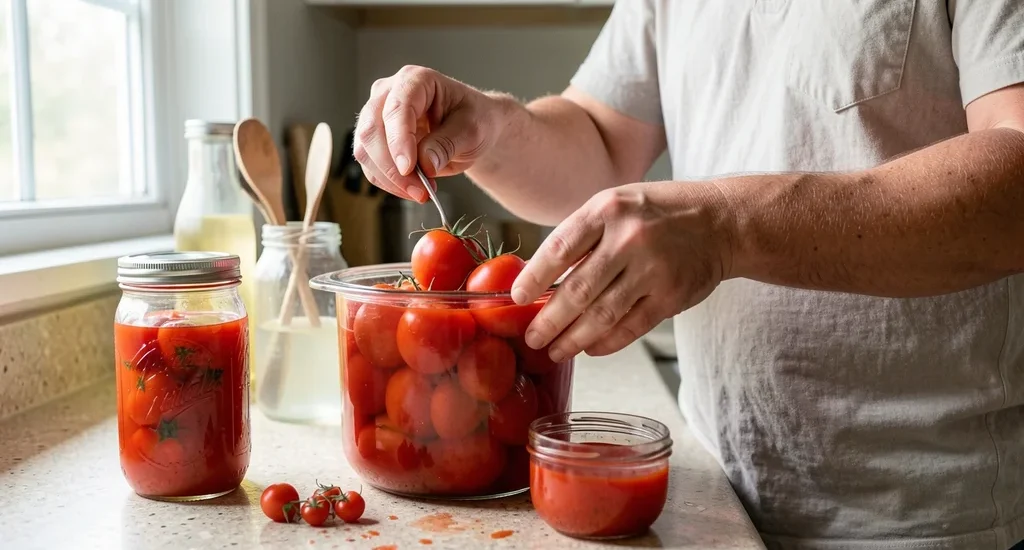
Preserving your garden harvest doesn’t have to be complicated. Canning tomatoes in a hot water bath is a simple, time-tested method to enjoy homegrown flavor all year long without special equipment. This guide covers everything you need to know to do it safely and effectively, from selecting the best tomatoes to avoiding common pitfalls that can ruin your batch.
You can safely preserve tomatoes using a hot water bath by acidifying them with lemon juice or citric acid, packing them into sterile jars, and processing for 35-45 minutes depending on jar size. This method works for whole, halved, or crushed tomatoes.
What You Need for Hot Water Bath Canning
Before you start, gather all the essential tools and ingredients. Having everything ready prevents delays that could compromise safety. You’ll need a water bath canner (or a large pot with a rack), glass canning jars with lids and bands, a jar lifter, and basic kitchen tools like a ladle and bubble remover.
For ingredients, use high-quality, ripe tomatoes—preferably homegrown or from a trusted source. You’ll also need bottled lemon juice or citric acid to ensure the tomatoes are acidic enough for safe preservation. Salt is optional but enhances flavor.
- Water bath canner or large stockpot with rack
- Canning jars (pint or quart, depending on your needs)
- Flat lids and screw bands (new lids for each use)
- Jar lifter (to safely move hot jars)
- Canning funnel (for mess-free filling)
- Bubble remover (or a plastic knife)
- Bottled lemon juice or citric acid (1 tbsp per pint, 2 tbsp per quart)
- Non-iodized salt (optional, ½ tsp per pint, 1 tsp per quart)
Important: Always use tested recipes from trusted sources like the National Center for Home Food Preservation or USDA guidelines. Improper canning can lead to botulism, a serious foodborne illness.
Choosing the Best Tomatoes for Canning
Not all tomatoes are created equal when it comes to canning. The best varieties are meaty with fewer seeds and less water content, which results in a thicker, more flavorful product. Roma tomatoes are a popular choice because of their low moisture and high flesh-to-seed ratio.
You can use other varieties like San Marzano, Amish Paste, or even beefsteak tomatoes, but they may require more prep work to remove excess liquid. Avoid overripe or bruised tomatoes, as they can affect the quality and safety of your canned goods.
| Tomato Variety | Best For | Notes |
|---|---|---|
| Roma | Sauces, paste, whole tomatoes | Meaty, low water content, few seeds |
| San Marzano | Sauces, crushed tomatoes | Sweet, low acidity—always add lemon juice |
| Amish Paste | Whole, crushed, or sauce | Large, meaty, great for cold climates |
| Beefsteak | Sliced or whole | High water content—remove seeds and juice |
| Cherry | Whole or halved | Small size, great for snacks or salads |
According to the USDA, tomatoes are borderline acidic (pH 4.6-4.8), which is why adding acid is crucial for safety. Always add 1 tablespoon of bottled lemon juice per pint or 2 tablespoons per quart, even if your tomatoes seem acidic.
Preparing Tomatoes for Canning
Proper preparation ensures your canned tomatoes are safe and delicious. Start by washing your tomatoes thoroughly to remove dirt and bacteria. You can leave them whole, halve them, or crush them depending on how you plan to use them later.
For easier peeling, many canners use the blanching method: score the bottom of each tomato with an “X,” boil for 30-60 seconds, then plunge into ice water. The skins will slip right off. This step is optional but recommended for smoother textures in sauces or soups.
- Wash tomatoes under running water to remove dirt and debris.
- Remove stems and cores using a paring knife or corer.
- Peel (optional) by blanching in boiling water for 30-60 seconds, then cooling in ice water.
- Chop or leave whole based on your preferred end product.
- Pre-cook (optional) for 5 minutes to soften and remove excess liquid for thicker sauces.
- Add acid directly to jars (1 tbsp lemon juice per pint, 2 tbsp per quart).
- Add salt (optional) (½ tsp per pint, 1 tsp per quart) for flavor.
Tip: If you’re canning tomato sauce or crushed tomatoes, cook them down first to remove excess liquid. This prevents siphoning (liquid loss) during processing and results in a thicker product.
Sterilizing Jars and Lids
Sterilizing your jars and lids is a critical step to prevent contamination. While modern canning guidelines often skip pre-sterilizing jars for hot water bath canning (since the processing time is long enough to sterilize them), it’s still a good practice to ensure safety, especially for beginners.
Lids, however, must always be new and kept hot until use. Never reuse lids, as the sealing compound can degrade, leading to improper seals.
How to Sterilize Jars
- Wash jars and lids in hot, soapy water and rinse thoroughly.
- Keep jars hot until filling by placing them in a warm oven (200°F) or in the canner as it heats.
- Boil lids in a small saucepan for 5 minutes to soften the sealing compound, then keep them hot in the water until use.
- Avoid touching the inside of jars or the flat lid surface to prevent contamination.
How to Sterilize the Canner
- Fill the canner with enough water to cover jars by 1-2 inches.
- Bring to a boil before adding jars.
- Keep the water hot throughout the process.
- Use a rack to prevent jars from touching the bottom of the pot.
Warning: Never use chipped or cracked jars for canning. Inspect each jar carefully before use to avoid breakage during processing.
Step by Step Canning Tomatoes in a Hot Water Bath
Now that your tomatoes and jars are prepped, it’s time to can. Follow these steps carefully to ensure a safe and successful batch. The key is maintaining high heat throughout the process to kill any bacteria or mold.
Processing times vary based on jar size and altitude. Always adjust for your elevation—add 5 minutes for every 1,000 feet above sea level. For example, at 3,000 feet, pints require 45 minutes, and quarts require 55 minutes.
Step 1: Fill the Jars
- Place the prepared tomatoes into the hot, sterilized jars, leaving ½-inch headspace for pints and 1-inch for quarts.
- Add 1 tablespoon of bottled lemon juice per pint or 2 tablespoons per quart.
- Add salt if desired (½ tsp per pint, 1 tsp per quart).
- Remove air bubbles by running a bubble remover or plastic knife around the inside of the jar.
- Wipe the rim of the jar with a clean, damp cloth to ensure a proper seal.
- Place the lid on the jar and screw the band on fingertip-tight (not too tight).
Step 2: Process the Jars
- Using a jar lifter, place the filled jars into the canner, ensuring they’re covered by 1-2 inches of water.
- Bring the water to a full rolling boil before starting the timer.
- Process pints for 35 minutes and quarts for 45 minutes at altitudes up to 1,000 feet.
- Add 5 minutes for every additional 1,000 feet of elevation.
- Maintain a consistent boil throughout the processing time.
Step 3: Cool and Store
- After processing, turn off the heat and let the jars sit in the canner for 5 minutes.
- Remove the jars with a jar lifter and place them on a towel-lined countertop, spaced at least 1 inch apart.
- Let the jars cool undisturbed for 12-24 hours.
- Check the seals by pressing the center of the lid—if it doesn’t pop, the jar is sealed.
- Label and store sealed jars in a cool, dark place. Refrigerate and use any unsealed jars within a week.
| Jar Size | Processing Time (0-1,000 ft) | Processing Time (1,001-3,000 ft) | Processing Time (3,001-6,000 ft) |
|---|---|---|---|
| Pints | 35 minutes | 40 minutes | 45 minutes |
| Quarts | 45 minutes | 50 minutes | 55 minutes |
According to the National Center for Home Food Preservation, processing times are based on tested recipes to ensure safety. Never shorten processing times, as this can lead to spoilage.
Common Mistakes to Avoid
Even experienced canners make mistakes that can compromise the safety and quality of their preserved tomatoes. Being aware of these pitfalls helps you avoid them and ensures a successful batch every time.
One of the most common mistakes is not adding enough acid. Since tomatoes are borderline acidic, skipping the lemon juice or citric acid can lead to botulism, a rare but deadly form of food poisoning. Always follow the recommended amounts.
- Using overripe or damaged tomatoes can introduce bacteria or mold, affecting both safety and flavor. Always use firm, ripe tomatoes.
- Not leaving enough headspace can cause siphoning (liquid loss) or improper seals. Stick to ½-inch for pints and 1-inch for quarts.
- Over-tightening lids can prevent air from escaping during processing, leading to improper seals. Tighten to fingertip-tight only.
- Processing for too short a time can result in under-processed jars, allowing bacteria to survive. Always follow the recommended processing times.
- Using old or damaged lids can prevent proper sealing. Always use new lids for each canning session.
- Cooling jars too quickly (e.g., in cold water) can cause breakage due to temperature shock. Let jars cool naturally on the counter.
- Ignoring altitude adjustments can lead to under-processing at higher elevations. Always adjust processing times for your altitude.
Tip: If a jar doesn’t seal, don’t reprocess it with a new lid. Instead, refrigerate the contents and use them within a week, or freeze for longer storage.
Adding Flavor to Canned Tomatoes
While plain canned tomatoes are versatile, adding herbs and spices can enhance their flavor for specific dishes. The key is to use dried herbs and spices, as fresh ones can introduce bacteria or mold.
You can add these extras directly to the jars before filling with tomatoes. Be mindful of the headspace—don’t overfill the jars. Also, avoid adding oils, fats, or thickeners like flour or cornstarch, as these can interfere with heat penetration and safety.
| Flavor Addition | Amount per Pint | Best For |
|---|---|---|
| Dried basil | 1 tsp | Italian dishes, sauces |
| Dried oregano | 1 tsp | Pizza, pasta, Mediterranean dishes |
| Garlic powder | ½ tsp | Sauces, stews, soups |
| Onion powder | ½ tsp | Sauces, soups, casseroles |
| Red pepper flakes | ¼ tsp | Spicy dishes, chili, salsa |
| Bay leaves | 1 leaf | Soups, stews, braises |
Another option is to can tomato sauce or crushed tomatoes with added herbs. For example, a simple marinara sauce can be canned by cooking down tomatoes with garlic, basil, and oregano, then processing in a hot water bath. Just be sure to follow a tested recipe to ensure safety.
Storing and Using Canned Tomatoes
Proper storage is essential to maintain the quality and safety of your canned tomatoes. Store sealed jars in a cool, dark, dry place like a pantry or cellar. Avoid areas with temperature fluctuations, such as near the stove or in direct sunlight, as these can degrade the quality of the food and the seals.
Canned tomatoes can last for 12-18 months if stored properly. However, for the best quality, use them within a year. Always check the jars before use—discard any with broken seals, bulging lids, or signs of spoilage like mold, off smells, or bubbling.
- Check seals after 12-24 hours of cooling. Press the center of the lid—if it doesn’t pop, the jar is sealed.
- Label jars with the date and contents for easy identification.
- Store in a cool, dark place (50-70°F is ideal).
- Rotate stock to use older jars first (first in, first out).
- Inspect before use—discard any jars with signs of spoilage.
- Use within 12-18 months for best quality.
- Refrigerate after opening and use within 5-7 days.
Warning: If a jar lid is bulging or the contents are bubbling or have an off smell, do NOT taste or use the tomatoes. Discard them immediately, as this could indicate botulism or other spoilage.
Canned tomatoes are incredibly versatile. Use them in soups, stews, sauces, casseroles, or chili. For a quick meal, simmer canned tomatoes with garlic, olive oil, and basil for a simple pasta sauce.
Or blend them into a soup with onions, carrots, and celery for a comforting bowl.
Frequently Asked Questions
Do I have to add lemon juice when canning tomatoes?
Yes, you must add lemon juice or citric acid to ensure the tomatoes are acidic enough for safe hot water bath canning. Tomatoes are borderline acidic (pH 4.6-4.8), and adding acid lowers the pH to prevent botulism. Use 1 tablespoon of bottled lemon juice per pint or 2 tablespoons per quart.
Can I can tomatoes without a water bath canner?
You can use a large stockpot with a rack as long as it’s deep enough to cover the jars by 1-2 inches of water. However, a dedicated water bath canner is designed for this purpose and makes the process easier and safer. Never use an open kettle or oven canning method, as these are unsafe.
How do I know if my canned tomatoes are safe to eat?
Before using canned tomatoes, check for signs of spoilage: bulging or leaking lids, mold, off smells, or bubbling. If the jar is sealed (lid doesn’t pop when pressed) and there are no signs of spoilage, the tomatoes are safe to eat. When in doubt, throw it out.
Can I reuse canning lids?
No, you should never reuse canning lids. The sealing compound on the flat lid can degrade after one use, leading to improper seals. However, you can reuse the screw bands if they’re in good condition.
Always use new lids for each canning session.
What’s the difference between hot water bath canning and pressure canning?
Hot water bath canning is suitable for high-acid foods like tomatoes (with added acid), fruits, pickles, and jams. It uses boiling water to kill bacteria, molds, and yeasts. Pressure canning is required for low-acid foods like vegetables, meats, and most mixtures.
It uses steam under pressure to reach higher temperatures (240°F) needed to kill harmful bacteria like Clostridium botulinum.
Final Thoughts
Canning tomatoes in a hot water bath is a rewarding way to preserve your harvest and enjoy homegrown flavor year-round. By following tested recipes, adding acid, and processing jars for the correct amount of time, you can safely store tomatoes for up to 18 months. Whether you prefer whole, crushed, or sauced tomatoes, this method is accessible and reliable for home canners at any skill level.








