

Last Updated on October 22, 2026 by D. Ruddy
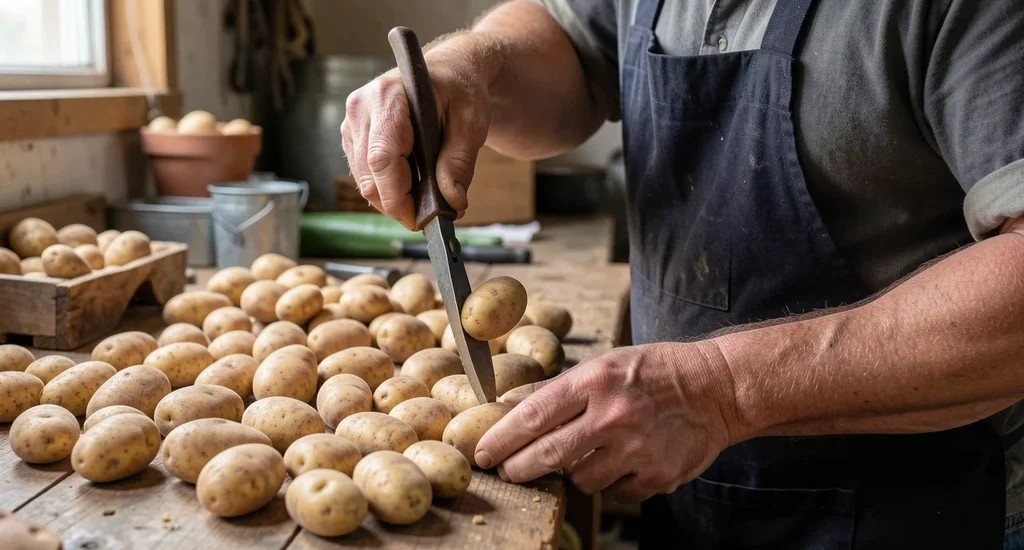
Properly how to cure potatoes for storage ensures they stay fresh for months without sprouting or rotting. Curing is a simple but essential process that toughens the skin, heals minor cuts, and reduces moisture loss. Whether you grow a few plants in your backyard or harvest a large crop, mastering this technique can extend shelf life significantly.
Below, we cover everything you need to know to cure potatoes like a pro.
Curing potatoes involves drying them in a dark, well-ventilated space at 45-60°F with high humidity for 10-14 days. This process thickens the skin and prepares them for long-term storage in a cool, dry place.
What You Need to Cure Potatoes Successfully
Before you start, gather the right tools and conditions. The curing environment is critical, so preparation prevents common mistakes like mold or uneven drying.
First, choose a location with consistent temperatures between 45-60°F (7-15°C). A basement, root cellar, or garage often works well. Avoid direct sunlight, which can turn potatoes green and produce solanine, a toxic compound.
High humidity (85-90%) is ideal to prevent excessive moisture loss while allowing the skin to toughen.
You’ll also need:
- Ventilation: Use fans or open windows to ensure airflow without drafts
- Storage containers: Wooden crates, cardboard boxes, or mesh bags (never plastic)
- Thermometer and hygrometer: To monitor temperature and humidity levels
- Clean, dry surface: Spread potatoes in a single layer to allow even curing
- Patience: Rushing the process leads to poor storage results
| Tool | Purpose | Alternative |
|---|---|---|
| Wooden crates | Allows airflow around potatoes | Cardboard boxes, mesh bags |
| Fan | Improves air circulation | Open windows, natural breeze |
| Thermometer | Monitors temperature accuracy | Digital weather station |
According to the University of Maine Cooperative Extension, potatoes cured at temperatures below 45°F may develop a sweet taste due to sugar accumulation, while those cured above 60°F risk sprouting prematurely.
Step by Step Process for Curing Potatoes
Follow this proven method to cure potatoes effectively. The process takes 10-14 days, but the exact time depends on temperature, humidity, and potato variety. Red and new potatoes typically cure faster than russets or Yukon Golds.
Step 1: Harvest at the Right Time
Dig potatoes when the vines have died back naturally or after you’ve cut them down 1-2 weeks prior. This signals the potatoes have stopped growing and are ready for harvest. Use a fork or spade to gently lift them from the soil, taking care not to pierce the skin.
- Harvest on a dry day when soil moisture is low
- Avoid washing potatoes—brush off excess dirt instead
- Handle gently to prevent bruising
- Sort out damaged or diseased potatoes for immediate use
Step 2: Dry the Potatoes Initially
After harvesting, let potatoes dry in a shaded, well-ventilated area for 2-4 hours. This initial drying removes surface moisture and prepares them for curing. Avoid direct sunlight, which can cause greening.
Tip: If the weather is humid, extend the initial drying period to 6 hours or move them to a covered porch.
Step 3: Set Up the Curing Environment
Place potatoes in a single layer on a clean, dry surface in your chosen curing location. Space them so they don’t touch each other, which helps prevent moisture buildup and rot. If using crates or boxes, ensure they’re shallow enough to allow airflow on all sides.
- Arrange in a single layer
- Maintain 45-60°F temperature range
- Keep humidity between 85-90%
- Ensure gentle airflow (no strong drafts)
- Keep the area dark
Step 4: Monitor and Rotate
Check potatoes daily for signs of spoilage or excessive drying. Rotate them every 2-3 days to ensure even curing. Look for skins that have tightened and any soft spots that may indicate rot.
- Signs of proper curing: Skin becomes firm and dry to the touch
- Signs of problems: Soft spots, mold, or wrinkled skins
- Action for rotten potatoes: Remove immediately to prevent spread
Step 5: Test for Readiness
After 10 days, test a potato by gently rubbing the skin. If it doesn’t scrape off easily, the potatoes are cured. If the skin still comes off, extend the curing period by 2-3 days.
Properly cured potatoes will have a slightly rough, dry surface.
Best Conditions for Curing Different Potato Varieties
Not all potatoes cure the same way. Different varieties have unique characteristics that affect the curing process. Understanding these differences ensures optimal results for each type.
| Variety | Curing Time | Ideal Storage Temp | Notes |
|---|---|---|---|
| Russet | 10-14 days | 38-40°F | Thick skin, long storage |
| Yukon Gold | 10-12 days | 38-40°F | Medium storage, slightly waxy |
| Red Pontiac | 7-10 days | 35-40°F | Thin skin, shorter storage |
| Fingerling | 7-10 days | 35-40°F | Small size, store in shallow layers |
| Kennebec | 10-14 days | 38-40°F | All-purpose, stores well |
Waxy potatoes like Reds and Fingerlings have thinner skins and cure faster but don’t store as long as floury varieties like Russets. According to the University of Idaho, properly cured Russet potatoes can store for 8-12 months under ideal conditions.
Common Mistakes to Avoid When Curing Potatoes
Even experienced gardeners make errors that can ruin a potato crop. Being aware of these pitfalls helps ensure your curing process goes smoothly. One wrong move can lead to rot, sprouting, or flavor changes.
Warning: Never cure potatoes in the refrigerator. The cold temperatures convert starches to sugars, giving them an unpleasant sweet taste.
- Curing in direct sunlight: Causes potatoes to turn green and develop solanine, a toxic compound. Always cure in complete darkness or very low light conditions.
- Using plastic containers: Traps moisture, leading to rot. Stick to breathable containers like wooden crates or burlap sacks.
- Curing at wrong temperatures: Below 45°F causes sweetness; above 60°F risks sprouting. Maintain the 45-60°F range consistently.
- Overcrowding potatoes: Prevents proper airflow and leads to uneven curing. Always arrange in a single layer with space between each potato.
- Skipping the initial drying: Surface moisture can cause mold during curing. Always allow 2-4 hours of initial drying after harvest.
- Storing before fully cured: Potatoes with soft skins won’t store well. Test for firmness before moving to long-term storage.
Research from Oregon State University shows that potatoes cured at temperatures above 65°F (18°C) are 40% more likely to sprout prematurely during storage. This statistic highlights the importance of temperature control during the curing phase.
How to Store Potatoes After Curing
Once cured, potatoes need proper storage conditions to maximize their shelf life. The curing process prepares them for storage, but the right environment is crucial for long-term preservation.
Ideal Storage Conditions
Store cured potatoes in a dark, cool, and humid environment. The ideal temperature range is 35-40°F (2-4°C), slightly cooler than the curing temperature. Humidity should remain high (85-90%) to prevent shrinking.
- Temperature: 35-40°F (2-4°C)
- Humidity: 85-90%
- Darkness: Complete darkness to prevent greening
- Ventilation: Gentle airflow to prevent moisture buildup
- Container: Breathable material like burlap, wood, or mesh
Best Storage Containers
Choose containers that allow for airflow while protecting potatoes from light and physical damage. The container should also make it easy to inspect potatoes regularly for signs of spoilage.
| Container Type | Pros | Cons |
|---|---|---|
| Burlap sacks | Excellent airflow, natural material | Can dry out if humidity is too low |
| Wooden crates | Durable, stackable, good airflow | Takes up more space |
| Cardboard boxes | Inexpensive, breathable | Can become soggy if too humid |
| Mesh bags | Maximum airflow, easy to inspect | Less protection from light |
Storage Location Options
Not everyone has a root cellar, but there are several effective storage options for home gardeners. The key is finding a space that meets the temperature and humidity requirements.
- Root cellar: The gold standard for potato storage. Naturally maintains cool temperatures and high humidity. Ideal for long-term storage of large quantities.
- Basement: Often has suitable temperatures, especially in older homes. Use a hygrometer to monitor humidity and add a humidifier if needed.
- Garage: Works well in cooler climates. Insulate the storage area if temperatures drop below freezing.
- Closet: An interior closet on an outside wall can work for small quantities. Add a small fan for airflow if needed.
- Refrigerator (short-term only): Can be used for 1-2 months if other options aren’t available. The cold converts starches to sugars, affecting flavor.
Important: Never store potatoes near onions. They release gases that cause each other to spoil faster. Also keep them away from apples and other fruits that emit ethylene gas.
How to Tell If Potatoes Are Properly Cured
Knowing when potatoes are fully cured is essential for successful storage. Properly cured potatoes have distinct characteristics that are easy to identify with a little practice.
Visual Signs
Examine the potatoes closely for these visual indicators:
- Skin texture: Should be dry and slightly rough to the touch, not smooth or moist
- Color: Should be uniform with no green spots (indicating light exposure)
- Surface: Free of dirt clumps (though some soil may remain)
- Eyes: Should be dormant, not sprouting
- No soft spots: Press gently—cured potatoes feel firm all over
Physical Tests
Perform these simple tests to confirm proper curing:
- Rub test: Gently rub the potato with your thumb. If the skin doesn’t come off easily, it’s cured.
- Flex test: Try to bend the potato slightly. A cured potato will resist bending.
- Sound test: Tap two potatoes together. A cured potato makes a solid, dull sound rather than a hollow one.
- Weight test: Cured potatoes feel heavier for their size due to reduced moisture content.
What to Do If Potatoes Aren’t Cured Properly
If you check your potatoes and find they’re not fully cured, don’t panic. You can often salvage them with a few adjustments:
- Extend curing time: Add 2-3 more days to the curing period
- Improve airflow: Use a fan or open windows to increase circulation
- Check temperature: Ensure it’s within the 45-60°F range
- Separate problematic potatoes: Remove any showing signs of rot to prevent spread
- Use damaged potatoes first: Any potatoes with cuts or bruises should be used within a week
Pro Tips for Long-Term Potato Storage
Even after proper curing, these expert tips can help extend the storage life of your potatoes and maintain their quality. Small adjustments in your storage approach can make a big difference.
Tip: Check stored potatoes every 2-3 weeks and remove any that show signs of spoilage. One rotten potato can quickly affect others in close proximity.
- Sort by size: Store larger potatoes separately from smaller ones. Larger potatoes tend to last longer in storage.
- Layer with straw: Place a layer of straw or newspaper between layers of potatoes to improve airflow and absorb excess moisture.
- Avoid washing: Never wash potatoes before storage. The added moisture promotes rot. Brush off dirt instead.
- Rotate stock: Use older potatoes first (first in, first out) to prevent any from staying too long in storage.
- Monitor temperature: Use a thermometer with a remote sensor to track storage conditions without disturbing the potatoes.
- Store in small batches: Instead of one large container, use several smaller ones. This limits the spread of rot if one batch goes bad.
- Consider variety mixing: Some gardeners report better results when storing different varieties separately, as they may have different storage needs.
According to a study by the Potato Association of America, properly stored potatoes can retain up to 90% of their vitamin C content for 2-3 months, making them a valuable nutritional resource during winter months.
Frequently Asked Questions
How long does it take to cure potatoes for storage?
The curing process typically takes 10-14 days, depending on temperature, humidity, and potato variety. Waxy potatoes like Reds may cure in as little as 7-10 days, while floury varieties like Russets often need the full 14 days. The key is to test for proper curing rather than relying solely on time.
Can I cure potatoes in my kitchen?
You can cure small batches in your kitchen if you have a cool, dark pantry. However, most kitchens are too warm and well-lit for proper curing. A basement, garage, or dedicated curing space works much better.
If using your kitchen, choose a dark corner away from appliances that generate heat.
What happens if I don’t cure potatoes before storage?
Potatoes that aren’t cured before storage are more susceptible to rot, sprouting, and moisture loss. The skin remains thin and easily damaged, leading to a shorter storage life. According to agricultural experts, uncured potatoes may only last 2-4 weeks in storage, compared to 2-6 months for properly cured ones.
Can I cure potatoes that have been washed?
It’s best to cure unwashed potatoes, as washing removes the protective layer of soil and adds moisture that can lead to rot. If you must wash them, allow them to dry completely in a well-ventilated area for at least 24 hours before beginning the curing process. Even then, they may not store as long as unwashed, properly cured potatoes.
Is it normal for potatoes to lose weight during curing?
Yes, potatoes naturally lose 5-10% of their weight during curing as moisture evaporates. This is normal and actually desirable, as it helps thicken the skin and prepare the potatoes for storage. The weight loss is primarily water, not the potato itself, so the nutritional value remains largely intact.
Final Thoughts
Mastering how to cure potatoes for storage transforms your harvest from a short-term abundance to a long-lasting food source. The process requires attention to temperature, humidity, and airflow, but the reward is months of fresh potatoes ready for your favorite recipes. Remember to test for proper curing, choose the right storage conditions, and regularly inspect your stored potatoes to catch any issues early.








