Last Updated on October 21, 2026 by D. Ruddy
A dull mower blade tears grass instead of cutting it cleanly, leaving your lawn looking ragged and vulnerable to disease. Our mower blade sharpening guide walks you through everything you need to restore razor-sharp edges safely and effectively. You’ll learn the right tools, techniques, and safety steps to keep your mower performing at its best.
Sharpening your mower blade takes 20-30 minutes with basic tools. Use a file, bench grinder, or angle grinder for best results. Always disconnect the spark plug before starting for safety.
Signs Your Mower Blade Needs Sharpening
Uneven or brown grass tips are the first red flag that your blade needs attention. Instead of clean cuts, a dull blade rips grass, stressing the plants and inviting pests.
Other warning signs include a mower that struggles through thick grass, leaves clumps of uncut grass behind, or makes a loud whirring noise during operation.
🍂 The Silent Lawn Killer: Damp Leaves Will Suffocate Your Grass
Trapped wet leaves create a breeding ground for destructive snow mold. Clear the yard fast with a high-power cordless blower before the ground freezes.
- Torn grass edges instead of clean cuts
- Uneven cutting height across the lawn
- Increased mowing time due to blade inefficiency
- Excessive vibration from unbalanced blades
- Visible nicks or dents on the blade edge
- Lawn disease from stressed grass
Tip: Check your blade after every 25 hours of use or at the start of each mowing season.
Tools You Need for Sharpening
Gathering the right tools before you start makes the process smoother and safer. While you can sharpen with just a file, power tools speed up the work significantly.
Safety gear is non-negotiable—gloves protect your hands from sharp edges, and eye protection shields against metal filings. A workbench or vise keeps the blade stable during sharpening.
| Tool | Purpose | Alternative |
|---|---|---|
| Socket wrench set | Remove blade from mower | Adjustable wrench |
| Metal file (10-12 inch) | Manual sharpening | Rasp file |
| Bench grinder | Fast precision sharpening | Angle grinder |
| Vise or clamp | Secure blade during work | Workbench |
| Balancing tool | Check blade balance | Nail hung on wall |
A basic sharpening kit costs $20-$50 and lasts for years. Power tools like grinders reduce sharpening time by 70% compared to manual filing.
Safety Steps Before You Start
🍂 The Silent Lawn Killer: Damp Leaves Will Suffocate Your Grass
Trapped wet leaves create a breeding ground for destructive snow mold. Clear the yard fast with a high-power cordless blower before the ground freezes.
Mower blades are sharp even when dull, and the sharpening process creates metal debris. Skipping safety steps can lead to serious injuries.
Always work in a well-ventilated area to avoid inhaling metal particles. Keep children and pets away from your workspace. If you’re using power tools, ensure they’re in good working condition with intact safety guards.
- Disconnect the spark plug to prevent accidental engine starts
- Drain the fuel tank or work in a fuel-free area
- Wear heavy-duty gloves to protect against cuts
- Use safety goggles to shield eyes from debris
- Secure the mower on a flat surface to prevent tipping
- Check for blade damage like cracks before sharpening
Warning: Never attempt to sharpen a blade while it’s still attached to the mower. Always remove it first.
How to Remove the Mower Blade
Most mower blades attach with a single bolt in the center, but the exact process varies by model. Consult your mower’s manual for specific instructions if you’re unsure.
Left-handed (reverse-thread) bolts are common on the underside of mowers. Turning the wrong way can strip the bolt head. If the bolt is stuck, penetrating oil can help loosen it after a few minutes.
- Locate the blade under the mower deck
- Clean debris from the blade and deck area
- Use a block of wood to wedge between blade and deck to prevent rotation
- Loosen the bolt with the correct size socket or wrench
- Remove the bolt and any washers completely
- Take off the blade carefully—it may be heavy or sharp
- Note the orientation of the blade for proper reinstallation
| Mower Type | Blade Bolt Size | Bolt Direction |
|---|---|---|
| Push mowers | 1/2 inch or 5/8 inch | Standard right-hand thread |
| Riding mowers | 3/4 inch or 1 inch | Left-hand thread |
| Electric mowers | 1/2 inch | Standard right-hand thread |
According to the Outdoor Power Equipment Institute, 15% of mower-related injuries occur during maintenance. Always prioritize safety when handling blades.
🍂 The Silent Lawn Killer: Damp Leaves Will Suffocate Your Grass
Trapped wet leaves create a breeding ground for destructive snow mold. Clear the yard fast with a high-power cordless blower before the ground freezes.
Step by Step Sharpening Process
Whether you use a file, bench grinder, or angle grinder, the goal is the same: create a sharp edge while maintaining the blade’s balance. Never remove more material than necessary—this weakens the blade and shortens its lifespan.
The factory edge on most mower blades is about 30-40 degrees. Try to match this angle when sharpening. If you’re unsure, a slight angle is better than no angle at all.
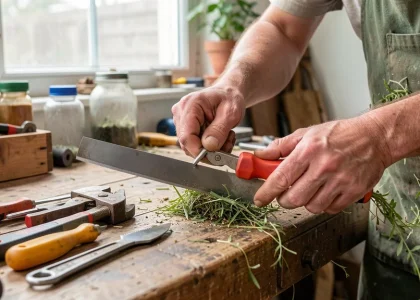
Method 1: Using a File
- Secure the blade in a vise with the cutting edge facing up
- Start at the outer edge and work toward the center
- Use long, smooth strokes in one direction only
- Apply even pressure to maintain consistent angle
- Flip the blade and repeat on the other side
- Check the edge frequently for sharpness
Filing takes 10-15 minutes per blade but gives you the most control over the edge. It’s the best method for beginners or when you don’t have power tools available.
Method 2: Using a Bench Grinder
- Set up the grinder with a medium-grit wheel (60-80 grit)
- Hold the blade firmly with both hands
- Touch the edge to the wheel at the existing angle
- Move the blade side to side to avoid overheating one spot
- Cool the blade in water if it gets too hot to touch
- Check progress frequently to avoid over-grinding
Bench grinders sharpen a blade in 2-3 minutes. The key is to avoid overheating the metal, which can weaken it. Never grind for more than 10 seconds at a time without cooling.
Important: Always grind in the direction that moves away from your body to prevent injury if the wheel grabs the blade.
Deal🍂 The Silent Lawn Killer: Damp Leaves Will Suffocate Your Grass
Trapped wet leaves create a breeding ground for destructive snow mold. Clear the yard fast with a high-power cordless blower before the ground freezes.
00Days 00Hrs 00Min 00SecSecure your Lawn As an Amazon Associate I earn from qualifying purchases.
Method 3: Using an Angle Grinder
- Equip the grinder with a metal grinding wheel
- Mark the blade edge with a marker to track progress
- Hold the grinder at the correct angle (30-40 degrees)
- Move along the edge in smooth, controlled motions
- Flip the blade and repeat on the opposite side
- Clean the edge with a wire brush to remove burrs
Angle grinders offer portability but require more skill to use safely. According to Consumer Product Safety Commission data, angle grinders cause over 5,000 emergency room visits annually—always use both hands and maintain control.
Checking and Maintaining Balance
An unbalanced blade creates dangerous vibrations that can damage your mower and create an uneven cut. Even removing a small amount of material from one side can throw off the balance.
There are two easy ways to check balance: using a specialized blade balancer tool or hanging the blade on a nail. Both methods work equally well for most homeowners.
Using a Blade Balancer
- Place the balancer on a flat surface
- Hang the blade horizontally on the balancer
- Observe which side drops lower
- Remove material from the heavier side with a file or grinder
- Recheck the balance after each adjustment
Using a Nail and String
- Hang a string from a ceiling or sturdy support
- Suspend the blade horizontally on a nail through the center hole
- Watch which side tilts downward
- File the heavier end until the blade hangs level
| Balance Check Method | Accuracy | Cost |
|---|---|---|
| Blade balancer tool | Very high | $10-$20 |
| Nail and string | High | $0 |
| Professional service | Highest | $20-$50 |
| Blade Condition | Action Needed | Estimated Cost |
|---|---|---|
| Minor nicks | Sharpen | $0 |
| Dull edge | Sharpen | $0 |
| Thin metal | Replace | $15-$50 |
| Cracks or bends | Replace immediately | $15-$50 |