Last Updated on October 21, 2026 by D. Ruddy
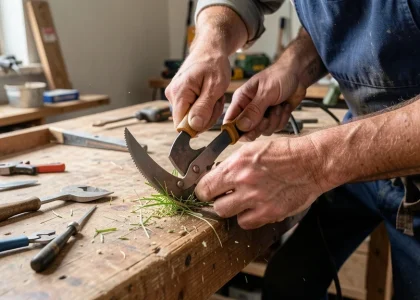
A dull lawn mower blade tears grass instead of cutting it cleanly, leaving your lawn looking ragged and susceptible to disease. How to sharpen a lawn mower blade properly ensures a crisp cut, healthier grass, and less stress on your mower’s engine. This guide covers everything you need to restore your blade’s edge safely and effectively, whether you’re using basic tools or a dedicated sharpener.
You can sharpen a lawn mower blade in under 30 minutes using a file, bench grinder, or angle grinder. Always disconnect the spark plug first for safety. Balance the blade after sharpening to prevent engine strain and uneven cuts.
What You Need to Sharpen a Lawn Mower Blade
Before you start, gather the right tools to ensure a smooth and safe process. Having everything on hand prevents interruptions and reduces the risk of mistakes.
Most of these items are likely already in your garage or workshop. If not, they’re inexpensive and widely available at hardware stores.
🍂 The Silent Lawn Killer: Damp Leaves Will Suffocate Your Grass
Trapped wet leaves create a breeding ground for destructive snow mold. Clear the yard fast with a high-power cordless blower before the ground freezes.
- Safety gear: Heavy-duty work gloves and safety goggles to protect your hands and eyes from metal shards and sparks.
- Wrench or socket set: To remove the blade from the mower deck. The size depends on your mower model, typically 1/2-inch or 9/16-inch.
- Blade balancer: A small tool to check if the blade is balanced after sharpening. An unbalanced blade can damage your mower.
- Sharpener: Choose one:
- A 10-inch mill bastard file (most common for manual sharpening)
- A bench grinder (faster but requires caution)
- An angle grinder with a metal grinding wheel (aggressive but efficient)
- A lawn mower blade sharpener (specialized tool for consistent results)
- Vise or clamp: To secure the blade while you work on it, ensuring stability and precision.
- Wire brush or rag: To clean the blade before and after sharpening, removing grass clippings, dirt, and rust.
- Marker or paint: To mark the blade’s orientation before removal, making reinstallation easier.
Warning: Never attempt to sharpen the blade while it’s still attached to the mower. Always disconnect the spark plug wire to prevent accidental starts.
Step by Step How to Sharpen a Lawn Mower Blade
Follow these steps carefully to achieve a razor-sharp edge without compromising safety or the blade’s integrity.
Step 1: Prepare the Mower and Workspace
Start by parking your mower on a flat, stable surface like a workbench or garage floor. Turn off the engine and let it cool completely if it was recently used. Disconnect the spark plug wire and secure it away from the spark plug to prevent accidental ignition.
Clear your workspace of clutter and ensure good lighting. Lay out all your tools within easy reach.
Step 2: Remove the Blade
Locate the blade under the mower deck. Most mowers have a single blade attached with a bolt in the center. Use a marker to mark the side of the blade that faces the deck (usually the side with the “this side down” stamp) to ensure proper reinstallation.
🍂 The Silent Lawn Killer: Damp Leaves Will Suffocate Your Grass
Trapped wet leaves create a breeding ground for destructive snow mold. Clear the yard fast with a high-power cordless blower before the ground freezes.
Use a wrench or socket to loosen the bolt. If the blade is stuck, apply penetrating oil and wait a few minutes. Turn the blade counterclockwise to remove it (lefty-loosey).
Some mowers may have a lock nut or require blocking the blade to prevent it from spinning.
Tip: If the bolt won’t budge, try placing a block of wood between the blade and the deck to wedge it in place while you turn the wrench.
Step 3: Clean the Blade
Once removed, use a wire brush or rag to clean off grass clippings, dirt, and rust from the blade. Pay special attention to the cutting edges and the underside of the blade, where debris tends to accumulate.
A clean blade allows you to inspect it for damage, such as bends, cracks, or excessive wear. If the blade is bent, it’s best to replace it rather than sharpen it, as a bent blade can cause uneven cuts and stress on the mower.
Step 4: Secure the Blade for Sharpening
Place the blade in a vise or clamp it securely to a workbench. Ensure the blade is stable and won’t move while you’re working on it. If using a vise, protect the blade’s edge with a piece of wood or metal to avoid damaging it.
🍂 The Silent Lawn Killer: Damp Leaves Will Suffocate Your Grass
Trapped wet leaves create a breeding ground for destructive snow mold. Clear the yard fast with a high-power cordless blower before the ground freezes.
If you don’t have a vise, you can place the blade on a stable surface and hold it firmly with one hand while sharpening with the other. However, this method is less safe and less precise, so use it only as a last resort.
Step 5: Sharpen the Blade
Now it’s time to restore the edge. The goal is to maintain the blade’s original angle (typically around 30-45 degrees) while removing nicks and restoring sharpness. Here’s how to do it with different tools:
- Using a File:
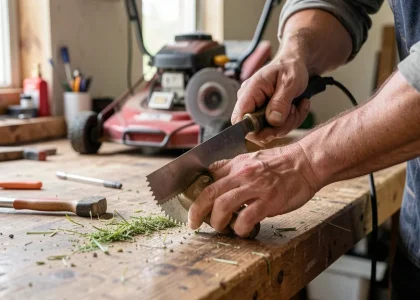
This is the most common and beginner-friendly method. Use a 10-inch mill bastard file and follow the existing angle of the blade’s edge.
- Start at one end of the cutting edge and push the file in one direction (away from your body) along the blade’s edge.
- Apply even pressure and use smooth, controlled strokes. Avoid sawing back and forth, as this can create an uneven edge.
- Count your strokes and repeat the same number on the opposite edge to maintain balance.
- Check your progress frequently. The edge should look shiny and smooth, not rough or jagged.
- Using a Bench Grinder:
A bench grinder is faster but requires caution to avoid overheating the blade or removing too much material.
- Turn on the grinder and let it reach full speed before you start.
- Hold the blade at the correct angle (match the existing bevel) and press it lightly against the grinding wheel.
- Move the blade back and forth across the wheel to avoid creating a hollow grind (where too much metal is removed from one spot).
- Dip the blade in water occasionally to cool it down and prevent it from becoming too hot to touch.
- Wear safety goggles and gloves, as sparks can fly off the grinder.
- Using an Angle Grinder:
An angle grinder with a metal grinding wheel is another fast option, but it’s easy to overdo it. Use a light touch and take your time.
- Secure a metal grinding wheel to the angle grinder.
- Hold the grinder with both hands and position the blade at the correct angle.
- Press the blade lightly against the wheel and move it in a smooth, sweeping motion along the edge.
- Avoid holding the grinder in one spot for too long to prevent overheating.
- Check the edge frequently to ensure you’re not removing too much metal.
Important: Always sharpen both edges of the blade equally. Uneven sharpening can throw off the blade’s balance and lead to poor cutting performance or even damage to your mower.
Deal🍂 The Silent Lawn Killer: Damp Leaves Will Suffocate Your Grass
Trapped wet leaves create a breeding ground for destructive snow mold. Clear the yard fast with a high-power cordless blower before the ground freezes.
00Days 00Hrs 00Min 00SecSecure your Lawn As an Amazon Associate I earn from qualifying purchases.
Step 6: Check and Restore Balance
An unbalanced blade is one of the most common causes of excessive vibration, which can damage your mower’s engine and spindle. Even a slight imbalance can lead to uneven cuts and a shorter lifespan for your mower.
To check the balance:
- Hang the blade on a nail or a blade balancer tool. If it tilts to one side, it’s unbalanced.
- If the blade is unbalanced, remove a small amount of metal from the heavier side using your file or grinder. Focus on the non-cutting edge (the back of the blade) to avoid affecting the sharpness.
- Recheck the balance after each adjustment until the blade hangs level.
Step 7: Reinstall the Blade
Once the blade is sharp and balanced, it’s time to put it back on the mower. Follow these steps:
- Align the blade with the spindle, ensuring the marked side faces the deck (or matches the “this side down” stamp).
- Slide the blade onto the spindle and hand-tighten the bolt to secure it in place.
- Use your wrench or socket to tighten the bolt. Most manufacturers recommend tightening it to 40-60 ft-lbs of torque. If you don’t have a torque wrench, tighten it as much as you can by hand, then give it an additional quarter turn with the wrench.
- Reconnect the spark plug wire.
Double-check that the blade spins freely and doesn’t wobble. If it does, you may need to recheck the balance or ensure the bolt is tightened properly.
How to Test if Your Lawn Mower Blade Is Sharp
Before you start mowing, it’s a good idea to verify that your blade is sharp enough to do the job effectively. A sharp blade should cut through grass cleanly, while a dull blade will tear it, leaving jagged edges that can turn brown and invite disease.
🍂 The Silent Lawn Killer: Damp Leaves Will Suffocate Your Grass
Trapped wet leaves create a breeding ground for destructive snow mold. Clear the yard fast with a high-power cordless blower before the ground freezes.
Here are a few ways to test the sharpness of your blade:
- Visual Inspection: Look at the edge of the blade. A sharp blade will have a smooth, shiny edge with no nicks or dull spots. If the edge looks rough, rounded, or has visible damage, it needs sharpening.
- Paper Test: Carefully run a piece of paper along the edge of the blade. If the blade is sharp, it should slice through the paper cleanly. If the paper tears or the blade doesn’t cut it at all, it’s dull.
- Grass Test: After reinstalling the blade, mow a small patch of grass. If the grass looks cleanly cut with no frayed or torn edges, your blade is sharp. If the grass looks ragged or has white tips, the blade needs more work.
- Tactile Test: Gently run your finger along the edge of the blade (not across it!). A sharp blade will feel smooth and consistent, while a dull blade will feel rough or rounded.
| Test Method | How to Do It | What to Look For |
|---|---|---|
| Visual Inspection | Examine the blade’s edge under good lighting. | Smooth, shiny edge with no nicks or dull spots. |
| Paper Test | Slide a piece of paper along the edge. | Paper cuts cleanly without tearing. |
| Grass Test | Mow a small patch of grass. | Grass is cut cleanly with no frayed edges. |
| Tactile Test | Run your finger along the edge (not across). | Edge feels smooth and consistent. |
Signs Your Lawn Mower Blade Needs Sharpening
Regularly sharpening your lawn mower blade is key to maintaining a healthy lawn. But how do you know when it’s time to sharpen it? Here are the most common signs that your blade has lost its edge:
- Ragged or Torn Grass: One of the most obvious signs of a dull blade is grass that looks torn or frayed at the tips. Instead of a clean cut, the blade tears the grass, leaving it with a jagged edge. These torn edges can turn brown or white within a day or two, giving your lawn a patchy, unhealthy appearance.
- Uneven Cutting: If your mower is leaving strips of uncut grass or the cut height varies across your lawn, it could be a sign of a dull or unbalanced blade. A sharp blade should cut all the grass in its path evenly.
- Excessive Vibration: A dull or unbalanced blade can cause your mower to vibrate excessively. This vibration can be felt through the handle and may even damage the mower’s engine or spindle over time.
- Longer Mowing Time: A dull blade doesn’t cut as efficiently, which means your mower has to work harder to get the job done. If you notice that mowing takes longer than usual or the engine seems to be struggling, it might be time to sharpen the blade.
- Visible Nicks or Damage: Inspect the blade regularly for signs of wear, such as nicks, dents, or a rounded edge. If the blade looks damaged, it’s time to sharpen or replace it.
- Lawn Looks Brown or Unhealthy: Torn grass is more susceptible to disease and pests. If your lawn starts to look brown or patchy shortly after mowing, a dull blade could be the culprit.
Tip: As a general rule, sharpen your lawn mower blade at least once per season. If you mow frequently or have a large lawn, you may need to sharpen it 2-3 times per year.
Common Mistakes to Avoid When Sharpening a Lawn Mower Blade
Sharpening a lawn mower blade seems straightforward, but there are several common mistakes that can ruin your blade or even damage your mower. Avoid these pitfalls to ensure a safe and effective sharpening process.
| Mistake | Why It’s a Problem | How to Avoid It |
|---|---|---|
| Not Disconnecting the Spark Plug | The mower could start accidentally, causing serious injury. | Always disconnect the spark plug wire before working on the blade. |
| Sharpening an Unbalanced Blade | An unbalanced blade causes excessive vibration, damaging the mower. | Always check and restore balance after sharpening. |
| Removing Too Much Metal | Weakens the blade and shortens its lifespan. | Use light, controlled strokes and check your progress frequently. |
| Sharpening at the Wrong Angle | Creates an improper edge that won’t cut effectively. | Follow the existing angle of the blade’s edge (usually 30-45 degrees). |
| Using a Dull File or Grinder Wheel | Makes the sharpening process slower and less effective. | Replace worn files or grinder wheels before starting. |
| Skipping the Cleaning Step | Dirt and debris can interfere with sharpening and balance. | Clean the blade thoroughly before and after sharpening. |
Another common mistake is reinstalling the blade upside down. Always mark the blade’s orientation before removing it to ensure you reinstall it correctly. An upside-down blade won’t cut properly and can damage your mower.
🍂 The Silent Lawn Killer: Damp Leaves Will Suffocate Your Grass
Trapped wet leaves create a breeding ground for destructive snow mold. Clear the yard fast with a high-power cordless blower before the ground freezes.
Pro Tips for Maintaining a Sharp Lawn Mower Blade
Sharpening your blade is just one part of the equation. To keep your lawn mower running smoothly and your lawn looking its best, follow these pro tips for blade maintenance:
- Clean the Blade After Every Use: Grass clippings and dirt can build up on the blade, causing it to dull faster. After each mowing session, take a few minutes to clean the underside of the mower deck and the blade. Use a wire brush or a putty knife to scrape off caked-on debris.
- Check for Balance Regularly: Even if your blade is sharp, it may become unbalanced over time due to uneven wear. Check the balance every time you sharpen the blade or at least once per season.
- Inspect for Damage: Look for nicks, bends, or cracks in the blade. If the blade is bent, it’s best to replace it rather than try to straighten it. A bent blade can cause uneven cuts and stress on the mower.
- Use a Blade Sharpener for Consistency: If you sharpen your blade frequently, consider investing in a dedicated lawn mower blade sharpener. These tools are designed to maintain the correct angle and provide a consistent edge every time.
- Avoid Mowing Over Hard Objects: Rocks, sticks, and other hard objects can dull or damage your blade quickly. Clear your lawn of debris before mowing, and avoid mowing over gravel or rocky areas.
- Sharpen at the Right Time: Don’t wait until your blade is extremely dull to sharpen it. Regular maintenance is easier and more effective than trying to restore a severely damaged blade.
- Store Your Mower Properly: At the end of the mowing season, clean and sharpen your blade, then store your mower in a dry place. This helps prevent rust and keeps the blade in good condition for the next season.
Important: According to the Outdoor Power Equipment Institute (OPEI), a dull mower blade can increase fuel consumption by up to 25% because the engine has to work harder to cut the grass.
When to Replace Your Lawn Mower Blade Instead of Sharpening It
While sharpening can extend the life of your lawn mower blade, there comes a point when replacement is the better option. Here’s how to know when it’s time to retire your old blade:
- The Blade Is Too Thin: Over time, repeated sharpening removes metal from the blade, making it thinner and weaker. If the blade is less than 1/8 inch thick, it’s time to replace it.
- Excessive Nicks or Damage: If the blade has large nicks, cracks, or bends, sharpening may not be enough to restore its performance. A damaged blade can cause uneven cuts and stress on the mower.
- Worn-Out Cutting Edges: If the cutting edges are so worn that they can’t hold a sharp edge, no amount of sharpening will help. Look for blades where the edge is rounded or completely gone.
- Rust or Corrosion: If the blade is heavily rusted or corroded, it may not be worth the effort to restore it. Rust can weaken the blade and make it more prone to breaking.
- Frequent Sharpening Needed: If you find yourself sharpening the blade more than 3-4 times per season, it may be more cost-effective to replace it. A new blade will last longer and perform better.
| Sign It’s Time to Replace | Why It Matters | Recommended Action |
|---|---|---|
| Blade thickness < 1/8 inch | Weak blade can break or cause poor cuts. | Replace the blade. |
| Large nicks or cracks | Can cause vibration and damage to the mower. | Replace the blade. |
| Heavy rust or corrosion | Weakens the blade and affects performance. | Replace the blade. |
| Frequent sharpening needed | Indicates the blade is worn out. | Replace the blade. |
A new lawn mower blade typically costs between $10 and $30, depending on the size and type. Considering the time and effort required to sharpen a heavily damaged blade, replacement is often the more practical choice.
Frequently Asked Questions
How often should I sharpen my lawn mower blade?
As a general rule, sharpen your lawn mower blade at least once per mowing season. If you mow frequently (e.g., weekly) or have a large lawn, you may need to sharpen it 2-3 times per year. Always sharpen the blade if you notice torn grass, uneven cuts, or excessive vibration.
Can I sharpen my lawn mower blade without removing it?
No, you should never attempt to sharpen the blade while it’s still attached to the mower. The blade spins at high speeds, and even with the engine off, the risk of injury is too high. Always disconnect the spark plug and remove the blade before sharpening.
🍂 The Silent Lawn Killer: Damp Leaves Will Suffocate Your Grass
Trapped wet leaves create a breeding ground for destructive snow mold. Clear the yard fast with a high-power cordless blower before the ground freezes.
What angle should I sharpen my lawn mower blade?
The ideal angle for sharpening a lawn mower blade is typically between 30 and 45 degrees. Most blades have a slight bevel on the cutting edge, and you should follow this existing angle when sharpening. If you’re unsure, check your mower’s manual for specific recommendations.
How do I know if my lawn mower blade is balanced?
To check if your blade is balanced, hang it on a nail or use a blade balancer tool. If the blade tilts to one side, it’s unbalanced. To restore balance, remove a small amount of metal from the heavier side using a file or grinder.
Focus on the non-cutting edge to avoid affecting the sharpness.
Can I use a drill to sharpen my lawn mower blade?
While it’s technically possible to use a drill with a sharpening attachment, it’s not the most effective or safe method. A drill lacks the precision and control of a file, bench grinder, or angle grinder. Stick to dedicated sharpening tools for the best results.
Final Thoughts
Learning how to sharpen a lawn mower blade is a simple but essential skill for any homeowner. A sharp blade ensures a clean cut, promotes a healthier lawn, and reduces strain on your mower. By following the steps outlined in this guide, you can keep your blade in top condition and enjoy a beautifully manicured lawn all season long.
Regular maintenance, including cleaning and balancing, will extend the life of your blade and save you time and money in the long run.
🍂 The Silent Lawn Killer: Damp Leaves Will Suffocate Your Grass
Trapped wet leaves create a breeding ground for destructive snow mold. Clear the yard fast with a high-power cordless blower before the ground freezes.