Last Updated on October 22, 2026 by D. Ruddy
Saving tomato seeds from your best plants ensures a bountiful harvest next season without buying new packets. How to save tomato seeds for next year is simpler than you think, requiring just a few household items and patience. This guide covers the fermentation method, drying techniques, and storage tips to preserve seed viability for years.
You can save tomato seeds by fermenting them in water for 2-3 days to remove the gel coating, then drying and storing them in a cool, dark place. This preserves their viability for up to 5 years.
Why Save Tomato Seeds
Saving your own tomato seeds offers several compelling benefits that go beyond just saving money. First, you preserve the exact characteristics of your favorite varieties, which is especially important for heirloom tomatoes that might not be available commercially next year. Store-bought seeds can also be expensive, and saving your own means you’ll always have a supply on hand.
- Cost-effective: No need to repurchase seeds annually
- Preserve heirlooms: Maintain unique varieties year after year
- Adapt to your climate: Seeds from plants that thrived in your garden are already acclimated to your local conditions
- Self-sufficiency: Reduce dependence on seed companies
- Fun and rewarding: The process connects you more deeply with your garden
According to the Seed Savers Exchange, home-saved tomato seeds can maintain viability for 4-6 years when stored properly. This organization has preserved over 20,000 heirloom varieties through seed saving practices. The National Gardening Association reports that 68% of home gardeners who save seeds do so primarily to maintain their favorite plant varieties.
Tip: Always choose the healthiest, most productive plants for seed saving to ensure the best traits are passed on to next year’s crop.
Best Tomato Varieties for Seed Saving
Not all tomatoes are equally suitable for seed saving. Open-pollinated varieties are your best bet because they produce seeds that will grow true to the parent plant. Hybrid tomatoes (often labeled as F1) may produce seeds that don’t resemble the original plant.
| Variety Type | Suitable for Seed Saving? | Examples |
|---|---|---|
| Open-pollinated | ✅ Yes | Brandywine, Cherokee Purple, Roma, San Marzano |
| Heirloom | ✅ Yes | Green Zebra, Black Krim, Yellow Pear |
| Hybrid (F1) | ❌ No | Early Girl, Better Boy, Big Beef |
| GMO | ❌ No | Most commercial varieties (avoid for seed saving) |
Open-pollinated tomatoes rely on natural pollination methods like wind or insects, which means their seeds will produce plants identical to the parent. Heirloom tomatoes are a subset of open-pollinated varieties that have been passed down through generations, typically at least 50 years old.
For seed saving purposes, focus on non-hybrid varieties. According to the Organic Seed Alliance, about 85% of home gardeners who save seeds prefer open-pollinated varieties because of their reliability in producing consistent offspring.
What You Need to Save Tomato Seeds
Gathering the right materials before you start makes the seed saving process much smoother. You likely already have most of these items in your kitchen.
- Ripe tomatoes: Choose fully ripe (even overripe) tomatoes from your healthiest plants. The seeds inside must be mature for proper germination next year.
- Sharp knife: For cleanly cutting open the tomatoes without crushing the seeds.
- Spoon: To scoop out the seed gel mixture from the tomato cavities.
- Containers: Glass jars or small bowls for the fermentation process. Mason jars work perfectly.
- Water: For the fermentation mixture and rinsing.
- Fine mesh strainer: To separate seeds from the pulp after fermentation.
- Paper towels or coffee filters: For drying the seeds.
- Small envelopes or airtight containers: For long-term seed storage.
Important: Always label your containers and storage envelopes with the tomato variety and date. Without proper labeling, it’s easy to forget which seeds are which.
You’ll also want some paper and a pen for labeling, and optionally, a small scale if you want to measure your seed yield. The University of California Cooperative Extension recommends using non-chlorinated water for the fermentation process, as chlorine can inhibit the natural fermentation.
Step by Step Process to Save Tomato Seeds
Step 1: Select the Best Tomatoes
Choose tomatoes from your most vigorous, disease-resistant plants that have produced the tastiest fruits. Avoid using tomatoes from plants that showed signs of disease during the growing season, as these issues can be passed on through the seeds.
Look for fully ripe tomatoes – they should be at their peak color and slightly soft to the touch. The seeds inside will be most mature in these fruits. If you’re saving seeds from multiple varieties, work with one variety at a time to avoid cross-contamination.
Step 2: Extract the Seed Gel
Cut the tomato in half horizontally (across the equator) rather than vertically. This exposes more of the seed cavities. Use a spoon to scoop out the gel-like substance that contains the seeds. Place this mixture into your labeled container.
Try to get as much of the gel as possible, as this contains the natural substances that will help with the fermentation process. The gel also protects the seeds during fermentation. Don’t worry about separating the seeds from the gel at this stage – that will happen naturally during fermentation.
Step 3: Ferment the Seeds
Add a small amount of water to the container with the seed gel – about equal to the volume of the gel. Cover the container loosely (to allow gas to escape) and place it in a warm location, out of direct sunlight. Ideal fermentation temperature is between 70-80°F (21-27°C).
- Stir the mixture once or twice daily
- You’ll notice bubbles forming after about 24 hours – this is normal
- After 2-3 days, a layer of mold may appear on the surface – this is good
- The fermentation process removes the gel coating that inhibits germination
- When bubbles stop forming and the seeds sink to the bottom, fermentation is complete
The fermentation process is crucial because it removes the gelatinous coating around each seed that contains germination inhibitors. According to research from Cornell University, this natural coating can prevent seeds from sprouting even under ideal conditions.
Step 4: Clean the Seeds
Once fermentation is complete, add more water to the container and stir. The viable seeds will sink to the bottom while the pulp and non-viable seeds will float. Pour off the floating material, then add more water and repeat the process until the water runs clear.
Use a fine mesh strainer to catch the seeds as you pour off the water. You may need to do this several times to ensure all the pulp is removed. Be gentle during this process to avoid damaging the seeds.
Step 5: Dry the Seeds
Spread the cleaned seeds on a paper towel or coffee filter in a single layer. Place them in a well-ventilated area, out of direct sunlight. Stir the seeds occasionally to ensure even drying and prevent them from sticking together.
Drying typically takes 1-2 weeks, depending on humidity levels. The seeds are completely dry when they can be easily separated and have a hard, dry appearance. Don’t rush this process – seeds that aren’t fully dry can mold during storage.
Warning: Never dry seeds in an oven or microwave, as the heat can kill them. Also avoid direct sunlight, which can cause uneven drying and reduce viability.
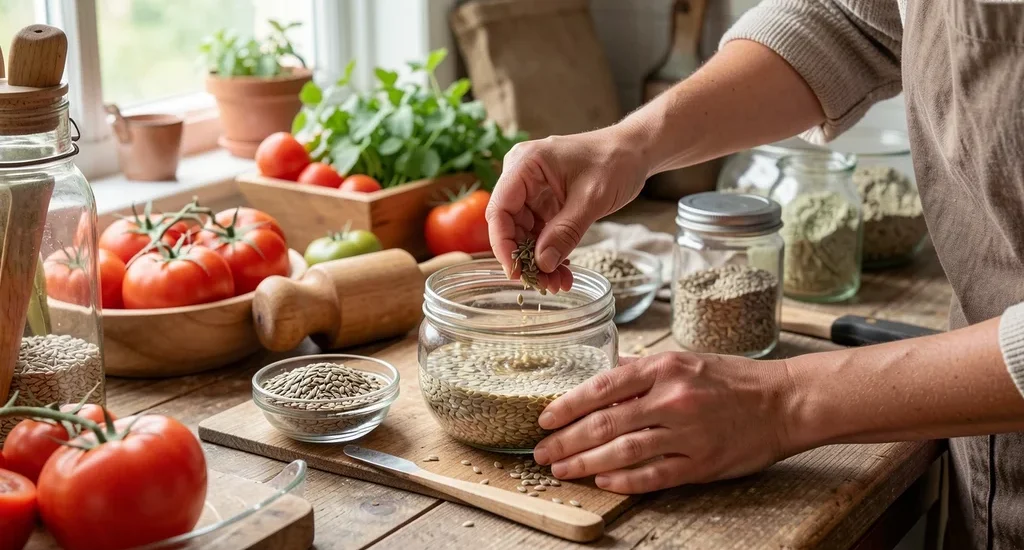
Step 6: Store the Seeds
Once completely dry, transfer the seeds to a labeled envelope or airtight container. For added protection against moisture, you can include a silica gel packet or a small piece of paper towel at the bottom of the container to absorb any residual moisture.
Store the seeds in a cool, dark, dry place. A basement or a closet in a temperature-controlled room works well. The ideal storage temperature is between 32-41°F (0-5°C), which is why many gardeners store their seeds in the refrigerator.
Common Mistakes to Avoid
Even with the best intentions, it’s easy to make mistakes when saving tomato seeds. Being aware of these common pitfalls can help ensure your seed saving efforts are successful.
- Using hybrid tomatoes: As mentioned earlier, seeds from hybrid tomatoes may not produce plants true to the parent. Always check if your tomatoes are open-pollinated before saving seeds.
- Not fermenting long enough: Rushing the fermentation process can leave the germination inhibitors on the seeds. If your seeds aren’t germinating well next year, this might be the reason.
- Drying seeds too quickly: Using heat to speed up drying can kill the seeds. Always air-dry at room temperature.
- Storing seeds with moisture: Even a little moisture can cause seeds to mold or sprout prematurely. Make sure they’re completely dry before storage.
- Not labeling seeds: Without proper labeling, you might forget which variety is which. Always include the variety name and the date.
- Using diseased plants: Some plant diseases can be seed-borne. Only save seeds from healthy, disease-free plants.
- Skipping the fermentation step: While it’s possible to dry and plant seeds without fermentation, the germination rate will be much lower.
The American Seed Trade Association reports that improper storage is the number one reason for seed viability loss, with moisture being the primary culprit. Even seeds that seem dry can contain up to 13% moisture content, which is enough to cause problems during storage.
How to Test Seed Viability
Before planting all your saved seeds, it’s wise to test their viability. This simple test can save you from planting a whole tray of non-viable seeds.
- Count out 10 seeds from your saved batch
- Place them on a damp paper towel
- Fold the towel over the seeds to cover them completely
- Place the towel in a plastic bag and seal it
- Keep the bag in a warm location (about 70°F/21°C)
- Check after 5-7 days for germination
- Count how many seeds have sprouted
If 7-10 seeds germinate, your seed batch has excellent viability. If 4-6 seeds germinate, the viability is good but you might want to plant a few extra seeds to compensate. If fewer than 4 seeds germinate, it might be worth trying again with fresh tomatoes or considering purchasing new seeds.
According to the International Seed Testing Association, the standard germination rate for tomato seeds is about 85% when properly saved and stored. However, home-saved seeds can sometimes have lower rates, which is why testing is important.
Tip: Perform the viability test about a month before you plan to start your seeds. This gives you time to save more seeds if needed.
How to Store Tomato Seeds Long Term
Proper long-term storage is key to maintaining seed viability for years. While tomato seeds can remain viable for up to 5-6 years with proper care, their germination rate decreases over time.
| Storage Method | Temperature | Humidity | Expected Viability |
|---|---|---|---|
| Paper envelope at room temp | 60-70°F (15-21°C) | Low | 2-3 years |
| Airtight container at room temp | 60-70°F (15-21°C) | Very low | 3-4 years |
| Refrigerator storage | 32-41°F (0-5°C) | Very low | 4-5 years |
| Freezer storage | 0°F (-18°C) | Very low | 5-6 years |
For most home gardeners, storing seeds in labeled envelopes in a cool, dark closet is sufficient. The envelope should be placed inside a larger airtight container with a desiccant packet to control moisture. Silica gel packets (like those found in vitamin bottles) work well for this purpose.
If you have the space, refrigerator storage can extend the life of your seeds significantly. Place the seeds in an airtight container and let it come to room temperature before opening to prevent condensation from forming on the seeds.
Frequently Asked Questions
Do I need to ferment tomato seeds before saving?
While you can save tomato seeds without fermentation, the process significantly improves germination rates. Fermentation removes the natural gel coating that contains germination inhibitors. Without this step, you may experience lower and more inconsistent germination.
The fermentation process also helps kill some seed-borne diseases.
How long do saved tomato seeds last?
Properly saved and stored tomato seeds can remain viable for 4-6 years, though their germination rate decreases over time. According to the Seed Savers Exchange, most home-saved tomato seeds maintain good germination for at least 3-4 years when stored in cool, dry conditions. After 5 years, it’s recommended to test germination before planting a large batch.
Can I save seeds from store-bought tomatoes?
You can save seeds from store-bought tomatoes, but there are important considerations. Most grocery store tomatoes are hybrids, so their seeds may not produce plants true to the original variety. Additionally, many commercial tomatoes are picked before fully ripe to extend shelf life, which means their seeds may not be fully mature.
For best results, use fully ripe tomatoes from known open-pollinated varieties.
What’s the best way to label saved seeds?
Use a permanent marker to write directly on the storage envelope or container. Include the variety name, the date you saved the seeds, and any notable characteristics (like “early producer” or “disease-resistant”). For added durability, you can place a small slip of paper with this information inside the envelope as well.
Some gardeners also note the source plant’s performance to help with future selection.
How many tomato seeds should I save?
For home gardening purposes, saving 10-20 seeds per variety is usually sufficient. This gives you enough to plant with some backup in case of poor germination. If you’re saving seeds to share with others or for long-term preservation, aim for 50-100 seeds per variety.
Remember that each tomato can produce hundreds of seeds, so you’ll likely have more than enough even from a single fruit.
Final Thoughts
Saving tomato seeds for next year is a rewarding process that connects you more deeply with your garden. By following the fermentation method and proper storage techniques, you can preserve your favorite varieties for years to come. Remember to always choose the healthiest plants, allow for proper fermentation, and store your seeds in cool, dry conditions.
With these steps, you’ll enjoy the satisfaction of growing tomatoes from seeds you saved yourself, while also saving money and maintaining the unique characteristics of your favorite plants.