Last Updated on September 16, 2026 by D. Ruddy
Making a spooky garden on a budget doesn’t have to be difficult; it’s all about creative repurposing and DIY spirit. You can transform your outdoor space into a Halloween wonderland without spending a fortune by focusing on clever decorations and strategic placement. This guide will show you how to achieve a chillingly good effect that will impress trick-or-treaters and neighbors alike, proving that scary good fun doesn’t require a scary price tag.
Simply put, a spooky garden on a budget is achievable through DIY crafts, repurposed household items, strategic lighting, and natural elements. Focus on creating atmosphere and illusion rather than expensive store-bought props to maximize impact without breaking the bank.
Key Takeaways
- Repurpose everyday items like old sheets, cardboard boxes, and plastic bottles into ghoulish decorations.
- Strategic lighting is crucial for creating a spooky atmosphere; use affordable string lights and lanterns.
- DIY crafts such as ghost figures, spiderwebs, and creepy signs are cost-effective and add a personal touch to your spooky garden.
- Embrace natural elements like dead branches, fallen leaves, and gourds for an authentic, eerie feel.
- Focus on illusions and suggestions rather than explicit, expensive props to maximize scare factor on a budget.
What is a Spooky Garden on a Budget?
A spooky garden on a budget is an outdoor space decorated for Halloween using mostly low-cost, homemade, or repurposed items. The goal is to create an eerie, festive atmosphere that evokes the spirit of the holiday without incurring significant expenses. This approach prioritizes creativity, resourcefulness, and visual impact over the purchase of expensive commercial decorations.
It’s about transforming what you already have or can acquire cheaply into something frightfully fun.
What If Your Patio Became Your Favorite Spot This Fall?
Cooler evenings don’t have to send everyone indoors. Discover simple ways to turn your porch or patio into a warm, cozy place to gather after sunset.
The essence lies in clever design and the illusion of horror. Instead of buying elaborate animatronics, you might use strategically placed branches to mimic clawing hands or drape old fabric to create ghostly figures. Lighting plays a pivotal role, as well as sound effects, all of which can be achieved affordably.
The focus is on making the most out of minimal resources to deliver maximum spooky effect.
- Definition: An outdoor Halloween-themed display using affordable, DIY, or recycled materials.
- Objective: To create an eerie and festive atmosphere for minimal cost.
- Key Components: Creative repurposing, strategic lighting, DIY crafts, natural elements.
- Philosophy: Illusion and suggestion over expensive, store-bought props.
- Impact: A personalized and frightfully fun Halloween display.
DIY Ghost Decorations from Repurposed Materials
One of the most iconic and budget-friendly spooky garden elements is the ghost. You can easily create an army of spectral figures using simple household items. Old white sheets, pillowcases, or even garbage bags can be transformed into eerie apparitions that seem to float amongst your plants and trees.
This method is incredibly versatile, allowing you to create ghosts of various sizes and poses.
To make these specters, you’ll need a few basic supplies: your chosen fabric or plastic, string or twine, and something to form the ghost’s head. A small ball, a crumpled plastic bottle, or even a stuffed sock works perfectly. Tie the material securely around the head form, and then hang your ghost from tree branches, garden stakes, or porch eaves.
What If Your Patio Became Your Favorite Spot This Fall?
Cooler evenings don’t have to send everyone indoors. Discover simple ways to turn your porch or patio into a warm, cozy place to gather after sunset.
For an extra spooky touch, consider placing a small LED light or glow stick inside the head to give them an ethereal glow at night.
- Materials: Old white sheets, pillowcases, large garbage bags, string, scissors.
- Head Form: Small ball, crumpled plastic bottle, old sock, or styrofoam ball.
- Assembly:
- Drape fabric over the head form.
- Tie fabric securely below the form with string to create the “neck.”
- Let the rest of the fabric hang loosely to form the ghost’s body.
- Trim fabric to desired length.
- Display: Hang from trees, branches, fences, or stakes.
- Enhancements: Add glow sticks or battery-operated LED lights inside for a glowing effect.
Warning: Ensure that any lights used inside your DIY ghosts are battery-operated LEDs and do not generate significant heat to prevent fire hazards. For outdoor decorations, use weather-resistant materials.
Creating Eerie Spiderwebs on a Dime
Spiderwebs are a quintessential Halloween decoration that can instantly add a creepy vibe to your garden. While store-bought webs can be flimsy and expensive, creating your own is a satisfyingly simple and affordable project. You can achieve a realistic, spooky look using common materials like cotton balls, polyester stuffing, or even old yarn.
For a classic stretched cobweb look, separate cotton balls or polyester stuffing into thin wisps. Gently pull and stretch the material in different directions until it’s very fine and wispy. You can then attach these to bushes, fences, railings, and doorways.
For more robust webs, consider using white yarn, knotting it strategically and then stretching it across areas. Adding fake spiders, which are often sold in multi-packs for a low price, will complete the illusion.
- Method 1: Cotton/Polyester Stuffing
- Take a small amount of stuffing.
- Gently pull and stretch it thin until it’s wispy and translucent.
- Attach to surfaces by tucking ends or using small pieces of tape.
- Method 2: Yarn Webs
- Tie one end of white yarn to a starting point (e.g., a tree branch).
- Stretch the yarn across to another point and tie it off, creating a radial pattern.
- Weave additional strands horizontally between the radial strands to form a web.
- Enhancements:
- Attach plastic spiders of various sizes.
- Lightly spray with a glow-in-the-dark paint for nighttime effect.
A simple tip for attaching these wispy webs is to use dabs of hot glue or small pieces of double-sided tape. This ensures they stay in place, even with a gentle breeze, without damaging your garden structures. Remember, the goal is a delicate, overgrown look, so don’t be afraid to let strands hang loose and create an unkempt, abandoned feel.
What If Your Patio Became Your Favorite Spot This Fall?
Cooler evenings don’t have to send everyone indoors. Discover simple ways to turn your porch or patio into a warm, cozy place to gather after sunset.
DIY Tombstones from Cardboard and Paint
No spooky graveyard scene is complete without tombstones, and you can craft convincing ones from simple cardboard boxes. This is a fantastic way to upcycle materials that would otherwise be thrown away. The key to making them look realistic is in the shaping, painting, and adding of spooky epitaphs.
Gather large cardboard boxes, typically from appliance deliveries or large online purchases. Cut them into tombstone shapes – rectangles with rounded tops, arched tops, or more elaborate designs. Use a craft knife for clean edges.
To give them texture and durability, you can cover them with a layer of papier-mâché made from newspaper and watered-down glue, or simply apply a primer. Once dry, paint them with gray or black acrylic paint. Use a sponge to dab on different shades for a weathered, stone-like effect.
Finally, use a lighter gray or white paint to stencil or freehand spooky epitaphs, names, and dates.
| Tombstone Crafting Steps | Materials Needed |
|---|---|
| 1. Gather and cut cardboard into tombstone shapes. | Large cardboard boxes, scissors or craft knife. |
| 2. Apply texture (optional: papier-mâché) and primer. | Newspaper, glue, water, primer. |
| 3. Paint the tombstone with base colors (gray/black). | Acrylic paints (gray, black, white), sponges or brushes. |
| 4. Add weathered details and epitaphs. | Lighter gray/white paint, stencil or marker. |
| 5. Securely stake into the ground. | Wooden stakes or strong wire. |
For a more durable tombstone, consider using foam insulation boards, which can be cut with a hot wire cutter or utility knife and then painted. To make them stand up, you can attach wooden stakes to the back. For an added touch of realism, consider adding cracks or moss effects using dark washes of paint in crevices.
Strategic Lighting for Maximum Spooky Effect
What If Your Patio Became Your Favorite Spot This Fall?
Cooler evenings don’t have to send everyone indoors. Discover simple ways to turn your porch or patio into a warm, cozy place to gather after sunset.
Lighting is arguably the most critical element in creating a spooky garden atmosphere, especially on a budget. Instead of expensive spotlights, focus on ambiance with affordable string lights, lanterns, and strategic use of color. These elements can transform even the simplest decorations into something genuinely eerie.
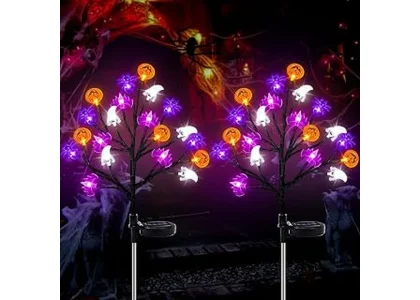
Consider using basic white or colored LED string lights. You can drape them through trees, along fences, or around bushes to create a mysterious glow. Orange and purple lights are particularly effective for Halloween.
Alternatively, repurpose old glass jars by placing battery-operated tealights or small LED strings inside them. You can tint the glass with food coloring or tissue paper for an added effect. Placing these lanterns along pathways or clustered in garden beds can create pools of eerie light.
- Drape String Lights: Weave inexpensive LED string lights through trees and bushes.
- Colored Bulbs: Opt for orange, purple, or green bulbs for a distinctly Halloween feel.
- Jar Lanterns: Fill old jars with LED tealights or fairy lights.
- Path Illumination: Line pathways with these lanterns or stake lights.
- Silhouette Lighting: Place lights behind scarecrows or DIY figures to cast spooky shadows.
- Color Washing: Use colored gels or transparent plastic sheets over existing outdoor lights.
Don’t underestimate the power of shadows. Position your lights so they cast long, distorted shadows of your decorations onto walls or fences. This technique can make even simple props seem much more menacing.
Look for sales on Halloween-themed lights after the holiday, or check thrift stores for old lamps and lanterns you can repurpose.
Important: Always use outdoor-rated lights and electrical cords for safety. Ensure all connections are secure and protected from the elements. Keep lights away from flammable materials.
DealWhat If Your Patio Became Your Favorite Spot This Fall?
Cooler evenings don’t have to send everyone indoors. Discover simple ways to turn your porch or patio into a warm, cozy place to gather after sunset.
00Days 00Hrs 00Min 00SecWarm Up My Patio As an Amazon Associate I earn from qualifying purchases.
Incorporating Natural Elements for an Authentic Scare
Nature itself can provide some of the spookiest elements for your garden. Fallen leaves, dead branches, and withered plants can be transformed into unsettling props with a little imagination. These natural materials add an authentic, organic eeriness that store-bought decorations often lack.
Gather bare, twisted branches from trees or bushes. Arrange them in a way that suggests clawing hands reaching from the ground, or position them to look like skeletal figures. Piles of dry leaves can be used to create mounds that hint at buried things, or spread them around to give your garden a neglected, autumnal feel.
Gourds and pumpkins, especially if you find them at a discounted price after the peak season or grow your own, are classic fall decorations that can also be given a spooky twist with paint or carved designs.
| Natural Spooky Elements | How to Use Them |
|---|---|
| Dead Branches | Arrange as skeletal hands, creepy figures, or to create a dense, menacing thicket. |
| Dry Leaves | Create mounds, scatter for an unkempt look, or form creepy shapes. |
| Withered Plants/Vines | Drape over structures, use to create a sense of decay, or weave into other decorations. |
| Gourds and Pumpkins | Carve, paint with spooky designs, or group together for a festive yet eerie display. |
| Pinecones and Acorns | Use as creepy crawly texture, or group to create unsettling focal points. |
For an extra creepy touch, consider adding some cobwebs made from natural materials like loose straw or fine twigs to your branch displays. The goal is to create a scene that looks both unsettling and naturally aged, as if the garden itself has become haunted.
Creating a Spooky Soundscape on a Budget
Sight is a primary sense for Halloween decorations, but sound can elevate your spooky garden from merely visually unsettling to truly immersive. Fortunately, you don’t need an expensive sound system to create a chilling soundscape. Simple tricks and readily available technology can work wonders.
What If Your Patio Became Your Favorite Spot This Fall?
Cooler evenings don’t have to send everyone indoors. Discover simple ways to turn your porch or patio into a warm, cozy place to gather after sunset.
The easiest method is using a portable Bluetooth speaker hidden discreetly amongst your decorations. You can play a variety of spooky sound effects from your smartphone or tablet. Think howling wolves, creaking doors, distant screams, or cackling witches.
Many free sound effects are available online from sites like Freesound.org or YouTube. For a more permanent, low-cost solution, consider a solar-powered motion-activated speaker that triggers sounds when guests approach.
- Hidden Speaker: Use a portable Bluetooth speaker concealed within decorations or foliage.
- Sound Sources: Stream free sound effects from websites or apps.
- DIY Sound Effects:
- Record yourself making spooky noises.
- Use household items to mimic sounds (e.g., shaking pebbles for rattling bones).
- Sound Selection:
- Howling wolves, eerie music, cackling witches.
- Creaking doors, chains rattling, distant screams.
- Ghostly whispers, rustling leaves, sudden bangs.
- Placement: Position speakers to create directional sounds or ambient noise.
- Motion Activation: Use motion-activated sound modules for interactive scares.
You can also create simple, low-tech sound effects. For instance, hanging empty cans or metal scraps that rattle in the wind can create a metallic, eerie clanking. A strategically placed wind chime made of old keys or small metal objects can produce unsettling, discordant notes.
The key is to use sounds that create suspense and unease, rather than jump scares, to maintain a consistent creepy atmosphere.
Repurposing Household Items for Creepy Creatures
Your home is likely a treasure trove of potential spooky garden inhabitants. Old plastic bottles, discarded toys, empty containers, and even old clothing can be given a new, ghoulish life. The more unusual the item, the more unique and creepy your creature can become.
For example, large plastic soda bottles can be cut and painted to resemble monstrous eyeballs peering from the darkness. Old, worn-out shoes can be arranged in a spooky pile, perhaps with some straw or leaves spilling out, to suggest something unpleasant has occurred. Even toilet paper rolls can be painted and embellished to create small, creepy crawlies or decorative elements.
What If Your Patio Became Your Favorite Spot This Fall?
Cooler evenings don’t have to send everyone indoors. Discover simple ways to turn your porch or patio into a warm, cozy place to gather after sunset.
Think outside the box and consider how the shape and material of an item can be adapted to create a monster, a ghoul, or some other frightful entity.
| Household Item Creatures | Transformation Idea |
|---|---|
| Plastic Bottles (large) | Cut, painted to look like giant eyeballs or monster heads. |
| Old Shoes/Boots | Arranged in a pile, filled with straw for a creepy effect. |
| Toilet Paper/Paper Towel Rolls | Painted and decorated as small spiders, mummies, or creepy figures. |
| Discarded Toys | Distressed or modified to look menacing (e.g., broken doll parts). |
| Old T-shirts/Fabric Scraps | Cut into strips for spooky “bandages” or tattered flags. |
Consider adding googly eyes to various items to instantly make them look more alive and unsettling. A collection of painted tin cans arranged to look like a robot monster or a pile of old tires adorned with glowing eyes can add unique, eye-catching elements to your budget-friendly spooky garden.
Frequently Asked Questions
What are the cheapest materials for a spooky garden?
The cheapest materials are typically recycled household items like cardboard boxes, plastic bottles, old sheets, and fabric scraps. Natural elements such as fallen leaves, dead branches, and gourds also provide free or low-cost decoration options.
How can I make my spooky garden look scary without spending money?
Focus on creating atmosphere through strategic lighting (even basic string lights), using shadows, and incorporating eerie sound effects. Illusion and suggestion are key; hinting at horrors can be scarier than explicit, expensive props.
Are DIY decorations durable for outdoor use?
Durability depends on the materials and weatherproofing. Cardboard and paper items will degrade quickly in rain; consider covering them with plastic or sealant. Items made from old fabric or plastic are generally more weather-resistant.
What kind of lighting is best for a spooky garden on a budget?
Affordable LED string lights (especially in orange and purple), battery-operated tealights in repurposed jars, and strategically placed flashlights to create shadows are excellent budget-friendly options for spooky garden lighting.
What If Your Patio Became Your Favorite Spot This Fall?
Cooler evenings don’t have to send everyone indoors. Discover simple ways to turn your porch or patio into a warm, cozy place to gather after sunset.
How do I make spooky sounds for my garden without a speaker?
You can create ambient spooky sounds by hanging items that rattle in the wind, such as old keys or metal scraps. Wind chimes made from discordant materials, or even rustling leaves strategically placed, can contribute to an eerie soundscape.
Final Thoughts
Creating a memorable spooky garden on a budget is entirely within reach through creativity and resourcefulness. By repurposing everyday items, leveraging natural elements, and mastering the art of atmospheric lighting and sound, you can craft a truly haunting display. The key is to let your imagination run wild and embrace the DIY spirit to bring your Halloween vision to life without breaking the bank, ensuring a frightfully good time for all.