Last Updated on September 16, 2026 by D. Ruddy
Decorating planters can add a personal touch to your home and garden, but it’s crucial to ensure your creative flair doesn’t harm your precious plants. Many decorative materials and techniques can leach toxins, alter soil pH, or physically impede root growth. This guide will show you how to beautify your plant containers safely and effectively, so your greenery thrives alongside your stunning designs.
Simply put, decorate the outside of planters, use non-toxic, breathable materials, and avoid direct contact with the soil or roots to ensure plants remain healthy and vibrant.
Key Takeaways
- Decorate planters on the exterior only to prevent soil contamination and root damage.
- Opt for non-toxic, waterproof, and breathable decorative materials like acrylic paints, natural stones, and twine.
- Avoid materials that can alter soil pH, retain excessive moisture, or physically restrict root expansion.
- Consider the plant’s specific needs when choosing decorative elements to ensure a symbiotic relationship.
- Regularly inspect your decorated planters for any signs of wear or potential harm to your plants.
Understanding Planter Decoration Safety
When we think about decorating, our minds often jump to vibrant colors, interesting textures, and unique embellishments. Applying these ideas directly to the surfaces that hold our plants requires a thoughtful approach. The primary concern is the direct and indirect interaction between the decorative elements and the plant’s living environment – the soil and root system.
Many common craft supplies contain chemicals that can leach into the soil over time, potentially poisoning your plants or altering the soil’s delicate ecosystem. Even seemingly harmless natural materials can pose risks if they decompose in a way that promotes fungal growth or changes soil acidity. Therefore, a safe decorating strategy prioritizes the plant’s well-being above all else.
The goal is to create an aesthetically pleasing container without compromising the plant’s ability to absorb water and nutrients, or its capacity for healthy root development. This involves understanding what goes onto the planter and how it might eventually affect the plant’s internal environment, even if it’s not in direct contact.
What If Your Patio Became Your Favorite Spot This Fall?
Cooler evenings don’t have to send everyone indoors. Discover simple ways to turn your porch or patio into a warm, cozy place to gather after sunset.
Safe Materials for Planter Decoration
Choosing the right materials is the cornerstone of safe planter decoration. The key is to select items that are inert, non-toxic, and ideally, allow for some degree of breathability. This prevents any harmful chemical reactions or the creation of an unhealthy microenvironment within the planter.
Materials like acrylic paints are generally safe once dry, offering a vast palette for artistic expression. Natural stones, while beautiful, should be secured to the outside without obstructing drainage holes. Even certain types of glues, when fully cured, can be used to affix decorations, provided they are labeled as non-toxic and waterproof.
Consider the planter’s material itself. Terracotta pots are porous and allow for air and water exchange, which is beneficial for plants. If you paint or seal the exterior of terracotta, ensure it doesn’t completely block this porosity, which could lead to root rot.
For plastic or ceramic planters, the exterior is less critical for breathability, but toxicity remains a major concern.
- Acrylic Paints: Water-based, quick-drying, and available in countless colors. Ensure they are fully cured before adding soil.
- Waterproof Sealants: Use clear, non-toxic sealants over painted surfaces to protect the design and prevent chipping.
- Natural Stones & Pebbles: Choose smooth, non-porous stones. Wash them thoroughly before use.
- Twine & Natural Fibers: Jute, sisal, or cotton twine can be wrapped around planters for a rustic look.
- Mosaic Tiles: Ceramic, glass, or stone tiles can create stunning patterns. Use a non-toxic adhesive and grout.
- Stencils: For clean, repeating patterns, stencils paired with safe paints are excellent.
- Decoupage with Mod Podge: Use water-resistant formulas of Mod Podge to adhere paper or fabric designs.
Techniques to Avoid When Decorating Planters
Just as important as knowing what to use is knowing what to avoid. Certain decorative techniques can inadvertently create problems for your plants, even if the materials themselves are not overtly toxic. These methods often interfere with the plant’s natural processes or create environments conducive to disease.
What If Your Patio Became Your Favorite Spot This Fall?
Cooler evenings don’t have to send everyone indoors. Discover simple ways to turn your porch or patio into a warm, cozy place to gather after sunset.
One common mistake is using paints or sealants on the inside of the planter. While this might seem like a good way to protect the decoration, it directly exposes the soil and roots to potentially harmful chemicals and can create a barrier that prevents necessary moisture evaporation. This can lead to soggy soil and root rot.
Another technique to steer clear of is completely sealing all drainage holes with decorative elements. Drainage is paramount for plant health; excess water must escape to prevent roots from suffocating or rotting. Ensure any decorative additions do not obstruct these vital outlets.
| Technique to Avoid | Reason for Avoidance | Safe Alternative |
|---|---|---|
| Painting the inside of the planter | Chemical leaching into soil, hindering moisture evaporation. | Decorate the exterior only; use non-toxic interior glazes if absolutely necessary and plant-safe. |
| Using non-breathable exterior sealants on porous pots | Reduces pot’s ability to breathe, potentially leading to root issues. | Choose breathable sealants or decorative coatings that don’t fully block pores. |
| Adhering large, heavy objects directly to the soil surface | Can compact soil, block light, and impede root growth. | Attach decorative elements to the planter sides or use lightweight, easily removable items. |
| Using glitter or fine, non-biodegradable particles | Can clog soil pores and eventually break down into microplastics. | Opt for larger, natural embellishments or biodegradable glitter if absolutely necessary. |
Understanding these pitfalls allows for a more informed and plant-friendly approach to decorating. Prioritizing the plant’s environment ensures that your decorative efforts enhance, rather than detract from, your plant’s health and longevity.
Decorating Terracotta Pots Safely
Terracotta is a beloved material for planters due to its natural beauty and beneficial porosity. This porous nature allows soil to breathe, releasing excess moisture and preventing root rot. However, this also means terracotta can absorb substances from the exterior, making safe decorating practices even more critical.
When painting terracotta, always use water-based acrylics. Avoid oil-based paints or heavy varnishes that can seal the pores, turning your breathable pot into a non-porous one. If you want to preserve the natural look, consider using diluted acrylic washes or stains that allow the terracotta’s texture to show through.
For embellishments, use adhesives that are non-toxic and designed for outdoor use. While hot glue might seem convenient, its durability in varying temperatures and potential for leaching chemicals can be a concern. Opt for stronger, more plant-friendly adhesives when possible, ensuring they are fully cured before planting.
What If Your Patio Became Your Favorite Spot This Fall?
Cooler evenings don’t have to send everyone indoors. Discover simple ways to turn your porch or patio into a warm, cozy place to gather after sunset.
- Priming: Always prime terracotta with a plant-safe primer if using darker colors or if you want better paint adhesion.
- Layering Paint: Apply multiple thin coats of acrylic paint rather than one thick coat. This ensures better coverage and less chance of cracking.
- Sealing: If you must seal the exterior, use a breathable, water-based sealant. Test it on an inconspicuous area first.
- Decorating Edges: Focus decorations on the upper rim and body of the pot, leaving the lower portion and drainage holes clear.
- Natural Elements: Press small stones, sand, or moss into wet paint for natural textures. Ensure these elements are clean and free of pests.
- Stenciling: Use stencils with acrylic paints for intricate designs without direct saturation of the terracotta.
Decorating Plastic and Ceramic Planters
Plastic and ceramic planters offer a different canvas for creativity. Unlike terracotta, their non-porous surfaces are less likely to absorb decorations directly, which can be an advantage. However, the potential for chemical leeching from paints, glues, or other embellishments remains a significant concern.
For plastic planters, especially those that may be exposed to direct sunlight, opt for paints specifically designed for plastic. These paints are formulated to adhere better and resist chipping or fading. Always ensure they are non-toxic and fully cured.
You can also use permanent markers for intricate designs, provided they are labeled as non-toxic.
Ceramic planters, particularly glazed ones, offer a smooth surface that can be painted, decoupaged, or embellished with mosaics. When using mosaic tiles, ensure the grout used is sealed with a non-toxic, waterproof sealant. Avoid letting grout or adhesive seep into the drainage holes, as this can create a solid plug.
Important: When decorating plastic planters, choose paints that are flexible and UV-resistant to prevent cracking and fading, especially if the planters will be placed outdoors.
DealWhat If Your Patio Became Your Favorite Spot This Fall?
Cooler evenings don’t have to send everyone indoors. Discover simple ways to turn your porch or patio into a warm, cozy place to gather after sunset.
00Days 00Hrs 00Min 00SecWarm Up My Patio As an Amazon Associate I earn from qualifying purchases.
- Adhesion Promoters: For smooth plastic, a light sanding and the use of an adhesion promoter can significantly improve paint durability.
- Decoupage Mediums: Use waterproof versions of decoupage glues like Mod Podge Outdoor for fabric or paper designs.
- Metal or Glass Embellishments: Ensure these are securely attached with a strong, non-toxic adhesive and that no sharp edges are exposed.
- Spray Painting: When spray painting, work in a well-ventilated area and apply multiple thin, even coats.
- Painting Techniques: Experiment with crackle effects, faux finishes (like distressed wood or marble), and gradient washes for unique looks.
- Consider Weight: If adding heavy embellishments like stones or tiles to plastic planters, ensure the planter is stable enough to support the added weight without tipping.
Creative and Plant-Friendly Decorative Ideas
Beyond simply painting, numerous creative methods can transform your planters into works of art while respecting your plants’ needs. These ideas often focus on texture, natural elements, and durable applications that won’t compromise the plant’s environment.
One popular method is using natural twine or rope to wrap the planter. This creates a warm, rustic aesthetic that complements many plant types. Ensure the twine is securely attached with a plant-safe adhesive and that it doesn’t impede airflow or drainage.
Another engaging technique is mosaic art. You can use broken ceramic pieces, glass shards, or natural stones to create intricate patterns on the planter’s exterior. This method requires patience and the right adhesive and grout, but the results can be stunning.
Remember to seal the grout effectively to prevent moisture absorption and degradation.
- Seashells and Beach Glass: Adhere clean seashells or smoothed sea glass to the exterior for a coastal vibe.
- Moss and Lichen Art: Create a living art piece by attaching preserved moss or lichen to the planter’s surface with safe adhesive.
- Washi Tape Designs: For temporary or easily changeable decorations, colorful and patterned washi tape can be applied to the exterior.
- Fabric Wraps: Use durable outdoor fabrics, secured with waterproof adhesive, to give planters a unique texture and color.
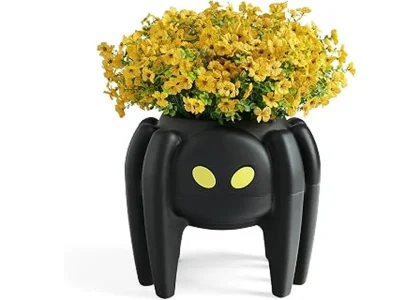
- Painted Designs on Pots with Legs: Enhance planters with legs by painting abstract designs or geometric patterns on the legs and lower body.
- Inlaid Designs: Press small, decorative items like beads or tiny polished stones into wet paint or sealant for a subtle, textured effect.
Considering Plant Needs When Decorating
The most crucial aspect of decorating planters is to always consider the plant’s specific requirements. Different plants have unique needs regarding light, water, and soil aeration, and your decorative choices can inadvertently impact these.
What If Your Patio Became Your Favorite Spot This Fall?
Cooler evenings don’t have to send everyone indoors. Discover simple ways to turn your porch or patio into a warm, cozy place to gather after sunset.
For succulents and cacti, which thrive in well-draining soil and prefer to dry out between waterings, it’s vital that your decorations don’t trap moisture. Avoid bulky decorations that sit directly on the soil surface or any coatings that prevent the pot from breathing. Porous pots are often best for these plants, so any exterior decoration should not compromise that porosity too much.
Plants that prefer consistently moist soil, like ferns or many tropicals, benefit from pots that retain some moisture, but still require adequate drainage to prevent root rot. For these, decorative elements that create a barrier to evaporation might be less detrimental, but ensuring proper drainage holes remain unobstructed is still paramount.
| Plant Type | Soil & Moisture Needs | Decorative Considerations |
|---|---|---|
| Succulents & Cacti | Prefer well-draining soil; let soil dry completely between waterings. | Prioritize porous pots. Avoid decorations that block drainage or soil surface, trapping moisture. Use breathable exterior paints/coatings. |
| Tropical Plants (e.g., Ferns, Calatheas) | Prefer consistently moist soil but require good drainage to prevent root rot. | Ensure drainage holes are clear. Exterior decorations that retain some moisture might be acceptable, but avoid waterlogging. |
| Herbs (e.g., Basil, Mint) | Variable needs, but generally prefer good drainage and consistent moisture without being waterlogged. | Focus on exterior decoration that doesn’t interfere with watering or soil health. Non-toxic adhesives are crucial if near edible parts. |
| Acid-loving Plants (e.g., Azaleas, Blueberries) | Require acidic soil (pH 4.5-5.5). Sensitive to soil pH changes. | Be extremely cautious with any materials that could leach into the soil and alter pH. Stick to exterior decoration. |
By factoring in these plant-specific needs, you can ensure your decorated planters are not only visually appealing but also contribute to a healthy growing environment for your plants.
Maintenance and Inspection of Decorated Planters
Once your planters are beautifully decorated, the work isn’t entirely done. Regular maintenance and inspection are key to ensuring the longevity of your designs and, more importantly, the continued health of your plants.
Over time, decorative elements can wear down, crack, or peel, potentially exposing your plants to the underlying materials. It’s important to periodically check for any signs of damage, especially if you used paints or sealants. Look for chips, peeling sections, or discoloration that might indicate material degradation.
Also, pay attention to how the decorations might be affecting the planter’s function. Are the drainage holes still clear? Is excess moisture being retained in a way that seems unusual?
What If Your Patio Became Your Favorite Spot This Fall?
Cooler evenings don’t have to send everyone indoors. Discover simple ways to turn your porch or patio into a warm, cozy place to gather after sunset.
Any changes in how your plant looks or behaves can be linked back to issues with its container, including its decorations.
- Wipe Down Regularly: Gently clean the exterior of the planter with a damp cloth to remove dust and debris.
- Check for Cracks: Inspect painted surfaces and mosaic work for any developing cracks that could harbor moisture or pests.
- Inspect Adhesives: Ensure that any attached embellishments are still firmly in place and not showing signs of adhesive failure.
- Monitor Drainage: Periodically check that water flows freely from the drainage holes. Clear any obstructions.
- Look for Mold or Mildew: If you notice growth on or around decorations, clean it off promptly with a mild, plant-safe solution.
- Assess Plant Health: Always correlate the planter’s condition with your plant’s overall health. Yellowing leaves, wilting, or stunted growth could be a sign of container issues.
Frequently Asked Questions
Can I paint the inside of a planter to decorate it?
It is generally not recommended to paint the inside of a planter. Paints and sealants can leach chemicals into the soil, potentially harming your plants or altering the soil’s pH and moisture retention properties. It’s best to focus decoration efforts on the exterior surfaces only.
What if my decorative rocks fall into the soil?
If small decorative rocks fall into the soil, monitor your plant closely. Ensure they don’t compact the soil excessively or hinder root growth. If they are substantial, you may need to carefully remove them to allow the plant’s roots to thrive unimpeded.
Are glitter and sequins safe for decorating planters?
While glitter and sequins can add sparkle, they are often made of plastic microparticles that can break down and negatively impact the soil and environment. It’s best to avoid them or opt for biodegradable alternatives if you must use them, and ensure they are applied only to the exterior where they won’t directly contact the soil.
What is the best way to attach shells to a planter?
The best way to attach shells is using a strong, waterproof, and non-toxic adhesive. Options like E6000 (ensure it’s fully cured before use) or specialized outdoor craft glues work well. Apply the adhesive to the shell and press it firmly onto the clean, dry planter exterior.
Allow ample drying time before exposing it to moisture.
What If Your Patio Became Your Favorite Spot This Fall?
Cooler evenings don’t have to send everyone indoors. Discover simple ways to turn your porch or patio into a warm, cozy place to gather after sunset.
How do I clean a decorated planter without damaging the design?
To clean a decorated planter, use a soft cloth dampened with water. For tougher grime, a very mild soap solution can be used, but always test it on an inconspicuous area first. Avoid abrasive cleaners, harsh chemicals, or soaking the planter, as these can degrade the decorations or the planter material itself.
Final Thoughts
Decorating planters offers a fantastic way to express your creativity and enhance your living spaces. By prioritizing plant-safe materials and techniques, focusing decorations on the exterior, and considering your plant’s specific needs, you can achieve beautiful results without compromising plant health. Regular inspection and maintenance will ensure your decorated planters remain a vibrant addition to your home for years to come.