A $60 pair of Felco pruners will cut worse than a $15 discount pruner if you never maintain it. I learned this lesson after my first expensive pruner started crushing stems instead of cutting them. The problem was not the tool. The problem was me.
Pruning tool maintenance takes about 10 minutes per week during the growing season. A deep clean at the end of the season takes 30 minutes. That small investment of time keeps your tools cutting cleanly for years – and clean cuts mean healthier plants.
Here is my complete maintenance routine, from daily habits to end-of-season deep cleaning.
Why Maintenance Matters
Three things destroy pruning tools: sap, rust, and dullness. Sap builds up on blades and gums up the pivot. Rust pits the steel and creates rough spots that tear plant tissue. Dull blades crush instead of cut, and forced dull blades put extra stress on the pivot, spring, and your hands.
All three problems are preventable with simple, regular care. It is much easier to prevent rust and sap buildup than to remove it once it has hardened into a crusty layer.
Daily Maintenance: During Pruning Sessions
This is what I do while I am actively pruning:
🍂 The Silent Lawn Killer: Damp Leaves Will Suffocate Your Grass
Trapped wet leaves create a breeding ground for destructive snow mold. Clear the yard fast with a high-power cordless blower before the ground freezes.
Keep a rag in your back pocket. Every 10 to 15 minutes, wipe the blades clean. Sap hardens quickly in sun and warm weather. A quick wipe while the sap is still fresh prevents hard buildup that you will have to scrub off later.
Disinfect between plants if you suspect disease. This is critical. Moving from a diseased plant to a healthy one with the same pruners spreads problems. Keep a small spray bottle of rubbing alcohol (70% isopropyl) and a rag. Spray the blades, wipe them, and move to the next plant. This takes 10 seconds and can save your garden.
Oil the pivot once during a long session. If you are pruning for several hours, put one drop of oil on the pivot joint. Open and close the pruners several times to work it in. This keeps the action smooth and prevents metal-on-metal wear.
Weekly Maintenance: The Quick Clean
Once a week during the growing season, give your tools 10 minutes of attention:
Clean the blades thoroughly. Use a rag with rubbing alcohol, mineral spirits, or warm soapy water. Scrub off any sap residue. For stubborn sap, use steel wool (0000 grade – very fine) or a Scotch-Brite pad. Do not use coarse steel wool on chrome-plated blades – it scratches the finish.
Check the pivot tightness. The blades should open and close smoothly with slight resistance. If they wobble side to side, tighten the pivot bolt slightly. If they are stiff, loosen it slightly. On most pruners, the pivot bolt can be adjusted with a standard screwdriver or the included wrench.
🍂 The Silent Lawn Killer: Damp Leaves Will Suffocate Your Grass
Trapped wet leaves create a breeding ground for destructive snow mold. Clear the yard fast with a high-power cordless blower before the ground freezes.
Oil the blades. After cleaning, apply a thin coat of oil to all metal surfaces. Camellia oil is traditional. 3-in-1 oil works. Even mineral oil is fine. The oil prevents rust and creates a barrier that sap has a harder time sticking to.
Check the spring. Look at the spring mechanism. Is it centered? Is it bent? Is it still providing good tension? Springs wear out over time on all pruners. A replacement spring costs $3 to $5 and takes 30 seconds to install. If the spring is weak or rusted, replace it.
Seasonal Deep Clean
At the end of the pruning season (late fall or early winter), do a thorough maintenance session:
Disassemble the pruners completely. Remove the pivot bolt. Separate the blades. Remove the spring. Take the locking mechanism apart if possible. This sounds intimidating but it is straightforward on quality pruners. Felcos, for example, are designed to be fully disassembled.
Clean every part individually. The pivot area collects grit that you cannot reach when the pruners are assembled. This grit is what causes wear and sticky action. Clean it out with a rag, cotton swab, and solvent. Get every surface clean.
Inspect for wear. Look at the blade edge for chips or rolling. Check the pivot hole for elongation (a sign of wear). Examine the handles for cracks. On loppers, check the handle grips for looseness. Replace any worn parts now so the tool is ready for spring.
🍂 The Silent Lawn Killer: Damp Leaves Will Suffocate Your Grass
Trapped wet leaves create a breeding ground for destructive snow mold. Clear the yard fast with a high-power cordless blower before the ground freezes.
Sharpen the blade. This is the ideal time to sharpen because the blade is off the tool and easy to work with. See my sharpening guide for detailed instructions. Match the existing bevel angle. Use a fine diamond stone. Remove the burr.
Lubricate and reassemble. Put a drop of oil on the pivot bolt threads before reassembling. Tighten until the blades have slight resistance. Too loose creates slop. Too tight makes the pruners hard to use and accelerates wear.
Store properly. Store tools in a dry location. A damp shed or garage promotes rust. If you store tools in an unheated space, oil them more heavily before storage. Condensation from temperature swings will cause rust on bare metal.
Caring for Different Types of Pruning Tools
Hand Pruners (Bypass and Anvil)
The routine above covers hand pruners completely. The key points: clean sap off frequently, oil the pivot, sharpen the bevel correctly, and replace springs when they weaken.
Loppers
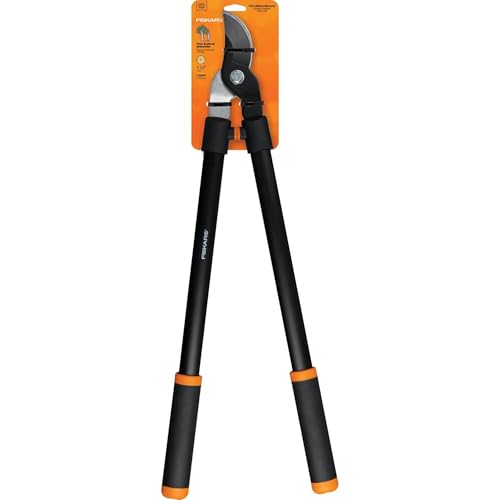
Same principles as hand pruners but with longer handles. Additional care points: check the handle grips for looseness. Inspect the handle attachment to the head – loose handles are dangerous. On geared loppers (Fiskars PowerGear2), put one drop of oil on the gear teeth once per season. Wipe off excess – oil attracts dirt.
Hedge Shears
The long blades need more attention to sharpening. Use a long mill file instead of a stone. Match the shallow bevel angle (about 15 to 20 degrees). Work in sections to keep the bevel even. Tighten the pivot bolt regularly – hedge shear blades develop play faster than pruner blades because of the leverage of the long handles.
🍂 The Silent Lawn Killer: Damp Leaves Will Suffocate Your Grass
Trapped wet leaves create a breeding ground for destructive snow mold. Clear the yard fast with a high-power cordless blower before the ground freezes.
Pruning Saws
Keep the blade clean. Sap buildup on saw teeth slows cutting. Scrape hardened sap off with a small stick or old toothbrush. Do not use metal tools – you will damage the teeth. Most modern pruning saws have impulse-hardened teeth that cannot be sharpened. When the saw stops cutting efficiently, replace the blade or the whole saw.
Store saws with the blade protected. Folding saws fold into the handle. Fixed-blade saws should stay in their sheath. A bare saw blade in a toolbox is dangerous and will get damaged by other tools banging against it.
Pole Saws
Powered pole saws (electric and battery) need chain maintenance. Check chain tension before every use. A loose chain can fly off. Fill the oil reservoir so the chain stays lubricated. Sharpen the chain when it produces fine dust instead of chips. Clean the bar groove after each use – sap and sawdust pack into the groove and cause binding.
Manual pole saw blades can be cleaned and the connection joints should be checked for tightness. Fiberglass poles need a wipe-down but no special care. Aluminum poles can corrode at the joints if left wet – dry them before storage.
Tool Storage Best Practices
How you store tools matters as much as how you maintain them. Here is what I do:
Store indoors if possible. A basement, garage, or mudroom is better than an outdoor shed. Temperature swings cause condensation. Condensation causes rust. If you must store in a shed, use a tool rack that keeps tools off the floor where moisture collects.
🍂 The Silent Lawn Killer: Damp Leaves Will Suffocate Your Grass
Trapped wet leaves create a breeding ground for destructive snow mold. Clear the yard fast with a high-power cordless blower before the ground freezes.
Hang tools, do not pile them. Tossing pruners into a bucket with other tools dulls the blade and bends the spring. Hang them on hooks or store them in a dedicated tool bag or holster.
Oil before long-term storage. If you will not use a tool for several months (winter storage), apply a heavier coat of oil than usual. This protects against humidity and condensation. In spring, wipe off the excess oil and the tool is ready to use.
Keep tools dry. Never put tools away wet. If you pruned in the rain or washed the blades, dry them thoroughly with a rag before storing. Even stainless steel can rust if left wet in a closed space.
Use silica gel packs in your tool drawer. If you store tools in a drawer or toolbox, toss in a few silica gel packs. They absorb moisture and help prevent rust. Replace them every few months.
Maintenance Schedule Summary
| Frequency | Task | Time Required |
|---|---|---|
| During use | Wipe blades, disinfect between plants | 10 seconds per plant |
| Weekly | Clean blades, oil, check pivot and spring | 10 minutes |
| Monthly | Sharpen blade (during heavy use season) | 15 minutes |
| End of season | Full disassembly, deep clean, sharpen, inspect parts, oil, store | 30 minutes per tool |
| As needed | Replace spring ($3-5), replace blade ($15-20) | 5 minutes |
Frequently Asked Questions
Can I use WD-40 on my pruning tools?
WD-40 is fine for cleaning and short-term rust protection but it evaporates quickly. It is not a long-term lubricant. Use WD-40 to clean stuck sap and grime, then wipe it off and apply real oil (3-in-1, camellia, or mineral oil) for lasting protection and lubrication.
How do I remove rust from pruning tools?
For light surface rust: steel wool (0000 grade) or a Scotch-Brite pad with some oil. Rub gently until the rust is gone. For heavier rust: soak the affected part in white vinegar for 2 to 4 hours, then scrub with steel wool. Rinse, dry immediately, and oil. For severe rust pitting: the blade is probably ruined. Replace it.
🍂 The Silent Lawn Killer: Damp Leaves Will Suffocate Your Grass
Trapped wet leaves create a breeding ground for destructive snow mold. Clear the yard fast with a high-power cordless blower before the ground freezes.
My pruners are sticky even after cleaning. What do I do?
Disassemble the pruners. The pivot area likely has hardened sap inside that surface cleaning cannot reach. Soak the pivot area in rubbing alcohol or mineral spirits for 10 minutes. Use a cotton swab or old toothbrush to scrub inside the pivot hole. Reassemble with a drop of oil.
How do I know when to replace instead of repair?
Replace the tool if the blade has deep chips or cracks (not just dullness), the pivot hole is so elongated the blades wobble even when tight, or the handles are cracked or bent. On quality tools (Felco, ARS), you can replace individual parts instead of the whole tool. The replaceability of parts is one reason premium tools are worth the price.
Can I use vegetable oil on my pruning tools?
You can, but vegetable oil goes rancid over time and becomes sticky. Mineral oil or camellia oil are better choices. They do not go rancid and provide consistent lubrication. 3-in-1 oil from the hardware store is also excellent and costs a few dollars.
Shop How to Maintain Pruning Tools: Keep Them Sharp for Years on Amazon
🍂 The Silent Lawn Killer: Damp Leaves Will Suffocate Your Grass
Trapped wet leaves create a breeding ground for destructive snow mold. Clear the yard fast with a high-power cordless blower before the ground freezes.