Last Updated on August 3, 2026 by D. Ruddy
Fixing Ryobi weed wacker string issues is a common task for any homeowner maintaining their lawn. Whether your string keeps breaking, won’t feed properly, or gets tangled, understanding the common causes and solutions can save you time and frustration. This guide will walk you through the most frequent problems and their fixes, ensuring your Ryobi trimmer is always ready for action.
Simply put, fixing your Ryobi weed wacker string involves checking the line itself for damage, ensuring the spool is loaded correctly, and verifying the trimmer head’s proper assembly and function. Addressing these core areas will resolve most string-related problems.
Key Takeaways
- The most common Ryobi weed wacker string issues stem from incorrect spool loading or damaged string.
- Regularly inspect your trimmer head for debris and ensure all parts are securely fastened.
- Using the correct gauge and type of trimmer line is crucial for optimal performance.
- Understanding how to properly rewind and install a new spool can prevent many problems.
What Is Trimmer Line and Why Does It Break?
Trimmer line, also known as trimmer string or weed eater line, is the cutting element of a string trimmer. It’s typically made from durable nylon or a similar polymer, designed to withstand constant friction and impact with grass, weeds, and other vegetation. The line is spun at high speeds, effectively “whipping” through foliage.
String can break for several reasons. The most common culprit is age and wear. Exposure to sunlight (UV radiation) and weather can make the line brittle, causing it to snap easily.
Friction from cutting also wears down the line, making it thinner and more prone to breaking. Hitting hard objects like fences, rocks, or pavement can instantly break or fray the line, leading to premature failure.
What If Your Patio Became Your Favorite Spot This Fall?
Cooler evenings don’t have to send everyone indoors. Discover simple ways to turn your porch or patio into a warm, cozy place to gather after sunset.
Another significant factor is improper loading onto the spool. If the line is wound too tightly, it can create tension that causes it to snap. Conversely, if it’s too loose, it might not feed out correctly and can bunch up, leading to breakage or jamming.
The gauge, or thickness, of the line also plays a role; using a line that is too thin for the task can lead to frequent breaks, while a line that is too thick may strain the trimmer’s motor.
- Causes of Trimmer Line Breakage:
- Brittleness due to age, UV exposure, and weather.
- Friction and wear from continuous cutting.
- Impact with hard objects (rocks, fences, concrete).
- Incorrect tension or winding on the spool.
- Using the wrong line gauge for the trimmer model or application.
- Debris and dirt accumulation within the trimmer head.
- Overheating of the line from friction.
How to Properly Load a Ryobi String Trimmer Spool
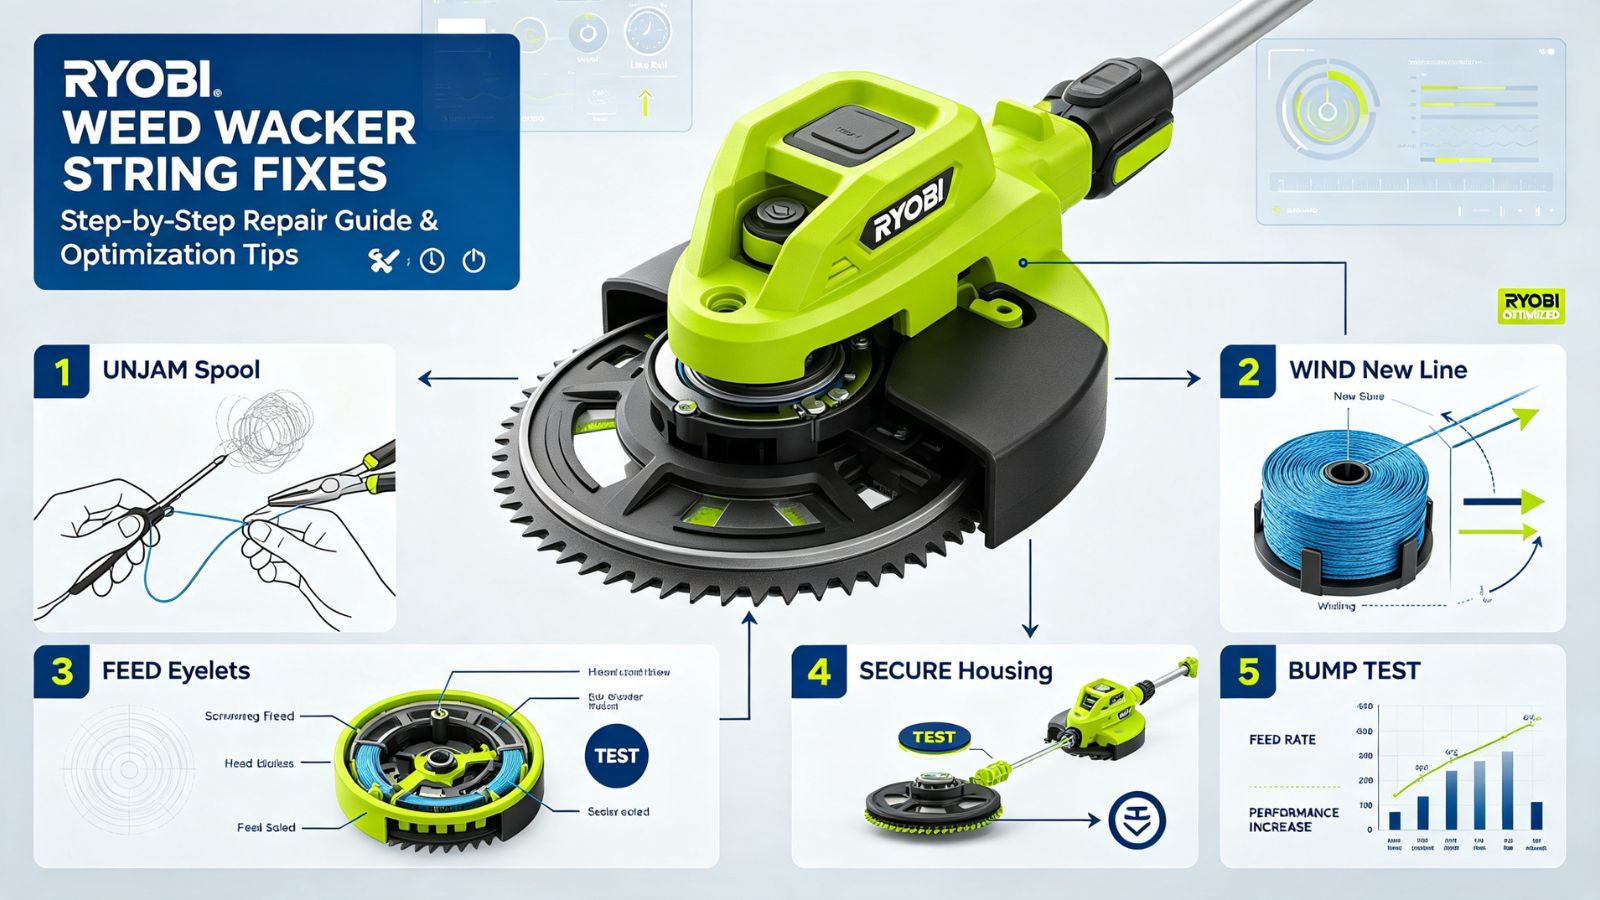
Correctly loading the trimmer spool is fundamental to preventing string breakage and feeding issues. Many problems users experience with their Ryobi weed wacker string arise directly from improper spool installation. This process requires a little attention to detail to ensure the line is wound evenly and securely.
First, always ensure your trimmer is turned off and disconnected from any power source. Remove the spool cap and the old spool. Inspect the new spool to ensure it’s compatible with your specific Ryobi model.
What If Your Patio Became Your Favorite Spot This Fall?
Cooler evenings don’t have to send everyone indoors. Discover simple ways to turn your porch or patio into a warm, cozy place to gather after sunset.
Most Ryobi trimmers use pre-wound spools or allow you to wind your own. If winding your own, pay close attention to the direction indicated on the spool or trimmer head for winding the line – it’s usually marked with arrows.
When winding, maintain consistent tension. The line should be wound in one direction, laying neatly in the spool’s groove. Avoid crossing the line over itself, as this can create tangles and prevent it from feeding smoothly.
Leave a small amount of line extending from the spool’s eyelet (usually about 6 inches) to make it easier for the trimmer to grab and feed the new line when you start. Secure the end of the line in the designated notch on the spool before placing it back into the trimmer head. Reassemble the spool cap and ensure it clicks firmly into place.
- Disconnect Power: Ensure the trimmer is off and unplugged.
- Remove Spool Cap: Locate the tabs on the spool cap and press them to release it.
- Remove Old Spool: Lift out the old spool and clean any debris from the housing.
- Inspect New Spool: Verify it’s the correct model and undamaged.
- Wind New Line (if applicable):
- Align the spool with the winding direction arrows.
- Begin winding the line evenly, maintaining consistent tension.
- Do not overwind or cross the line.
- Leave about 6 inches of line extending from the spool’s eyelet.
- Secure the line end in the spool’s notch.
- Install New Spool: Place the wound spool back into the trimmer head.
- Replace Spool Cap: Align the cap with the housing and press down until it clicks securely.
- Test Line Feed: Tap the spool cap on the ground while the trimmer is running (safely) to advance the line.
| Spool Loading Tip | Common Mistake |
|---|---|
| Wind the line in a single, consistent direction. | Winding the line back and forth or in multiple directions, creating knots. |
| Leave a few inches of line sticking out. | Pushing all the line into the spool, making it difficult for the trimmer to grab. |
| Ensure the spool sits flush and the cap clicks in place. | Forcing the spool cap on, leading to misalignment and improper line feed. |
Following these steps precisely helps prevent tangles and ensures a smooth, consistent line feed for efficient cutting.
Why Is My Ryobi Weed Wacker Not Feeding String?
A Ryobi weed wacker not feeding string is a frustrating problem that can halt your yard work. This issue typically arises from a few key areas: the trimmer head’s functionality, the line itself, or debris interference. Fortunately, most causes are easily identifiable and fixable.
What If Your Patio Became Your Favorite Spot This Fall?
Cooler evenings don’t have to send everyone indoors. Discover simple ways to turn your porch or patio into a warm, cozy place to gather after sunset.
One of the most frequent reasons for no string feed is that the spool has run out of line. While this seems obvious, sometimes the line breaks off inside the head without the user realizing it, or the last bit of line is too short to be advanced. Another common cause is a jammed spool.
If the line gets tangled or knotted on the spool, it can prevent the spool from rotating freely, thus stopping the line feed. This is often a result of improper winding during installation or wear on the spool itself.
Debris, such as grass clippings, dirt, or small twigs, can accumulate in the trimmer head, particularly around the spool mechanism and the line exit ports. This buildup can physically obstruct the spool from turning or prevent the line from being released. Additionally, if the bump-feed mechanism (the part you tap on the ground to advance the line) is damaged or clogged, it won’t properly engage the spool to feed more line.
Finally, the line itself might be too thick for the spool or trimmer head, causing it to bind.
- Troubleshooting No String Feed:
- Check if the spool is empty.
- Inspect the spool for tangles or knots.
- Clear any grass, dirt, or debris from the trimmer head.
- Ensure the spool rotates freely by hand.
- Verify the bump-feed mechanism is clean and functional.
- Confirm the line gauge is appropriate for the trimmer.
- Check for damage to the spool or spool cap.
What Type of String Should I Use for My Ryobi Weed Wacker?
Choosing the right string for your Ryobi weed wacker is vital for performance and longevity. Ryobi offers a range of string types, and using the manufacturer-recommended line gauge (thickness) and material will ensure your trimmer operates efficiently and without undue stress on its motor.
What If Your Patio Became Your Favorite Spot This Fall?
Cooler evenings don’t have to send everyone indoors. Discover simple ways to turn your porch or patio into a warm, cozy place to gather after sunset.
The most common string material is nylon, known for its flexibility and durability. However, not all nylon strings are created equal. They come in various gauges, measured in inches (e.g., 0.065″, 0.080″, 0.095″).
The gauge you need depends on your specific Ryobi trimmer model and the type of vegetation you’ll be cutting. For lighter tasks like trimming grass around flower beds or sidewalks, a thinner gauge like 0.065″ or 0.080″ is usually sufficient and less taxing on the motor. For tougher jobs involving thick weeds, brush, or overgrown areas, a thicker gauge such as 0.095″ or even 0.105″ might be necessary, provided your trimmer is designed to handle it.
Beyond standard nylon, you can find reinforced nylon lines that often contain more durable materials or are designed for specific cutting conditions. Some lines are twisted or shaped to reduce noise and vibration or to improve cutting efficiency. Always consult your Ryobi trimmer’s owner’s manual.
It will specify the recommended line gauge range for your model. Using a line that’s too thick can overwhelm the motor, causing overheating and potential damage, while a line that’s too thin might break excessively, reducing cutting effectiveness.
| Line Gauge (Diameter) | Recommended Use | Ryobi Models Typically For |
|---|---|---|
| 0.065″ – 0.080″ | Light-duty trimming, grass, soft weeds | Electric trimmers, some smaller gas models |
| 0.080″ – 0.095″ | Medium-duty trimming, average lawns, tougher weeds | Most gas-powered Ryobi trimmers |
| 0.095″ – 0.105″ | Heavy-duty cutting, thick brush, overgrown areas | High-performance gas models, commercial use |
Always check your owner’s manual for the exact recommended range for your specific Ryobi trimmer model.
What If Your Patio Became Your Favorite Spot This Fall?
Cooler evenings don’t have to send everyone indoors. Discover simple ways to turn your porch or patio into a warm, cozy place to gather after sunset.
Troubleshooting a Ryobi Weed Wacker Head That Won’t Spin
If your Ryobi weed wacker head isn’t spinning at all, even when the engine is running, it points to a more significant mechanical issue than just string problems. This usually involves the drive shaft, the gearbox, or a foreign object preventing rotation. It’s crucial to address this promptly to avoid further damage.
The most common culprit for a non-spinning head is an obstruction. This could be a thick vine or wire that has wrapped tightly around the shaft or the gearbox, jamming the rotation. Another possibility is a failure in the drive system connecting the engine to the trimmer head.
This might be a broken drive shaft, a stripped gear in the gearbox, or a damaged coupling. These components transmit the engine’s power to the cutting head, and if any part of this chain fails, the head won’t spin.
In some cases, the issue might be related to the trimmer head itself being improperly assembled or damaged. A loose or broken component within the head could cause it to seize. If the trimmer head has experienced a significant impact, internal gears might have broken, preventing rotation.
For electric or battery-powered Ryobi trimmers, a failing motor or a loose connection to the drive shaft can also be the cause. Always start by checking for obvious external obstructions before delving into more complex internal diagnostics.
What If Your Patio Became Your Favorite Spot This Fall?
Cooler evenings don’t have to send everyone indoors. Discover simple ways to turn your porch or patio into a warm, cozy place to gather after sunset.
- Steps for a Non-Spinning Trimmer Head:
- Safety First: Disconnect the spark plug (gas models) or battery (electric models).
- Check for Obstructions: Carefully examine the trimmer head and drive shaft for any wrapped vines, string, or debris. Remove anything you find.
- Inspect the Trimmer Head: Ensure it’s securely attached and that there’s no visible damage to the housing or cutting mechanism.
- Check Drive Shaft: If accessible, check if the drive shaft spins freely. For some models, you might need to partially disassemble the shaft housing.
- Examine the Gearbox: Listen for grinding noises or feel for resistance when manually trying to turn the shaft (if possible).
- Consult Manual/Service: If no obvious external issue is found, refer to your owner’s manual for internal diagnostics or seek professional service.
How to Extend the Life of Your Ryobi Weed Wacker String
Maximizing the lifespan of your Ryobi weed wacker string not only saves you money but also reduces the frequency of interruptions during yard work. While string is a consumable, there are several practices that can help it last longer and perform better.
Proper storage is key. Trimmer line can become brittle and weak when exposed to extreme temperatures and UV rays. Store unused trimmer line in a cool, dry place, away from direct sunlight.
Some users store their line in sealed bags or containers to protect it further. Another excellent method to keep nylon line pliable is to soak it in water. Many experts recommend soaking new line in a bucket of clean water for 24-48 hours before loading it onto the spool.
This rehydrates the nylon, making it more flexible and less prone to snapping during use.
When cutting, try to avoid hitting hard surfaces like concrete, rocks, or fences. While some contact is unavoidable, minimizing it will significantly reduce wear and tear on the line. Vary your cutting technique; instead of constantly hitting dense patches with full force, try sweeping motions.
What If Your Patio Became Your Favorite Spot This Fall?
Cooler evenings don’t have to send everyone indoors. Discover simple ways to turn your porch or patio into a warm, cozy place to gather after sunset.
If you frequently encounter very tough weeds or brush, consider using a thicker gauge line or a trimmer blade attachment, rather than forcing the string through an overly difficult task. Regularly inspect your trimmer head for wear or damage, as a worn head can cause the line to fray prematurely.
- Tips for Longer Trimmer Line Life:
- Store unused line in a cool, dry, dark place.
- Soak new line in water for 24-48 hours before use.
- Avoid hitting hard surfaces like concrete or rocks.
- Use sweeping motions for cutting dense areas.
- Choose the appropriate line gauge for the job.
- Inspect and maintain the trimmer head regularly.
- Rotate the trimmer head occasionally to ensure even wear on the line.
Common Mistakes to Avoid When Fixing Ryobi Weed Wacker String
Even with the best intentions, users often make mistakes when trying to fix Ryobi weed wacker string issues. These common errors can lead to more problems, frustration, and even damage to the trimmer. Being aware of them can help you avoid these pitfalls.
One of the most prevalent mistakes is using the wrong size line. As discussed, using a line that is too thick can strain the motor, while a line that is too thin will break constantly. Always adhere to the recommended line gauge for your specific Ryobi model.
Another frequent error is not properly securing the line on the spool. If the end of the line isn’t properly notched or if the line is wound loosely, it can unravel inside the spool, causing tangles and preventing feed. This can lead to the trimmer head jamming.
Forgetting to disconnect the power source before working on the trimmer head is a dangerous oversight. This can lead to accidental starts, resulting in injury. Always ensure the spark plug is removed or the battery is disconnected.
What If Your Patio Became Your Favorite Spot This Fall?
Cooler evenings don’t have to send everyone indoors. Discover simple ways to turn your porch or patio into a warm, cozy place to gather after sunset.
Overfilling the spool is another common mistake; winding too much line can cause it to bunch up and bind. Lastly, not cleaning the trimmer head thoroughly before reloading can leave debris that interferes with the spool’s rotation and the line feed mechanism. Many users also rush the process, leading to skipped steps and errors.
| Common Mistake | Consequence | How to Avoid |
|---|---|---|
| Using the wrong line gauge | Motor strain, frequent breaks, poor cutting performance | Consult owner’s manual for recommended gauge. |
| Not disconnecting power | Serious injury from accidental startup | Always remove spark plug or battery first. |
| Improperly winding the spool | Tangles, jamming, inconsistent line feed | Wind line evenly in one direction, secure end properly. |
| Failing to clean the trimmer head | Debris causes jamming and improper spool rotation | Clean head thoroughly before reassembling spool. |
Avoiding these common errors will significantly improve your experience with your Ryobi weed wacker and help maintain its optimal performance.
Frequently Asked Questions
What is the best way to store Ryobi trimmer line to keep it from becoming brittle?
To prevent Ryobi trimmer line from becoming brittle, store it in a cool, dry place away from direct sunlight. Many users place unused line in airtight plastic bags or containers. Soaking the line in water for 24-48 hours before use can also rehydrate it and improve its flexibility.
My Ryobi trimmer line keeps breaking off right at the spool. What could be causing this?
This usually indicates that the line is either too brittle or not properly seated in the spool. If the line is old or has been exposed to the elements, it can become brittle. Ensure you’re using fresh line and that it’s wound evenly with consistent tension.
Soaking new line can help prevent brittleness.
Can I use a different brand of trimmer line with my Ryobi weed wacker?
Yes, you can generally use trimmer line from other reputable brands, provided you use the correct gauge (thickness) recommended for your specific Ryobi model. Always check your owner’s manual for the recommended line diameter range.
What If Your Patio Became Your Favorite Spot This Fall?
Cooler evenings don’t have to send everyone indoors. Discover simple ways to turn your porch or patio into a warm, cozy place to gather after sunset.
How often should I replace the trimmer line spool on my Ryobi weed wacker?
There isn’t a set time frame for replacing the spool itself, as it depends on its condition and how often you use the trimmer. Replace the spool if it becomes cracked, warped, or if the line feed mechanism is damaged and cannot be repaired. The line on the spool needs replacing whenever it runs out or becomes excessively worn.
What should I do if my Ryobi weed wacker cuts out after a few minutes of use?
If your Ryobi weed wacker cuts out after a short period, it could be a fuel or air flow issue (for gas models) or a battery/motor overheating issue (for electric models). Check the fuel mixture and air filter, or allow battery models to cool down. Also, ensure the trimmer head isn’t jammed, as this can cause the motor to work too hard and shut down.
Final Thoughts
Effectively fixing Ryobi weed wacker string issues boils down to understanding the common problems like improper spool loading, line breakage, and feed malfunctions. By following proper loading techniques, using the right type of string, and performing regular maintenance, you can ensure your Ryobi trimmer performs reliably. Remember to always prioritize safety by disconnecting power before any work and consulting your owner’s manual for model-specific guidance.