Last Updated on October 22, 2026 by D. Ruddy
If you’ve ever dreamed of harvesting your own vibrant orange pumpkins, growing pumpkins at home is easier than you think. With the right soil, space, and care, you can cultivate healthy vines that produce impressive fruits perfect for pies, carving, or decoration. This guide covers everything from seed selection to harvest, ensuring your pumpkin patch thrives without the guesswork.
You can grow pumpkins successfully in most climates with full sun, well-draining soil, and 75-100 frost-free days. Start seeds indoors or direct-sow after the last frost for the best results.
Choosing the Right Pumpkin Variety
Pumpkins come in hundreds of varieties, each suited for different purposes. Some are ideal for carving, others for baking, and a few even for storing through winter. Selecting the right type ensures your efforts align with your goals, whether that’s a giant prize-winning pumpkin or a batch of sweet pie filling.
- Jack-O’-Lantern: The classic carving pumpkin, medium-sized (10-25 lbs), bright orange, and sturdy for intricate designs.
- Sugar Pie: Small (4-8 lbs) with sweet, dense flesh, perfect for desserts and baking.
- Atlantic Giant: Massive (200+ lbs), grown for competitions and displays, requiring ample space and nutrients.
- White Lumina: Ghostly white skin, great for painting or unique decorations, with a mild, sweet flavor.
- Cinderella (Rouge Vif d’Etampes): Flat, ribbed, and deep red-orange, a French heirloom that’s as decorative as it is delicious.
- Miniature (e.g., Jack Be Little): Tiny (1-2 lbs), ideal for tabletop decor or individual servings.
Tip: For beginners, start with Sugar Pie or Jack-O’-Lantern varieties. They’re forgiving, widely available, and deliver reliable results.
| Variety | Size | Best For | Days to Maturity |
|---|---|---|---|
| Jack-O’-Lantern | 10-25 lbs | Carving | 90-120 |
| Sugar Pie | 4-8 lbs | Baking | 90-100 |
| Atlantic Giant | 200+ lbs | Competitions | 120-150 |
| White Lumina | 10-20 lbs | Decorating, Baking | 95-110 |
| Cinderella | 15-25 lbs | Decorating, Cooking | 100-120 |
Choose a variety based on your space, climate, and intended use. Smaller pumpkins need less room, while giant varieties require at least 100 square feet per plant.
When and Where to Plant Pumpkins
Timing and location are critical for pumpkin success. These warm-season crops cannot tolerate frost and need plenty of heat to germinate and grow. Planting too early or in the wrong spot can stunt growth or lead to rot.
Pumpkins require full sun (6-8 hours daily) and well-draining soil rich in organic matter. The ideal soil pH is between 6.0 and 7.5. If your soil is heavy clay or sand, amend it with compost or aged manure to improve fertility and drainage.
- Start Indoors (Optional): 2-4 weeks before the last frost date in your area. Use peat pots to avoid disturbing roots during transplanting.
- Direct Sowing: After the last frost when soil temperatures reach at least 60°F (15°C). Pumpkin seeds won’t germinate in cold soil.
- Planting Depth: Sow seeds 1 inch deep, with 2-3 seeds per hill. Space hills 4-6 feet apart for small varieties, 8-12 feet for large ones.
- Thin Seedlings: Once seedlings have 2-3 true leaves, thin to the strongest plant per hill.
Warning: Avoid planting pumpkins where other cucurbits (like squash or cucumbers) grew the previous year. This reduces disease risk and soil depletion.
Preparing the Soil for Optimal Growth
Pumpkins are heavy feeders, meaning they deplete soil nutrients quickly. Proper soil preparation ensures your plants have the resources they need to produce large, healthy fruits.
Start by testing your soil’s pH and nutrient levels. Most garden centers offer affordable test kits. If your soil is too acidic (below 6.0), add lime to raise the pH. For alkaline soil (above 7.5), sulfur can help lower it.
- Add Organic Matter: Work in 2-3 inches of compost or well-rotted manure into the top 12 inches of soil. This improves fertility and drainage.
- Use a Balanced Fertilizer: At planting, mix in a 10-10-10 fertilizer. Once vines start running, switch to a low-nitrogen, high-phosphorus fertilizer (like 5-10-10) to encourage fruit production.
- Create Mounds: Plant in mounded rows (hills) to improve drainage and warm the soil faster. Each mound should be about 12 inches high and 24 inches wide.
- Mulch Heavily: Apply a 2-3 inch layer of straw or grass clippings around plants to retain moisture, suppress weeds, and keep fruits clean.
| Soil Amendment | Purpose | When to Apply |
|---|---|---|
| Compost | Improves fertility and structure | Before planting |
| Aged Manure | Adds nitrogen and organic matter | Before planting |
| Lime | Raises soil pH | Weeks before planting |
| Sulfur | Lowers soil pH | Weeks before planting |
According to the University of Minnesota Extension, pumpkins grow best in soil with a pH of 6.0-7.5 and require consistent moisture, especially during fruit development.
Watering Pumpkins for Maximum Yield
Pumpkins are about 90% water, so consistent moisture is key to preventing cracked skins and promoting steady growth. However, overwatering can lead to root rot and disease. The goal is to keep the soil evenly moist but not soggy.
- Deep Watering: Provide 1-2 inches of water per week, delivered directly to the soil (not the leaves) to prevent fungal diseases. Use a soaker hose or drip irrigation for best results.
- Morning Watering: Water early in the day so foliage dries quickly, reducing the risk of mildew and other fungal issues.
- Reduce Water as Fruit Matures: Once pumpkins start changing color, cut back on watering to toughen the skin and improve storage life.
- Avoid Wetting Leaves: Wet leaves can lead to powdery mildew, a common pumpkin disease. Always water at the base of the plant.
Tip: Use a rain gauge to track weekly watering. Pumpkins need about 1 inch of water per week, including rainfall.
| Growth Stage | Water Needs | Frequency |
|---|---|---|
| Seed Germination | Keep soil moist | Daily (if no rain) |
| Vine Growth | 1-2 inches per week | Every 2-3 days |
| Flowering & Fruit Set | Consistent moisture | Every 2-3 days |
| Fruit Maturation | Reduce gradually | Weekly |
Pumpkins are particularly sensitive to water stress during pollination and early fruit development. A study by the University of California found that inconsistent watering during these stages can lead to misshapen or cracked pumpkins.
Fertilizing Pumpkins for Bigger Harvests
Pumpkins are nutrient-hungry plants, especially as they transition from vine growth to fruit production. A strategic fertilizing schedule ensures your plants have the energy to produce large, healthy pumpkins.
Start with a balanced fertilizer (10-10-10) at planting to support early growth. Once the vines begin to run (about 3-4 weeks after planting), switch to a fertilizer lower in nitrogen and higher in phosphorus and potassium (5-10-10 or 3-4-6). This shift encourages flowering and fruiting over leafy growth.
- At Planting: Mix 1-2 tablespoons of 10-10-10 fertilizer into the soil around each seed or seedling.
- When Vines Start Running: Apply 5-10-10 fertilizer at a rate of 1 pound per 100 square feet. Scratch it into the soil around the plants, keeping it 6 inches away from the stems to avoid burning.
- When Fruits Form: Side-dress with compost or a high-phosphorus fertilizer to support fruit development.
- Every 3-4 Weeks: Continue feeding with a balanced or high-phosphorus fertilizer until harvest.
Tip: Over-fertilizing with nitrogen can lead to excessive vine growth at the expense of fruits. If your plants are producing lots of leaves but no pumpkins, cut back on nitrogen.
Pollination Tips for More Pumpkins
Without proper pollination, pumpkins won’t form—even if the vines are healthy and the flowers are abundant. Pumpkins have separate male and female flowers, and bees typically handle the pollination. However, you can give nature a helping hand to boost your yield.
Pumpkin flowers are open for just one day, so timing is critical. Male flowers usually appear first, followed by female flowers (which have a tiny pumpkin at the base). Bees are most active in the morning, so that’s the best time for pollination to occur.
- Plant Pollinator-Friendly Flowers: Attract bees by planting companion flowers like marigolds, sunflowers, or borage near your pumpkin patch.
- Hand-Pollinate if Needed: If bee activity is low, use a small paintbrush to transfer pollen from male to female flowers. Do this early in the morning when flowers are open.
- Avoid Pesticides: Chemical pesticides can harm bees and other pollinators. Use organic methods like neem oil or insecticidal soap if pests are a problem.
- Provide Water for Bees: A shallow dish of water with pebbles (so bees don’t drown) can encourage them to visit your garden.
Common Pumpkin Growing Problems and Solutions
Even with the best care, pumpkins can face challenges. Recognizing and addressing these issues early can save your crop.
| Problem | Cause | Solution |
|---|---|---|
| No Fruits Forming | Poor pollination, lack of bees | Hand-pollinate, plant pollinator-friendly flowers |
| Yellow Leaves | Nutrient deficiency, overwatering | Test soil, adjust watering, fertilize |
| Powdery Mildew | Fungal disease, wet foliage | Remove affected leaves, improve airflow, avoid overhead watering |
| Cracked Pumpkins | Uneven watering | Water consistently, mulch to retain moisture |
| Squash Bugs | Pests feeding on vines | Remove eggs by hand, use row covers, apply neem oil |
Warning: Squash bugs can quickly kill pumpkin vines. Check the undersides of leaves weekly for their copper-colored eggs and remove them by hand.
When and How to Harvest Pumpkins
Knowing when to harvest pumpkins is crucial for flavor, storage life, and appearance. Pick too early, and they won’t ripen properly. Wait too long, and they may rot or attract pests.
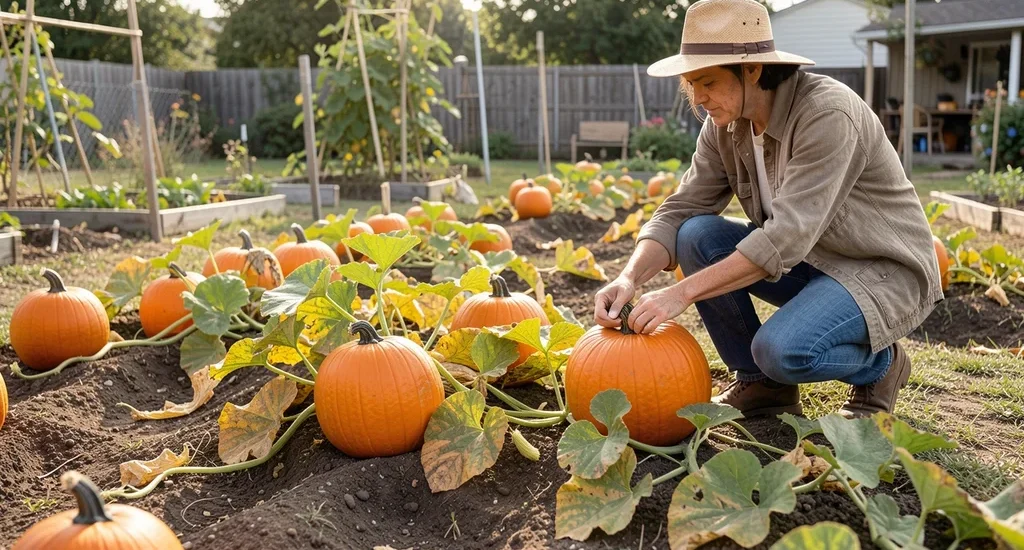
Pumpkins are ready to harvest when the rind is hard and cannot be punctured with a fingernail. The stem should be dry and woody, and the pumpkin should have a deep, solid color (orange for most varieties, white for Lumina, etc.). Additionally, the vines may start to die back as the pumpkins mature.
- Check the Rind: Press your fingernail into the pumpkin’s skin. If it resists puncture, it’s ready.
- Inspect the Stem: The stem should be dry and hard. If it’s green and soft, the pumpkin isn’t ripe yet.
- Look at the Color: Most pumpkins turn a deep, uniform orange (or their variety-specific color) when ripe.
- Listen to the Sound: Tap the pumpkin with your knuckles. A ripe pumpkin sounds hollow.
- Use a Sharp Knife: Cut the stem with 3-4 inches attached. Never carry the pumpkin by the stem, as it can break and lead to rot.
Tip: Harvest pumpkins before the first frost. Frost can damage the skin, reducing storage life. If a light frost is forecast, cover pumpkins with a blanket or harvest them early.
Curing and Storing Pumpkins
Proper curing and storage can extend the life of your pumpkins by months, allowing you to enjoy them well into winter. Curing helps harden the skin and heal any minor cuts or bruises, while proper storage prevents rot and pests.
Curing involves exposing pumpkins to warm, dry conditions for about 10 days. This process is especially important for pumpkins you plan to store long-term. After curing, store pumpkins in a cool, dry place (50-55°F or 10-13°C) with good airflow.
- Cure Pumpkins: Place pumpkins in a warm (80-85°F or 27-29°C), dry, well-ventilated area for 7-10 days. This can be a sunny porch, greenhouse, or even a sunny windowsill indoors.
- Clean Pumpkins: After curing, gently wipe off any dirt with a damp cloth. Do not use soap or water, as moisture can lead to rot.
- Store Properly: Keep pumpkins in a single layer on a shelf or pallet (not directly on the floor) in a cool, dry place. Avoid stacking, as this can cause bruising.
- Check Regularly: Inspect stored pumpkins every few weeks and remove any that show signs of rot or soft spots.
| Variety | Storage Life (Uncut) | Best Storage Temp |
|---|---|---|
| Jack-O’-Lantern | 2-3 months | 50-55°F (10-13°C) |
| Sugar Pie | 3-4 months | 50-55°F (10-13°C) |
| Atlantic Giant | 1-2 months | 50-55°F (10-13°C) |
| White Lumina | 2-3 months | 50-55°F (10-13°C) |
According to the National Center for Home Food Preservation, properly cured and stored pumpkins can last up to 4 months, with smaller varieties like Sugar Pie often storing the longest.
Frequently Asked Questions
How long does it take to grow pumpkins?
Most pumpkin varieties take 75-100 frost-free days to mature, though some giant types can take up to 150 days. Check the seed packet for the specific days to maturity for your variety. Plant after the last frost date in your area to ensure a long enough growing season.
Can you grow pumpkins in containers?
While it’s possible to grow small pumpkin varieties (like Jack Be Little) in large containers (at least 20 gallons), most pumpkins need extensive space for their vines. If you’re limited to containers, choose miniature varieties and provide a trellis for vertical growth to save space.
Why are my pumpkin flowers not turning into fruits?
This is usually due to poor pollination. Pumpkins have separate male and female flowers, and bees must transfer pollen between them. If bees are scarce, try hand-pollinating with a paintbrush.
Also, ensure you’re not over-fertilizing with nitrogen, which can lead to excessive vine growth at the expense of fruits.
How much space do pumpkins need to grow?
Small pumpkin varieties need at least 4-6 feet of space per plant, while large varieties like Atlantic Giant require 100 square feet or more per plant. Pumpkin vines can spread up to 20 feet or more, so plan accordingly. If space is limited, train vines vertically on a sturdy trellis.
What is the best fertilizer for pumpkins?
Start with a balanced fertilizer (10-10-10) at planting to support early growth. Once vines begin to run, switch to a low-nitrogen, high-phosphorus fertilizer (5-10-10 or 3-4-6) to encourage flowering and fruiting. Organic options like compost or aged manure also work well.
Final Thoughts
Growing pumpkins can be a rewarding experience, whether you’re aiming for a bountiful harvest of pie pumpkins or a single giant for a fall display. With the right variety, soil preparation, and care, you’ll be well on your way to a successful pumpkin patch. Remember to focus on pollination, consistent watering, and proper storage to maximize your yield and enjoy your pumpkins for months to come.