

Last Updated on October 22, 2026 by D. Ruddy
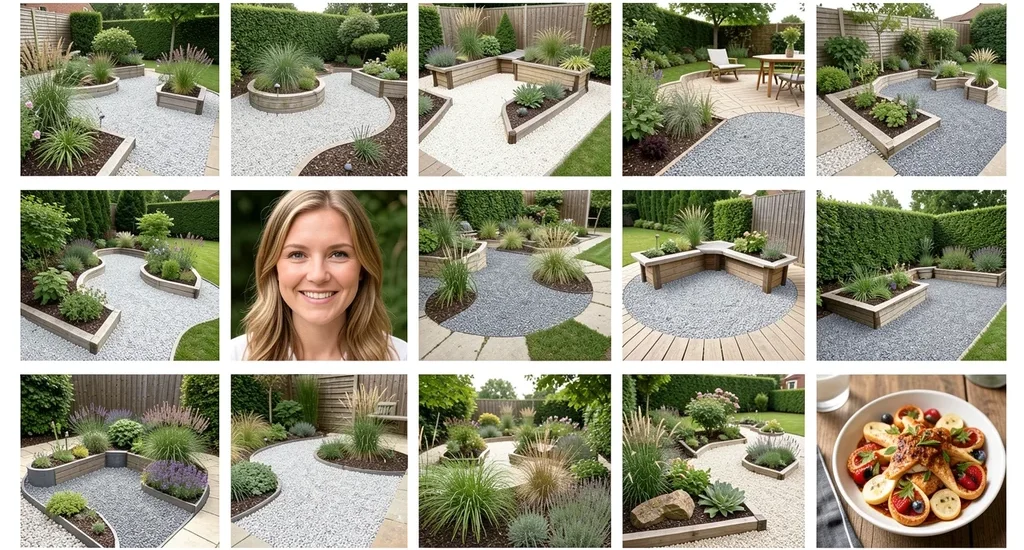
Transforming your outdoor space with a low-maintenance, stylish solution is easier than you think. Gravel garden ideas offer durability, affordability, and a modern aesthetic that complements any landscape. Whether you have a small urban yard or a sprawling countryside plot, gravel can create texture, reduce weeds, and improve drainage while cutting down on water usage.
Gravel gardens are perfect for homeowners who want a beautiful, eco-friendly landscape with minimal upkeep. They work in sunny or shaded areas, fit any budget, and can be installed in a weekend with basic tools.
Why Choose Gravel for Your Garden
Gravel is more than just a practical choice—it’s a design statement. Unlike traditional lawns, gravel requires no mowing, fertilizing, or watering, making it ideal for busy homeowners or dry climates. It also provides excellent drainage, preventing waterlogging in heavy rain.
Beyond functionality, gravel adds visual interest. Available in various colors, sizes, and textures, it can create contrast with plants, define pathways, or serve as a neutral backdrop for vibrant flowers. Plus, it’s cost-effective, with most projects costing between $1 and $3 per square foot for materials.
- Low maintenance: No mowing, watering, or pesticides needed
- Durability: Lasts for decades without replacement
- Weed suppression: Landscape fabric underneath blocks weeds
- Eco-friendly: Reduces water usage by up to 70% compared to grass
- Versatility: Works in formal, rustic, modern, or cottage-style gardens
- Quick installation: Most DIY projects take just a weekend
Warning: Avoid using gravel in high-traffic areas without proper edging, as it can scatter over time. Use landscape borders or pavers to keep it contained.
10 Stunning Gravel Garden Ideas to Inspire You
1. Mediterranean Courtyard with Lavender and Gravel
A Mediterranean-style garden thrives with gravel as its base. The loose stones mimic the arid landscapes of Southern Europe while providing perfect drainage for drought-tolerant plants like lavender, rosemary, and olive trees.
This design works especially well in sunny spots where water conservation is key. The silver-gray gravel contrasts beautifully with purple lavender blooms and terracotta pots, creating a warm, inviting atmosphere.
- Plant choices: Lavender, rosemary, thyme, santolina, agave
- Gravel type: Light gray or white pea gravel (3/8″ size)
- Accent materials: Terracotta pots, stone benches, wrought iron furniture
- Lighting: Solar-powered lanterns or string lights
- Edging: Natural stone or brick borders
| Feature | Benefit |
|---|---|
| Drought-resistant plants | Thrive in gravel with minimal water |
| Light-colored gravel | Reflects heat, keeping soil cooler |
| Natural stone edging | Prevents gravel from spreading |
Best for: Sunny climates, drought-prone areas, and homeowners who love fragrant, low-maintenance plants.
2. Japanese Zen Garden with Raked Gravel
For a tranquil, meditative space, a Japanese Zen garden uses gravel to represent water, with carefully raked patterns symbolizing ripples. This minimalist design requires only a few elements—gravel, rocks, and perhaps a single sculptural feature—to create a peaceful retreat.
Traditional Zen gardens use fine, light-colored gravel raked into concentric circles or straight lines around larger stones. The act of raking itself can be therapeutic, making this not just a garden but a mindfulness practice.
- Choose your gravel: Fine, light-colored gravel (1/4″ to 3/8″ size)
- Add focal rocks: 3-5 larger stones in odd-numbered groupings
- Incorporate a bridge or lantern: Traditional wooden or stone elements
- Keep it simple: Limit plant life to moss or a single bonsai
- Maintain regularly: Re-rake patterns weekly for the full effect
Tip: Use a wooden rake with fine tines for precise patterns. Practice on a small section first to perfect your technique.
Best for: Small spaces, meditation areas, and those seeking a low-maintenance, high-impact design.
3. Gravel Pathway with Stepping Stones
A gravel pathway adds charm and functionality to any garden. Combined with stepping stones, it creates a durable, weather-resistant walkway that blends naturally with the landscape. This design works especially well in cottage gardens, woodland settings, or as a connection between different garden areas.
For best results, use larger gravel (3/4″ to 1″) for pathways to ensure stability underfoot. Space stepping stones about 2-3 feet apart for comfortable walking, and consider adding a gentle curve to the path for visual interest.
| Material | Pros | Cons |
|---|---|---|
| Crushed limestone | Compacts well, light color | Can be sharp underfoot |
| Pea gravel | Smooth, comfortable to walk on | Doesn’t compact as well |
| Decomposed granite | Natural look, excellent compaction | More expensive |
Best for: Connecting garden areas, adding rustic charm, and creating durable walkways in any climate.
4. Modern Minimalist Garden with Dark Gravel
For a contemporary look, dark gravel creates striking contrast against architectural plants and clean lines. This design works particularly well in urban settings or modern homes with geometric landscapes. Black or dark gray gravel pairs beautifully with ornamental grasses, succulents, and sculptural plants like yucca or agave.
The key to this style is simplicity. Use a single type of dark gravel (such as black lava rock or dark slate chips) and limit your plant palette to 3-4 varieties. Add geometric planters or concrete edging for a polished finish.
- Gravel choices: Black lava rock, dark slate, or basalt chips
- Plant selections: Ornamental grasses, succulents, agave, yucca, black mondo grass
- Hardscaping: Concrete, steel, or dark wood elements
- Lighting: Minimalist LED fixtures or uplighting
- Color scheme: Stick to blacks, grays, and deep greens
Best for: Contemporary homes, small urban gardens, and those who prefer a sleek, sophisticated look.
5. Cottage Garden with Gravel and Perennials
Cottage gardens are known for their charm and abundance of flowers, and gravel can enhance this classic style while reducing maintenance. Use gravel as a mulch around flowering perennials to suppress weeds and retain moisture, while allowing the plants to take center stage.
This approach works especially well with traditional cottage garden plants like roses, peonies, delphiniums, and foxgloves. The gravel provides a neutral backdrop that makes the vibrant colors of the flowers pop, while the informal arrangement creates a romantic, old-world feel.
- Prepare the soil: Remove weeds and lay landscape fabric
- Add gravel: Spread 2-3 inches of medium-sized gravel (1/2″ to 3/4″)
- Plant densely: Space perennials 12-18 inches apart for a lush look
- Add a border: Use brick, stone, or wooden edging to contain the gravel
- Mulch annually: Top up gravel as needed to maintain depth
Tip: Mix in some organic mulch around moisture-loving plants to help retain water while still benefiting from gravel’s weed-suppressing properties.
Best for: Romantic gardeners, those who love flowers, and traditional or country-style homes.
6. Gravel and Succulent Garden
Succulents and gravel are a match made in garden heaven. These water-wise plants thrive in well-draining soil, making gravel an ideal growing medium. A succulent garden with gravel requires minimal care—just occasional watering and the occasional removal of dead leaves.
This design works in containers, raised beds, or directly in the ground. For a cohesive look, choose gravel in a color that complements your succulents—light gravel for pastel varieties, dark gravel for deep green or purple succulents, or terracotta-colored gravel for a desert-inspired look.
| Succulent Type | Gravel Color Pairing | Water Needs |
|---|---|---|
| Echeveria | Light gray or white | Every 2-3 weeks |
| Aloe | Dark gray or black | Every 3-4 weeks |
| Sedum | Terracotta or gold | Every 3 weeks |
| Agave | Black or dark brown | Every 4-5 weeks |
Best for: Dry climates, container gardens, and those who want a low-maintenance, drought-tolerant garden.
7. Gravel Fire Pit Area
Create a cozy outdoor gathering space with a gravel fire pit area. Gravel provides a stable, non-flammable surface around the fire pit while allowing water to drain through, preventing muddy conditions after rain. This design works well for both permanent and portable fire pits.
For safety and comfort, extend the gravel area at least 2-3 feet beyond the fire pit itself. Use larger gravel (3/4″ to 1″) for better stability underfoot, and consider adding a border of pavers or stones to contain the gravel and define the space.
- Fire pit options: In-ground, above-ground, or portable
- Seating: Adirondack chairs, benches, or built-in stone seating
- Lighting: String lights, lanterns, or solar path lights
- Gravel type: Larger, angular gravel for stability
- Safety: Keep a fire extinguisher or hose nearby
- Extras: Add a small table for drinks and snacks
Warning: Always check local regulations before installing a fire pit, and never leave it unattended. Keep a safe distance from structures and overhanging trees.
Best for: Backyard entertaining, cool evenings, and creating a focal point for outdoor living.
8. Gravel and Water Feature Garden
Combine the soothing sound of water with the textural appeal of gravel for a serene garden retreat. Water features like fountains, bubbling rocks, or small ponds pair beautifully with gravel, creating a peaceful ambiance while minimizing maintenance.
Gravel helps keep the area around water features clean by preventing mud and providing a stable surface. For a natural look, choose rounded river rock or pea gravel. For a more modern aesthetic, opt for uniform crushed stone in a single color.
- Choose your water feature: Fountain, bubbling rock, or small pond
- Select gravel size: Medium (1/2″ to 3/4″) for most features, larger for ponds
- Add plants: Water-loving plants like irises or bog plants for ponds
- Consider lighting: Submersible lights for nighttime ambiance
- Maintain regularly: Clean gravel and water feature to prevent algae
Best for: Creating a tranquil atmosphere, masking street noise, and attracting wildlife like birds and butterflies.
9. Gravel Driveway with Decorative Edging
A gravel driveway is a cost-effective alternative to pavement, offering durability and rustic charm. With proper installation and maintenance, a gravel driveway can last 10-15 years while providing excellent drainage and a country-style aesthetic.
For the best results, use a mix of different gravel sizes. Start with a base layer of larger, crushed stone (1-1.5″ size) for stability, then add a top layer of smaller gravel (3/8″ to 3/4″) for a finished look. Decorative edging with bricks, stones, or metal can prevent the gravel from spreading onto the lawn or walkway.
| Layer | Material | Depth |
|---|---|---|
| Base | Crushed stone (1-1.5″) | 4-6 inches |
| Middle | Crushed stone (3/4″) | 2-3 inches |
| Top | Pea gravel or crushed stone (3/8″) | 1-2 inches |
Best for: Rural properties, long driveways, and homeowners who prefer a natural, low-maintenance entryway.
10. Gravel and Herb Garden
Create a functional and fragrant herb garden with gravel as your growing medium. Many herbs, including thyme, oregano, and rosemary, thrive in well-drained soil, making gravel an excellent choice for both in-ground and container herb gardens.
Gravel helps prevent waterlogged soil, which can cause root rot in herbs. It also suppresses weeds and keeps the garden looking tidy. For a kitchen herb garden, plant in raised beds or containers filled with a mix of gravel and potting soil, then top with a layer of decorative gravel to maintain moisture.
- Best herbs for gravel: Thyme, oregano, rosemary, sage, lavender, mint
- Container options: Terracotta pots, wooden boxes, or galvanized metal troughs
- Gravel type: Small pea gravel (3/8″) for containers, medium (1/2″) for in-ground
- Soil mix: 60% potting soil, 30% gravel, 10% compost
- Sunlight: Most herbs need 6-8 hours of sun daily
- Watering: Let soil dry out between waterings
Best for: Cooks, small spaces, and those who want a practical, fragrant garden with minimal effort.
Gravel Types and Their Best Uses
Not all gravel is created equal. The type you choose can dramatically affect both the function and aesthetics of your garden. From fine pea gravel to large river rocks, each variety has its own characteristics and ideal applications.
According to the National Gardening Association, the most popular gravel types for gardens are pea gravel, crushed stone, and river rock, with each offering unique benefits for different garden styles and needs.
| Gravel Type | Size | Best For | Cost per Ton |
|---|---|---|---|
| Pea Gravel | 3/8″ | Pathways, decorative areas, container gardens | $40-$70 |
| Crushed Stone | 3/4″ – 1″ | Driveways, base layers, high-traffic areas | $30-$50 |
| River Rock | 1″ – 2″ | Water features, decorative borders, natural-looking areas | $80-$120 |
| Decomposed Granite | 1/4″ – 3/8″ | Pathways, Zen gardens, natural settings | $50-$80 |
| Lava Rock | 1/2″ – 1″ | Modern gardens, succulent beds, dark color contrast | $70-$100 |
| Marble Chips | 1/2″ – 3/4″ | Formal gardens, decorative borders, light-reflective areas | $90-$130 |
Prices can vary significantly based on location and supplier. For most garden projects, pea gravel and crushed stone offer the best balance of affordability and versatility.
How to Install a Gravel Garden Step by Step
Creating your own gravel garden is a straightforward DIY project that most homeowners can complete in a weekend. With proper preparation and the right materials, your gravel garden will look professional and last for years with minimal maintenance.
According to a survey by the National Association of Landscape Professionals, 78% of homeowners who installed gravel gardens reported high satisfaction with both the process and the results, citing ease of installation and low maintenance as the top benefits.
Step 1: Plan Your Garden Layout
Before you start digging, sketch out your garden design. Consider the shape, size, and location of your gravel area, as well as any plants, pathways, or features you want to include. Mark the area with garden hose, spray paint, or stakes and string.
- Measure the area to calculate how much gravel you’ll need
- Consider sunlight and drainage patterns
- Plan for at least 2-3 inches of gravel depth
- Include any curves, borders, or patterns you want
- Check for underground utilities before digging
Step 2: Remove Existing Vegetation
Clear the area of any grass, weeds, or plants. For small areas, you can use a shovel or garden fork. For larger projects, consider renting a sod cutter or using a herbicide (following all safety precautions) to kill existing vegetation before removal.
- Cut or dig out grass and weeds, removing roots
- Rake the area to remove debris
- Check for and remove any large rocks or obstacles
- Level the ground as much as possible
Tip: If you’re converting a lawn to a gravel garden, consider solarizing the area first. Cover it with clear plastic for 4-6 weeks during hot weather to kill grass and weeds naturally.
Step 3: Install Landscape Fabric
Landscape fabric is crucial for preventing weeds from growing through your gravel. Choose a high-quality, UV-resistant fabric that allows water to drain through while blocking weed growth.
- Roll out the fabric over the entire area
- Overlap edges by 6-12 inches to prevent gaps
- Secure with landscape staples every few feet
- Cut holes for any plants you’ll be adding
- Avoid cheap plastic sheeting, which doesn’t allow water drainage
Step 4: Add a Base Layer (For Paths and Driveways)
For areas that will see foot traffic or vehicle use, a base layer of larger gravel or crushed stone provides stability. This step isn’t necessary for decorative gravel areas that won’t be walked on.
- Spread a 2-4 inch layer of larger gravel (3/4″ to 1″ size)
- Use a garden rake to spread it evenly
- Compact the base with a hand tamper or plate compactor
- Check for level and adjust as needed
Step 5: Spread the Gravel
Now comes the fun part—adding your chosen gravel. For most garden applications, a depth of 2-3 inches is ideal. Use a shovel or wheelbarrow to distribute the gravel, then a rake to spread it evenly.
- Start by dumping gravel in small piles across the area
- Use a bow rake to spread it evenly
- Aim for a consistent depth of 2-3 inches
- For pathways, create a slight crown (higher in the center) for better drainage
- Use a plate compactor for driveways or high-traffic areas
Step 6: Add Edging
Edging keeps your gravel contained and gives your garden a finished look. Choose materials that complement your overall design—brick, stone, metal, or plastic edging all work well.
- Install edging around the perimeter of your gravel area
- For curves, use flexible plastic or metal edging
- For straight lines, brick or stone works well
- Secure edging with stakes or by burying the bottom edge
- Check that the edging is level with or slightly above the gravel surface
Step 7: Add Plants and Final Touches
If your design includes plants, now is the time to add them. Dig holes through the landscape fabric, plant your chosen varieties, and then add gravel around the base of each plant.
- Choose plants suited to gravel gardens (drought-tolerant varieties work best)
- Space plants according to their mature size
- Water thoroughly after planting
- Add decorative elements like rocks, statues, or lighting
- Consider adding a thin layer of mulch around plants if your climate is very dry
Common Mistakes to Avoid
While gravel gardens are relatively forgiving, there are some common pitfalls to watch out for. Avoiding these mistakes will help ensure your gravel garden looks great and lasts for years with minimal maintenance.
According to landscape professionals, the most common issues with gravel gardens stem from poor preparation, incorrect gravel choice, and inadequate maintenance. Being aware of these problems can save you time and money in the long run.
- Skipping the landscape fabric: Without a weed barrier, you’ll spend hours pulling weeds that grow through your gravel. Always use high-quality landscape fabric designed for drainage.
- Using the wrong gravel size: Very small gravel (like sand) can be kicked around and doesn’t provide good drainage. Very large gravel can be uncomfortable to walk on and may not stay in place. Aim for 3/8″ to 3/4″ sizes for most applications.
- Not considering drainage: While gravel itself drains well, the underlying soil might not. If your garden is in a low spot, consider adding a French drain or grading the area to prevent water pooling.
- Ignoring edging: Without proper edging, gravel will gradually spread into your lawn or other garden areas. Install edging before adding gravel to keep it contained.
- Choosing the wrong plants: Not all plants thrive in gravel. Avoid moisture-loving plants and opt for drought-tolerant varieties that prefer well-drained soil.
- Neglecting maintenance: While gravel gardens are low-maintenance, they’re not no-maintenance. You’ll need to occasionally rake the gravel to keep it looking neat and top it up as it settles or scatters.
Tip: To refresh your gravel garden, simply rake the surface to redistribute the stones and give it a like-new appearance. Add a thin layer of fresh gravel every year or two to maintain the depth and color.
Maintenance Tips for Your Gravel Garden
One of the biggest advantages of gravel gardens is their low maintenance requirements. However, a little regular care will keep your garden looking its best and extend its lifespan. With just a few simple tasks, you can maintain the beauty and functionality of your gravel garden for years.
The Royal Horticultural Society recommends a seasonal maintenance schedule for gravel gardens, with most tasks taking just a few hours per year. This minimal investment of time pays off with a garden that stays attractive and weed-free.
Seasonal Maintenance Checklist
| Season | Tasks | Frequency |
|---|---|---|
| Spring |
|
Once |
| Summer |
|
Monthly |
| Fall |
|
Once |
| Winter |
|
As needed |
Long-Term Care
In addition to seasonal maintenance, there are a few long-term care tasks to keep in mind:
- Top up gravel: Over time, gravel can settle, scatter, or break down. Add a fresh layer every 1-2 years to maintain the depth and appearance.
- Replace landscape fabric: Most landscape fabrics last 5-10 years. If you notice an increase in weeds, it may be time to replace the fabric.
- Refresh edging: Check edging annually and repair or replace as needed to keep gravel contained.
- Monitor drainage: If you notice water pooling in your gravel garden, you may need to improve drainage by adding a French drain or regrading the area.
- Update plants: As your garden matures, you may want to add new plants, divide existing ones, or replace those that aren’t thriving.
Frequently Asked Questions
Do I need to remove all the soil before adding gravel?
No, you don’t need to remove all the soil. For most gravel gardens, it’s sufficient to remove existing vegetation and create a level surface. The landscape fabric will prevent weeds from growing through.
However, for driveways or high-traffic areas, you may want to excavate a few inches and add a base layer of larger gravel for better stability.
How much gravel do I need for my garden?
The amount of gravel you need depends on the size of your garden and the desired depth. As a general rule, 1 ton of gravel covers approximately 100 square feet at a 2-inch depth. To calculate: (Length × Width × Depth in feet) ÷ 21.6 = Tons needed.
For example, a 20×30 foot garden with 2 inches of gravel would need about 5.6 tons.
Can I use gravel in a vegetable garden?
While you can use gravel in a vegetable garden, it’s not ideal for most vegetables, which typically prefer rich, moisture-retentive soil. However, gravel can work well for raised bed vegetable gardens, where it can be used as a mulch around plants to suppress weeds and retain moisture. Just ensure the underlying soil is fertile and well-draining.
How do I keep weeds out of my gravel garden?
Preventing weeds starts with proper installation: use high-quality landscape fabric, maintain a adequate depth of gravel (2-3 inches), and install edging to prevent weeds from encroaching from the sides. For any weeds that do appear, remove them promptly. You can also use a natural weed killer like vinegar or a commercial herbicide designed for use in gravel areas.
Is gravel garden suitable for slopes?
Gravel can work on gentle slopes, but steep slopes may require additional measures to prevent erosion. For slopes, use larger gravel (3/4″ to 1″) which is less likely to wash away, and consider installing a French drain at the base to manage water runoff. You may also need to use more frequent edging or terracing to keep the gravel in place.
Final Thoughts
Gravel garden ideas offer endless possibilities for creating beautiful, low-maintenance outdoor spaces. Whether you prefer the rustic charm of a cottage garden, the sleek lines of a modern design, or the tranquility of a Zen retreat, gravel provides a versatile, durable, and affordable foundation. With proper planning and installation, your gravel garden will provide years of enjoyment with minimal upkeep, allowing you more time to relax and appreciate your outdoor sanctuary.








