

Last Updated on October 22, 2026 by D. Ruddy
Preserving the harvest doesn’t get more rewarding than canning whole tomatoes. This method locks in peak flavor, color, and nutrition so you can enjoy garden-fresh taste all year. Whether you’re a beginner or looking to refine your technique, this guide covers everything from prep to storage.
You can safely can whole tomatoes using a water bath or pressure canner depending on whether you add acid. Raw pack or hot pack methods both work well for firm, ripe tomatoes.
Why Can Whole Tomatoes Instead of Sauce or Paste
Canning whole tomatoes keeps their natural texture and versatility. Unlike sauces or pastes, whole tomatoes can be used in countless recipes without losing their identity. You can dice them for salsa, crush them for soup, or leave them whole for salads.
They also retain more nutrients. According to the USDA, canned tomatoes provide similar levels of vitamin C and lycopene as fresh ones. Plus, the canning process makes lycopene more bioavailable, boosting its antioxidant benefits.
Here are the top reasons to can whole tomatoes:
- Versatility: Use in stews, casseroles, or as a pizza topping
- Nutrient retention: Preserves vitamins and antioxidants
- Long shelf life: Stays fresh for 12-18 months
- Cost-effective: Save money by preserving your own
- Flavor control: No added preservatives or excessive salt
Tip: Choose paste tomatoes like Roma or San Marzano for meatier texture with fewer seeds.
Essential Equipment for Canning Whole Tomatoes
Having the right tools makes canning safer and more efficient. While you can start with basic kitchen items, investing in proper canning equipment ensures better results and safety.
Here’s what you’ll need:
- Canner: Water bath canner for acidified tomatoes or pressure canner for low-acid varieties
- Jars: Mason jars with new lids and rings (pint or quart size)
- Jar lifter: To safely move hot jars in and out of the canner
- Canning funnel: Helps fill jars without spills
- Bubble remover: Plastic or wooden tool to remove air bubbles
- Lid magnet: For handling lids from hot water
- Large pot: For pre-heating jars and preparing tomatoes
| Equipment | Purpose | Estimated Cost |
|---|---|---|
| Water bath canner | For high-acid foods | $30-$60 |
| Pressure canner | For low-acid foods | $70-$200 |
| Mason jars (12 count) | Storage containers | $15-$30 |
| Canning kit | Includes funnel, lifter, bubble remover | $10-$20 |
According to the National Center for Home Food Preservation, proper equipment reduces the risk of spoilage and foodborne illness. Always inspect your canner and jars for damage before each use.
Choosing the Best Tomatoes for Canning
Not all tomatoes are created equal when it comes to canning. The best varieties have thick flesh, few seeds, and less water content. These characteristics help maintain texture and prevent mushy results.
Here are the top tomato varieties for canning whole:
- Roma: Classic choice with meaty texture and low water content
- San Marzano: Italian heirloom perfect for sauces and whole canning
- Amish Paste: Large, meaty tomatoes with rich flavor
- Viva Italia: Hybrid with excellent disease resistance
- Big Mama: Large paste tomato great for whole canning
- Celebrity: Reliable hybrid with good flavor and texture
Important: Avoid overripe or bruised tomatoes as they may break down during processing.
For best results, pick tomatoes at their peak ripeness. They should be firm but not hard, with vibrant color and no signs of spoilage. The USDA recommends using tomatoes within 1-2 days of harvest for optimal quality.
| Variety | Type | Flesh Quality | Best For |
|---|---|---|---|
| Roma | Paste | Very meaty | Sauces, whole canning |
| San Marzano | Heirloom | Meaty, low seeds | Sauces, whole |
| Amish Paste | Heirloom | Very meaty | Whole canning, sauces |
Preparing Tomatoes for Canning
Proper preparation is key to successful canning. This process involves several steps to ensure your tomatoes maintain quality and safety during storage.
Follow these preparation steps:
- Wash: Rinse tomatoes thoroughly under cool water to remove dirt and debris
- Sort: Discard any bruised, overripe, or damaged tomatoes
- Blanch: Dip tomatoes in boiling water for 30-60 seconds to loosen skins
- Cool: Immediately transfer to ice water to stop cooking
- Peel: Remove skins with a knife or your fingers
- Core: Remove the stem and core from each tomato
- Optional: Remove seeds if you prefer less liquid in your jars
The blanching process, also known as scalding, makes peeling easier while preserving the tomato’s texture. According to the University of Georgia Extension, this step also helps remove any surface bacteria.
Warning: Never skip the blanching step as it’s crucial for removing skins that can toughen during canning.
For whole tomatoes, you can leave them as-is or make a small slit in the skin to prevent bursting during processing. Some canners prefer to pack tomatoes in their own juice for better flavor.
Raw Pack vs Hot Pack Methods
When canning whole tomatoes, you have two main packing options: raw pack and hot pack. Each has its advantages depending on your preferences and the tomato variety.
The raw pack method involves placing raw, prepared tomatoes directly into jars and covering them with hot liquid. This method is quicker but may result in more floating tomatoes and potential texture issues.
Hot pack, on the other hand, requires pre-cooking the tomatoes in boiling water or juice before packing them into jars. This method often yields better results with less floating and more consistent texture.
| Method | Pros | Cons | Best For |
|---|---|---|---|
| Raw Pack | Faster, preserves more nutrients | More floating, potential texture issues | Firm tomatoes, quick processing |
| Hot Pack | Better texture, less floating | More time-consuming | All tomato varieties |
For hot pack, simmer tomatoes in water or juice for 5 minutes before packing. This step helps expel air and ensures a tighter pack in the jar.
Acidification for Safe Canning
Tomatoes are borderline acidic foods, which means proper acidification is crucial for safe canning. The pH level of tomatoes can vary based on variety and growing conditions, so adding acid ensures they fall within the safe range.
Here’s how to properly acidify your tomatoes:
- Bottled lemon juice: Add 1 tablespoon per pint or 2 tablespoons per quart jar
- Citric acid: Use 1/4 teaspoon per pint or 1/2 teaspoon per quart jar
- Vinegar: Add 2 tablespoons of 5% acidity vinegar per quart jar (not recommended for pints)
Important: Always use bottled lemon juice or vinegar with 5% acidity for consistent results.
The National Center for Home Food Preservation emphasizes that proper acidification is essential to prevent the growth of Clostridium botulinum, which causes botulism. This is especially important when using a water bath canner.
For pressure canning, acidification is still recommended as it provides an extra layer of safety and helps maintain quality during storage.
Step by Step Canning Process
Follow these detailed steps for safe and successful canning whole tomatoes. Whether you’re using a water bath or pressure canner, these guidelines ensure proper processing.
Water Bath Canning Method
- Prepare jars: Wash jars and keep them hot until ready to use. Prepare lids according to manufacturer’s instructions.
- Pack tomatoes: Fill jars with prepared tomatoes, leaving 1/2 inch headspace. Add acid as described above.
- Add liquid: Cover tomatoes with hot water or tomato juice, maintaining 1/2 inch headspace.
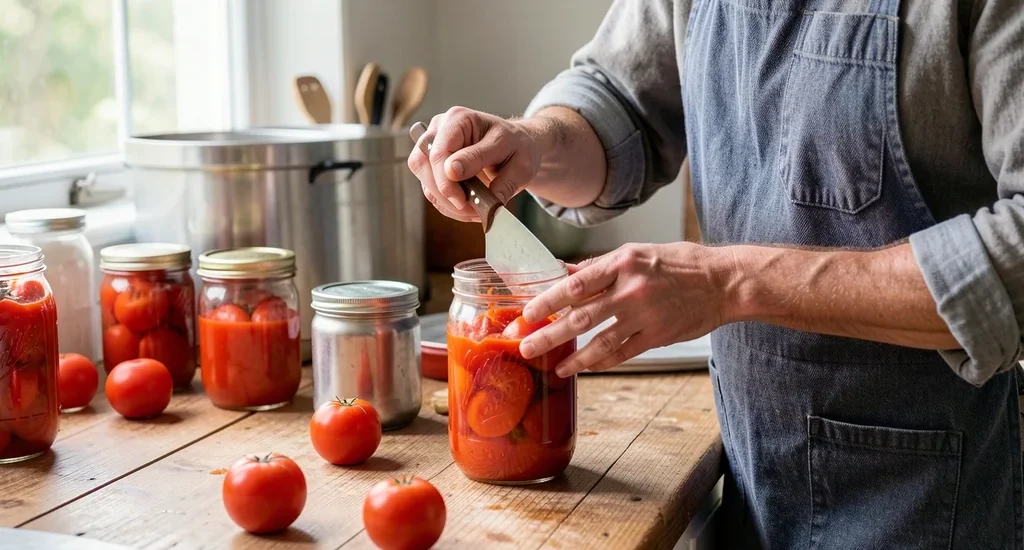
- Remove air bubbles: Use a bubble remover or clean knife to release trapped air.
- Wipe rims: Clean jar rims with a damp cloth to ensure a good seal.
- Apply lids: Place lids on jars and screw on rings fingertip tight.
- Process: Place jars in canner, ensuring they’re covered by 1-2 inches of water. Process pints for 40 minutes and quarts for 45 minutes at a rolling boil.
- Cool: Remove jars and place on a towel to cool for 12-24 hours.
Pressure Canning Method
- Prepare canner: Add 2-3 inches of water to the pressure canner and heat.
- Pack jars: Fill with tomatoes and acid, leaving 1 inch headspace.
- Process: Place jars in canner, lock the lid, and bring to pressure. Process pints for 10 minutes and quarts for 15 minutes at 10-11 pounds of pressure (adjust for altitude).
- Cool: Let pressure drop naturally, then remove jars to cool.
Tip: For best results, use a tested recipe from a reliable source like the USDA or National Center for Home Food Preservation.
Common Mistakes to Avoid
Even experienced canners can make mistakes that affect the quality and safety of their preserved tomatoes. Being aware of these common pitfalls helps ensure successful results every time.
Here are the most frequent mistakes and how to avoid them:
- Overpacking jars: Leaving insufficient headspace can prevent proper sealing and processing. Always leave the recommended headspace (1/2 inch for water bath, 1 inch for pressure canning).
- Using damaged jars or lids: Chipped jars or dented lids can compromise the seal. Always inspect equipment before use.
- Skipping acidification: Not adding enough acid can lead to unsafe pH levels. Always follow recommended guidelines.
- Improper cooling: Moving jars too soon or exposing them to drafts can cause seals to fail. Let jars cool undisturbed for 12-24 hours.
- Using old lids: Reusing lids can result in failed seals. Always use new lids for each canning session.
- Incorrect processing time: Under-processing can lead to spoilage. Always follow tested processing times for your altitude and jar size.
| Mistake | Risk | Solution |
|---|---|---|
| Underfilling jars | Poor seal, spoilage | Follow recommended headspace |
| Reusing lids | Failed seal | Use new lids each time |
| Skipping acid | Botulism risk | Always add recommended acid |
According to a study by the University of California, improper canning practices are responsible for most cases of home-canned food spoilage. Following tested procedures significantly reduces these risks.
Storing and Using Your Canned Tomatoes
Proper storage ensures your canning whole tomatoes efforts last as long as possible. With the right conditions, your preserved tomatoes can maintain quality for 12-18 months.
Here are the best practices for storing canned tomatoes:
- Cool, dark place: Store jars in a pantry or cupboard away from direct light and heat sources
- Consistent temperature: Avoid temperature fluctuations which can compromise seals
- Upright position: Store jars upright to prevent lid corrosion
- Check regularly: Inspect jars for signs of spoilage like bulging lids or leakage
- Rotate stock: Use oldest jars first to maintain freshness
Tip: Label each jar with the date and contents for easy identification.
When ready to use your canned tomatoes, there are countless ways to incorporate them into meals:
- Sauces: Crush or blend for pasta sauces, pizza sauce, or marinara
- Soups: Add to vegetable soup, chili, or minestrone
- Stews: Use in beef stew, chicken cacciatore, or ratatouille
- Casseroles: Incorporate into lasagna, baked ziti, or shepherd’s pie
- Salsa: Dice and mix with onions, peppers, and spices for fresh salsa
- Salads: Use whole in Greek salad or as a side dish
The USDA notes that canned tomatoes retain their nutritional value well, making them a healthy addition to any meal. Lycopene, in particular, becomes more available after the canning process.
Frequently Asked Questions
Do I need to add salt when canning whole tomatoes?
Salt is optional when canning tomatoes. It’s added for flavor, not preservation. If you choose to use salt, add 1/2 teaspoon per pint or 1 teaspoon per quart.
You can also add it when cooking with the tomatoes later.
Can I can tomatoes without peeling them?
While you can can tomatoes without peeling, it’s not recommended. The skins can toughen during processing and become unpleasant to eat. Blanching and peeling ensures a better texture in your finished product.
How do I know if my canned tomatoes have spoiled?
Signs of spoilage include bulging lids, leakage, off odors, or mold. If you notice any of these signs, discard the jar immediately. Never taste food from a jar that shows signs of spoilage.
Can I use a pressure cooker instead of a pressure canner?
No, pressure cookers (like Instant Pots) are not recommended for canning. They may not maintain consistent pressure and temperature needed for safe canning. Always use a dedicated pressure canner that meets USDA standards.
How long do canned whole tomatoes last?
Properly canned and stored tomatoes maintain best quality for 12-18 months. They’re still safe to eat beyond this time if the jar remains sealed and shows no signs of spoilage, but quality may decline.
Final Thoughts
Canning whole tomatoes is a rewarding way to preserve the garden’s bounty with minimal effort. By following these tested methods, you’ll enjoy the taste of summer all year long. Remember to prioritize safety with proper acidification and processing, and your canned tomatoes will be a pantry staple you reach for again and again.








