

Last Updated on October 22, 2026 by D. Ruddy
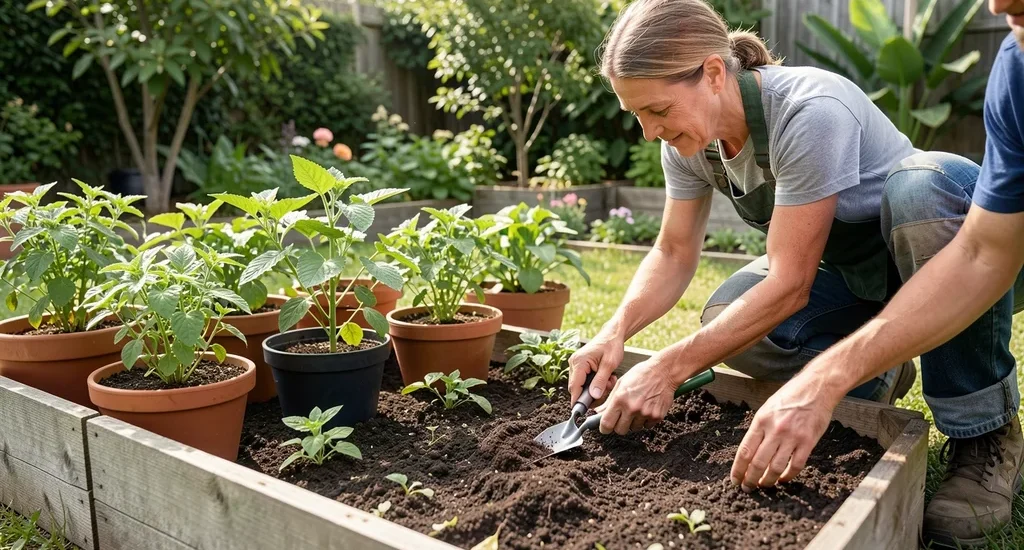
Starting a garden can feel overwhelming, but mastering gardening basics makes it simple and rewarding. Whether you have a sprawling backyard or just a few pots on a balcony, understanding the fundamentals ensures healthy plants and a thriving green space. This guide covers everything from soil preparation to plant care, helping you grow with confidence.
You can start a successful garden by choosing the right location, preparing nutrient-rich soil, selecting suitable plants, and providing consistent watering and sunlight. These core principles apply to all types of gardens.
Why Gardening Basics Matter for Success
Gardening is more than just digging and watering—it’s a science and an art. Without a solid grasp of gardening basics, even the most enthusiastic beginners can struggle with wilting plants, poor yields, or pest invasions. Learning the fundamentals saves time, money, and frustration.
According to the National Gardening Association, 77% of new gardeners who start with proper techniques continue gardening for years. This compares to just 30% of those who jump in without preparation. The difference comes down to understanding plant needs, soil health, and environmental factors.
- Prevents common mistakes like overwatering or poor plant spacing
- Boosts plant health with proper soil and nutrient management
- Increases yield through optimal growing conditions
- Saves money by reducing the need for replacements or fixes
- Builds confidence as you see your garden thrive
Important: Even experienced gardeners return to the basics when troubleshooting problems. Mastery starts with fundamentals.
Choosing the Perfect Garden Location
Location is everything in gardening. Most plants need 6-8 hours of direct sunlight daily, so observe your space throughout the day. South-facing areas typically get the most light, while north-facing spots may be too shady for sun-loving plants.
Consider these factors when selecting your garden spot:
- Sunlight exposure – Track sun patterns in different areas
- Soil quality – Avoid low spots where water pools
- Wind protection – Fences or buildings can shield delicate plants
- Access to water – Hose reach or irrigation setup is essential
- Proximity to home – Gardens near kitchens encourage regular care
| Sunlight Requirement | Suitable Plants |
|---|---|
| Full sun (6+ hours) | Tomatoes, peppers, roses, lavender |
| Partial sun (3-6 hours) | Lettuce, spinach, impatiens, hostas |
| Full shade (<3 hours) | Fern, coleus, begonia, mint |
For container gardening, ensure your balcony or patio gets adequate light. Many herbs and leafy greens thrive in partial sun, making them perfect for urban gardeners with limited space.
Understanding Soil Types and Preparation
Soil is the foundation of your garden. Healthy soil supports root development, retains moisture, and provides essential nutrients. The University of Massachusetts Amherst reports that improving soil quality can increase plant growth by up to 50%.
There are four main soil types, each with distinct characteristics:
- Clay soil – Heavy and dense, holds nutrients well but drains poorly
- Sandy soil – Light and gritty, drains quickly but doesn’t retain nutrients
- Silt soil – Smooth and fertile, holds moisture but can become compacted
- Loamy soil – Ideal blend of clay, sand, and silt with excellent drainage and fertility
| Soil Type | Pros | Cons | Improvement Tips |
|---|---|---|---|
| Clay | Rich in nutrients | Poor drainage, compacts easily | Add organic matter, avoid walking on wet soil |
| Sandy | Excellent drainage | Low nutrient content | Add compost, use mulch |
| Silt | Fertile, holds moisture | Can become waterlogged | Add sand, improve drainage |
| Loamy | Balanced, ideal for most plants | May need occasional replenishment | Maintain with regular compost |
To prepare your soil, start with a soil test available from garden centers or extension offices. This reveals pH levels and nutrient deficiencies. Most vegetables prefer slightly acidic to neutral soil (pH 6.0-7.0).
Amend your soil with organic matter like compost, aged manure, or peat moss to improve structure and fertility.
Tip: Create your own compost by layering green materials (fruit/vegetable scraps, grass clippings) with brown materials (dry leaves, straw) in a compost bin. Turn every few weeks for faster decomposition.
Essential Gardening Tools for Beginners
The right tools make gardening easier and more enjoyable. You don’t need an expensive arsenal to start—just a few quality basics. Invest in durable tools with comfortable grips to prevent hand strain during long gardening sessions.
Here are the must-have tools for any beginner gardener:
- Garden gloves – Protect your hands from thorns, dirt, and blisters. Look for breathable, flexible materials.
- Hand trowel – Essential for planting, transplanting, and digging small holes. Choose one with a sturdy metal blade.
- Pruning shears – Keep plants healthy by removing dead or damaged growth. Bypass pruners work best for most tasks.
- Garden fork – Loosen and aerate soil without damaging roots. Useful for turning compost piles too.
- Watering can or hose – Consistent moisture is key. A watering can with a removable rose is great for seedlings.
- Rake – Clear debris and level soil. A bow rake works for heavy-duty tasks, while a leaf rake is lighter.
- Wheelbarrow or garden cart – Transport soil, plants, and tools with ease. Look for sturdy handles and a deep basin.
| Tool | Primary Use | Estimated Cost |
|---|---|---|
| Hand trowel | Planting, digging | $10-$20 |
| Pruning shears | Trimming, shaping | $15-$30 |
| Garden fork | Soil aeration | $20-$40 |
| Watering can | Watering plants | $15-$25 |
| Wheelbarrow | Transporting materials | $50-$100 |
As you gain experience, you can add specialized tools like a soil pH tester, drip irrigation system, or ergonomic kneeler. But these basics will cover 90% of your early gardening tasks.
Selecting the Right Plants for Your Garden
Choosing plants that match your climate, soil, and sunlight conditions is crucial for success. Start with easy-to-grow varieties to build confidence. Consider your local hardiness zone, which determines which plants can survive winter temperatures in your area.
The USDA Plant Hardiness Zone Map divides North America into 13 zones based on average annual minimum temperatures. Find your zone using your ZIP code on the USDA website. Then select plants labeled for your zone or lower (cold-hardy plants can typically survive in warmer zones).
- Annuals – Complete their life cycle in one season (e.g., marigolds, basil)
- Perennials – Return year after year (e.g., daylilies, mint)
- Biennials – Two-year life cycle (e.g., carrots, foxglove)
- Native plants – Naturally occur in your region and require less maintenance
- Heirloom varieties – Open-pollinated plants with historical significance
Warning: Avoid invasive plant species that can spread aggressively and crowd out native plants. Check with your local extension office for a list of invasive plants in your area.
For beginners, these plants are excellent starting points:
| Plant Type | Easy Varieties | Care Level | Best For |
|---|---|---|---|
| Vegetables | Lettuce, radishes, green beans | Easy | Edible gardens |
| Herbs | Basil, mint, chives | Very easy | Container gardens |
| Flowers | Marigolds, sunflowers, zinnias | Easy | Pollinator gardens |
| Shrubs | Hydrangea, butterfly bush | Moderate | Landscaping |
When selecting plants, consider their mature size and growth habits. Tall plants should go at the back of beds, with medium and short plants in front. This ensures all plants get adequate sunlight.
Also, group plants with similar water and soil needs together for easier maintenance.
Planting Techniques for Healthy Growth
Proper planting techniques give your plants the best start. The method varies slightly depending on whether you’re planting seeds, seedlings, or mature plants. Always follow the specific instructions on seed packets or plant tags for best results.
Here’s a step-by-step guide for planting seedlings, which is the most common method for beginners:
- Prepare the soil – Loosen the soil to a depth of 12-18 inches and mix in compost or other organic matter. Remove any weeds, rocks, or debris.
- Dig the hole – Make the hole twice as wide as the root ball but no deeper. The top of the root ball should sit slightly above the surrounding soil level.
- Remove the plant – Gently squeeze the sides of the container and tip it sideways to slide out the plant. If the roots are tightly bound, gently tease them apart.
- Place the plant – Set the plant in the hole, ensuring it’s at the same depth it was in its container. The point where the stem meets the roots (crown) should be at soil level.
- Backfill the hole – Fill in around the plant with soil, pressing lightly to remove air pockets. Don’t pack the soil too tightly.
- Water thoroughly – Give the plant a deep watering to help it settle in. This also removes any remaining air pockets.
- Add mulch – Spread a 2-3 inch layer of mulch around the base of the plant to retain moisture and suppress weeds. Keep mulch away from the stem.
Tip: Water your seedlings in their containers before planting. This ensures they’re well-hydrated and makes them easier to remove from their pots.
For seeds, follow these additional guidelines:
- Check the seed packet for planting depth—most seeds need to be planted at a depth of 2-3 times their width
- Space seeds according to packet instructions to prevent overcrowding
- Keep the soil consistently moist but not waterlogged until seeds germinate
- Thin seedlings once they have their first true leaves to the recommended spacing
- Use a seed-starting mix rather than regular garden soil for better drainage
Watering Wisdom for Thriving Plants
Water is essential for plant growth, but too much or too little can cause problems. Most plants need about 1 inch of water per week, including rainfall. However, this varies based on plant type, soil, and weather conditions.
The best time to water is early in the morning. This allows plants to absorb moisture before the heat of the day and reduces evaporation. Avoid watering in the evening, as damp foliage overnight can encourage fungal diseases.
- Check soil moisture – Stick your finger 1-2 inches into the soil. If it feels dry, it’s time to water.
- Water deeply – Give plants a thorough soaking less frequently rather than light watering daily. This encourages deep root growth.
- Focus on the base – Water at the soil level rather than spraying leaves to prevent disease and ensure water reaches the roots.
- Use the right tool – A soaker hose or drip irrigation system delivers water directly to the soil and is more efficient than sprinklers.
- Adjust for weather – Plants need more water during hot, dry periods and less during cool, rainy weather.
- Consider plant needs – Succulents need less water, while leafy vegetables may need more frequent watering.
| Plant Type | Watering Frequency | Signs of Overwatering | Signs of Underwatering |
|---|---|---|---|
| Vegetables | 1-2 times per week | Yellow leaves, mushy stems | Wilting, dry soil |
| Herbs | When soil is dry | Root rot, mold | Drooping, crispy leaves |
| Flowers | 1-2 times per week | Leaf drop, fungal growth | Wilting, dry leaves |
| Succulents | Every 2-3 weeks | Black stems, mushy leaves | Wrinkled leaves, dry soil |
Consider installing a rain gauge to track rainfall accurately. This helps you determine when supplemental watering is needed. For container gardens, check moisture daily in hot weather, as pots dry out faster than in-ground plantings.
Fertilizing for Optimal Plant Health
Plants need nutrients to grow, and while soil provides some, most gardens benefit from additional fertilization. The three primary nutrients plants need are nitrogen (N), phosphorus (P), and potassium (K), often referred to as NPK on fertilizer labels.
Each nutrient plays a specific role in plant health:
- Nitrogen (N) – Promotes leafy growth and green color. Essential for vegetables like lettuce and spinach.
- Phosphorus (P) – Encourages root development and flowering. Important for fruiting plants like tomatoes and peppers.
- Potassium (K) – Strengthens plants and improves disease resistance. Helps with overall plant health and fruit quality.
Fertilizers come in organic and synthetic forms. Organic options, like compost, manure, or bone meal, release nutrients slowly and improve soil structure. Synthetic fertilizers provide immediate nutrients but can lead to salt buildup in the soil if overused.
| Fertilizer Type | NPK Ratio | Best For | Application Frequency |
|---|---|---|---|
| Compost | Varies | All plants, soil improvement | Annually or as needed |
| Balanced (10-10-10) | 10-10-10 | General garden use | Every 4-6 weeks |
| High nitrogen (20-10-5) | 20-10-5 | Leafy vegetables, lawns | Every 4-6 weeks |
| High phosphorus (5-10-5) | 5-10-5 | Flowering plants, fruiting vegetables | Every 4-6 weeks |
| Bone meal | 3-15-0 | Root crops, bulbs | At planting time |
Warning: Over-fertilizing can harm plants and pollute waterways. Always follow package instructions and err on the side of using less rather than more.
For most gardeners, a balanced, slow-release fertilizer applied at the beginning of the growing season provides sufficient nutrients. For heavy feeders like tomatoes or roses, supplemental feeding every few weeks may be beneficial. Remember that healthy soil with plenty of organic matter often reduces the need for additional fertilization.
Common Gardening Mistakes to Avoid
Even with the best intentions, beginners often make mistakes that can hinder their gardening success. Being aware of these common pitfalls helps you avoid them and sets you up for a more productive garden.
Here are the most frequent mistakes new gardeners make, along with how to prevent them:
- Overwatering or underwatering – Both can stress plants. The solution is to check soil moisture regularly and water based on plant needs and weather conditions. Stick to a consistent watering schedule rather than watering erratically.
- Ignoring soil health – Poor soil leads to weak plants. Always amend your soil with organic matter before planting and continue to add compost regularly. Healthy soil is the foundation of a healthy garden.
- Planting too close together – Overcrowding causes competition for nutrients, water, and sunlight. Follow spacing recommendations on seed packets or plant tags. Proper spacing also improves air circulation, reducing disease risk.
- Choosing the wrong plants – Selecting plants unsuitabled for your climate or growing conditions leads to disappointment. Research plants before purchasing and choose varieties that thrive in your specific conditions.
- Neglecting pest control – Waiting until pests are out of control makes treatment difficult. Monitor your garden regularly for signs of pests or disease. Early intervention with organic methods like neem oil or insecticidal soap is most effective.
- Skipping mulch – Bare soil loses moisture quickly and allows weeds to thrive. Apply a 2-3 inch layer of organic mulch around plants to retain moisture, suppress weeds, and regulate soil temperature.
- Not rotating crops – Planting the same crops in the same spot year after year depletes soil nutrients and encourages pests and diseases. Practice crop rotation by moving plant families to different locations each season.
Important: Keep a garden journal to track what you plant, when you plant it, and how well it performs. Note weather conditions, pest issues, and harvest times. This information becomes invaluable for planning future gardens.
Another common mistake is giving up too soon. Gardening is a learning process, and even experienced gardeners have failures. Don’t be discouraged by setbacks.
Instead, view them as opportunities to learn and improve your skills.
Frequently Asked Questions
How often should I water my garden?
Most gardens need about 1 inch of water per week, including rainfall. This typically translates to watering 1-2 times per week, depending on your soil, plant types, and weather conditions. Always check soil moisture before watering—if the top 1-2 inches of soil are dry, it’s time to water.
Container gardens may need daily watering in hot weather.
What is the best soil for gardening?
Loamy soil, which is a balanced mixture of clay, sand, and silt, is considered ideal for most plants. It provides good drainage while retaining moisture and nutrients. If your soil isn’t naturally loamy, you can improve it by adding organic matter like compost, aged manure, or peat moss.
A soil test can help you determine your soil’s composition and pH level.
When is the best time to start a garden?
The best time to start a garden depends on your climate and what you want to grow. In most regions, spring is the primary planting season for warm-season crops like tomatoes, peppers, and cucumbers. Cool-season crops like lettuce, spinach, and peas can be planted in early spring or fall.
For the most accurate timing, check the average last frost date for your area and follow the planting guidelines on seed packets or plant tags.
How do I keep pests out of my garden?
Preventing pests starts with healthy plants and good garden practices. Rotate crops annually, remove plant debris, and maintain proper spacing for good air circulation. Encourage beneficial insects like ladybugs and lacewings by planting pollinator-friendly flowers.
For existing pest problems, try organic solutions first, such as hand-picking pests, using insecticidal soap, or applying neem oil. Physical barriers like row covers can also be effective for many pests.
Do I need to fertilize my garden?
Most gardens benefit from some form of fertilization, but the need depends on your soil quality and what you’re growing. If your soil is rich in organic matter, you may need less fertilizer. Heavy feeders like tomatoes, peppers, and roses often require more frequent fertilization.
Organic options like compost and manure improve soil health while providing nutrients. Always follow package instructions for synthetic fertilizers to avoid over-application, which can harm plants and the environment.
Final Thoughts
Mastering gardening basics transforms what might seem like a daunting task into an enjoyable and rewarding experience. Start with good soil, choose the right plants for your conditions, and provide consistent care. Remember that every gardener, from beginner to expert, continues learning with each season.
The key is to start small, stay consistent, and enjoy the process of watching your garden grow.








