Last Updated on October 22, 2026 by D. Ruddy
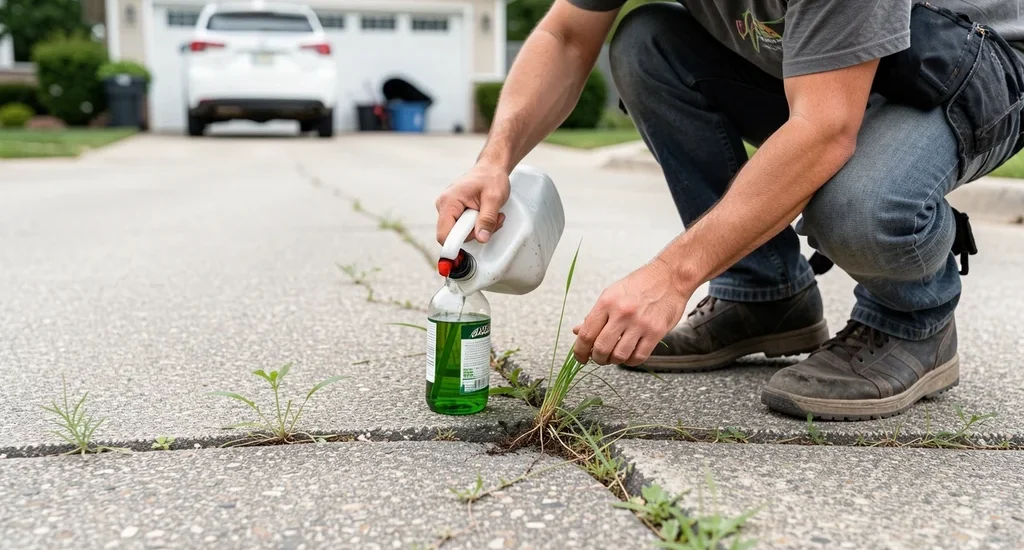
Unsightly weeds sprouting between driveway cracks can turn a clean entrance into an eyesore. Kill weeds in driveway effectively with methods that target the roots without harming your pavement or the environment. This guide covers natural, chemical, and preventive approaches to keep your driveway pristine all year round.
The most effective way to kill weeds in driveway is a mix of vinegar-based sprays for immediate results and boiling water for deep root destruction. For long-term prevention, apply a commercial weed barrier after cleaning the area thoroughly.
Why Weeds Grow in Driveways
Weeds thrive in driveways because the cracks and crevices collect soil, moisture, and organic debris—perfect conditions for seeds to germinate. Asphalt and concrete are porous, allowing water to seep beneath the surface, which encourages root growth. Over time, these roots can expand the cracks, leading to more significant damage.
- Soil accumulation in gaps provides a fertile bed for seeds
- Moisture retention from rain or irrigation keeps seeds alive
- Lack of competition from other plants lets weeds spread
- Temperature fluctuations create microclimates that aid growth
- Poor maintenance allows cracks to widen over time
According to the University of California Statewide Integrated Pest Management Program, a single weed can produce thousands of seeds, which can lie dormant for years until conditions are right. This means that even if you pull weeds today, new ones can appear tomorrow if the underlying conditions aren’t addressed.
Tip: Regularly sweep your driveway to remove soil and organic debris that can accumulate in cracks and support weed growth.
Natural Methods to Kill Driveway Weeds
Natural weed killers are safe for pets, children, and the environment while still being tough on weeds. These methods are ideal for homeowners who prefer chemical-free solutions.
White Vinegar Solution
A mixture of white vinegar, salt, and dish soap can kill weeds within 24 hours. The acetic acid in vinegar dries out the plants, while salt prevents regrowth, and dish soap helps the solution stick to the leaves.
- Mix 1 gallon of white vinegar (5% acetic acid or higher)
- Add 1 cup of table salt
- Include 1 tablespoon of dish soap
- Spray directly onto weeds on a sunny day for best results
| Method | Effectiveness | Time to Results | Best For |
|---|---|---|---|
| White vinegar spray | High (kills most weeds) | 1-2 days | Annual and perennial weeds |
| Boiling water | Medium (kills roots) | Immediate | Cracks and small areas |
| Baking soda paste | Low-Medium (slower action) | 3-5 days | Patios and walkways |
The vinegar method works best when the solution is applied directly to the leaves of the weeds. Avoid spraying on nearby grass or plants, as vinegar is non-selective and will kill any vegetation it touches.
Boiling Water
Boiling water is one of the simplest and most effective ways to kill weeds in driveway cracks. The extreme heat destroys the plant cells and roots, preventing regrowth. This method is particularly useful for weeds growing in small, isolated cracks.
- Boil a kettle or pot of water.
- Carefully pour the boiling water directly onto the weeds, focusing on the roots.
- Repeat every few days if new weeds appear.
Warning: Be cautious when handling boiling water to avoid burns. Keep children and pets away from the area until the water cools.
Baking Soda and Water Paste
Baking soda is a mild, natural herbicide that can be used to kill weeds in driveway cracks. It works by disrupting the pH balance of the soil, making it inhospitable for weeds. To use this method, mix baking soda with water to form a paste and apply it directly to the weeds.
- Mix 4 tablespoons of baking soda with 1 quart of water
- Stir until the baking soda dissolves
- Use a spray bottle or brush to apply the solution to the weeds
- Reapply every 1-2 weeks until the weeds die
Baking soda is less aggressive than vinegar or boiling water, making it a good option for areas where you want to minimize the risk of damaging nearby plants.
Chemical Weed Killers for Driveways
If natural methods aren’t effective, chemical herbicides can provide a more powerful solution. These products are designed to kill weeds quickly and prevent regrowth for extended periods.
Glyphosate-Based Herbicides
Glyphosate is a systemic herbicide that kills weeds by inhibiting a specific enzyme pathway found in plants. It is absorbed through the leaves and transported to the roots, ensuring complete eradication. Products like Roundup are widely available and highly effective.
- Fast-acting with visible results in 1-2 weeks
- Non-selective—kills all vegetation it touches
- Long-lasting—prevents regrowth for several months
- Easy to apply with a spray bottle or hose attachment
| Product | Active Ingredient | Effectiveness | Best For |
|---|---|---|---|
| Roundup Weed & Grass Killer | Glyphosate (18%) | High (kills most weeds) | Large driveways, stubborn weeds |
| Spectracide Weed & Grass Killer | Glyphosate (20%) | Very High (fast-acting) | Fast results, heavy infestations |
| Compare-N-Save Concentrate | Glyphosate (41%) | High (concentrated) | Large areas, cost-effective |
When using glyphosate-based herbicides, always follow the manufacturer’s instructions for application and safety. Wear gloves and protective clothing, and avoid spraying on windy days to prevent drift onto desirable plants.
Pre-Emergent Herbicides
Pre-emergent herbicides work by creating a barrier in the soil that prevents weed seeds from germinating. These products are ideal for preventing new weeds from growing in your driveway. Apply pre-emergent herbicides in early spring before weed seeds begin to sprout.
- Barricade 4FL (Prodiamine) – lasts up to 6 months
- Dimension 2EW (Dithiopyr) – effective for 4-6 months
- Preen Garden Weed Preventer – granular, easy to apply
Pre-emergent herbicides are most effective when applied to clean, dry surfaces. Water the area lightly after application to activate the herbicide.
Important: Chemical herbicides can leach into the soil and water supply. Always use them responsibly and consider natural alternatives for environmentally sensitive areas.
Step by Step Guide to Remove Weeds from Driveway
Follow this step-by-step process to effectively kill weeds in driveway and prevent them from returning.
Step 1: Clear the Area
Remove any debris, loose soil, or organic matter from the cracks and edges of your driveway. Use a broom, leaf blower, or pressure washer to clean the surface thoroughly. This step ensures that the weed killer can reach the roots directly.
- Sweep away leaves, dirt, and small rocks
- Use a pressure washer for deep cleaning (1,500-2,000 PSI recommended)
- Pull any large weeds by hand if possible
Step 2: Choose Your Weed Killer
Select the appropriate weed killer based on the type of weeds and the size of the infestation. For small areas, natural methods like vinegar or boiling water may suffice. For larger or more stubborn weeds, consider chemical herbicides.
- For small cracks – use boiling water or vinegar spray
- For large areas – use glyphosate-based herbicides
- For prevention – apply pre-emergent herbicides
Step 3: Apply the Weed Killer
Apply your chosen weed killer according to the instructions. For liquid sprays, use a spray bottle or garden sprayer for even coverage. For granular products, use a spreader to ensure uniform distribution.
- Spray on a dry, calm day to avoid runoff or drift
- Focus on the leaves and roots of the weeds
- Reapply as needed, following the product’s recommended schedule
Step 4: Remove Dead Weeds
After the weeds have died (usually within 1-2 weeks for chemical herbicides or 1-2 days for natural methods), remove the dead plants from the cracks. Use a hand tool, such as a weeding knife or screwdriver, to scrape out the roots and debris.
- Pull out dead weeds with a weed puller or pliers
- Use a wire brush to clean out cracks
- Dispose of weeds in a compost bin or yard waste bag
Step 5: Seal the Cracks
To prevent future weed growth, fill the cracks in your driveway with a sealant or filler. This step is crucial for long-term weed control, as it eliminates the spaces where weeds can take root.
- Use asphalt crack filler for asphalt driveways
- Use concrete patch compound for concrete driveways
- Apply polymeric sand for paver driveways
Step 6: Apply a Weed Barrier
After sealing the cracks, apply a weed barrier to further prevent regrowth. Commercial weed barriers, such as landscape fabric or pre-emergent herbicides, can be highly effective.
- Lay down landscape fabric under gravel or pavers
- Apply a pre-emergent herbicide to the entire driveway surface
- Use corn gluten meal as a natural pre-emergent
Preventing Weeds from Returning
Prevention is the key to maintaining a weed-free driveway. By taking proactive steps, you can minimize the need for repeated weed control treatments.
Regular Cleaning
Keep your driveway clean and free of debris to reduce the chances of weed seeds taking root. Regular sweeping and occasional pressure washing can remove soil and organic matter that weeds need to grow.
- Sweep the driveway weekly to remove leaves and dirt
- Use a leaf blower for larger driveways
- Pressure wash every 3-6 months to deep clean cracks
Seal Cracks Promptly
Inspect your driveway regularly for new cracks and seal them as soon as possible. Small cracks can quickly become home to weeds if left unaddressed. Use high-quality sealants designed for your driveway material (asphalt, concrete, or pavers).
- Inspect driveway every 3 months for new cracks
- Clean cracks with a wire brush or pressure washer
- Apply sealant according to manufacturer instructions
Apply a Weed Barrier
Weed barriers create a physical or chemical barrier that prevents weeds from growing. Landscape fabric is a physical barrier that can be laid under gravel or pavers, while pre-emergent herbicides create a chemical barrier in the soil.
| Barrier Type | Lifespan | Best For | Cost |
|---|---|---|---|
| Landscape fabric | 5-10 years | Gravel or paver driveways | $0.50-$2 per sq ft |
| Pre-emergent herbicide | 4-6 months | All driveway types | $20-$50 per bottle |
| Corn gluten meal | 3-4 months | Organic prevention | $10-$30 per bag |
Use Salt or Vinegar as a Preventative
In addition to using them as weed killers, salt and vinegar can also be used as preventative measures. Sprinkle salt in the cracks of your driveway to create an inhospitable environment for weeds. Alternatively, spray a vinegar solution on the driveway surface every few months to deter new growth.
- Sprinkle rock salt or table salt in cracks
- Spray a vinegar and water solution monthly
- Reapply after rain or heavy watering
Tip: For a long-term solution, combine multiple prevention methods, such as sealing cracks, applying a weed barrier, and regular cleaning.
Common Mistakes to Avoid
Even with the best intentions, homeowners often make mistakes that can hinder their efforts to kill weeds in driveway effectively. Avoid these common pitfalls to ensure success.
Using Too Much Herbicide
Over-applying chemical herbicides can damage your driveway and the surrounding environment. It can also lead to runoff, which may harm desirable plants or contaminate water sources. Always follow the manufacturer’s instructions for the correct dosage.
- Read the product label for application rates
- Use a measured sprayer for accuracy
- Avoid applying herbicides before rain
Ignoring the Roots
Many people make the mistake of only treating the visible parts of the weeds, such as the leaves and stems. However, to effectively kill weeds, you must target the roots. If the roots are left intact, the weeds will likely regrow.
- Use methods that penetrate the soil (e.g., boiling water, vinegar)
- Pull weeds by hand to remove roots
- Reapply treatments to ensure root death
Not Sealing Cracks
Failing to seal cracks after removing weeds is a common mistake that allows weeds to return quickly. Sealing cracks not only prevents weeds but also extends the life of your driveway by reducing water infiltration and freeze-thaw damage.
- Clean cracks thoroughly before sealing
- Use the right sealant for your driveway material
- Reapply sealant every 1-2 years or as needed
Using the Wrong Tools
Using improper tools can make weed removal less effective and more time-consuming. For example, using a regular garden hoe may not be sufficient for removing weeds from cracks. Instead, use specialized tools like weed pullers, crack scrapers, or wire brushes.
- Use a weed puller for deep roots
- Use a wire brush to clean cracks
- Use a pressure washer for large areas
Neglecting Prevention
Many homeowners focus solely on killing existing weeds without implementing preventive measures. Without prevention, weeds will continue to return, requiring repeated treatments. Incorporate preventive steps, such as sealing cracks and applying weed barriers, into your routine.
- Apply pre-emergent herbicides in early spring
- Seal cracks promptly
- Keep the driveway clean and debris-free
Best Tools for Weed Removal in Driveways
Having the right tools can make the process of removing weeds from your driveway much easier and more effective. Here are some of the best tools for the job.
Hand Tools
Hand tools are ideal for small driveways or spot treatments. They allow for precise weed removal without damaging the surrounding pavement.
- Weed Puller – designed to remove weeds by the roots with minimal effort
- Crack Scraper – used to clean out cracks and remove weeds
- Wire Brush – effective for scrubbing weeds out of cracks
- Pliers – useful for pulling stubborn weeds
Power Tools
For larger driveways or heavy weed infestations, power tools can save time and effort. These tools are more expensive but highly effective for tough jobs.
- Pressure Washer – removes weeds and cleans the driveway surface
- Weed Torch – uses heat to kill weeds (be cautious with flammable materials)
- String Trimmer – cuts down weeds along the edges of the driveway
Sprayers and Applicators
Sprayers and applicators are essential for applying liquid weed killers evenly and accurately. They come in various sizes and styles to suit different needs.
| Tool | Best For | Pros | Cons |
|---|---|---|---|
| Handheld Sprayer | Small areas, spot treatments | Affordable, easy to use | Limited capacity |
| Backpack Sprayer | Large driveways, heavy infestations | High capacity, comfortable | More expensive |
| Hose-End Sprayer | Large areas, even coverage | Covers large areas quickly | Less precise, requires hose |
Choose the right tool based on the size of your driveway and the severity of the weed infestation. For most homeowners, a handheld sprayer and a few hand tools will be sufficient.
Frequently Asked Questions
How often should I treat my driveway for weeds?
For natural methods like vinegar or boiling water, reapply every 1-2 weeks until the weeds are gone, then switch to a preventive treatment like sealing cracks or applying a weed barrier. For chemical herbicides, follow the product’s recommended schedule, which is typically every 3-6 months. Regular maintenance, such as sweeping and sealing cracks, can reduce the need for frequent treatments.
Can I use bleach to kill weeds in my driveway?
While bleach can kill weeds, it is not recommended for use on driveways. Bleach can damage the pavement, discolor the surface, and harm the environment. It can also kill nearby plants and contaminate soil and water sources.
Stick to safer alternatives like vinegar, boiling water, or commercial herbicides.
Will vinegar kill weeds permanently?
Vinegar can kill the visible parts of weeds and even some roots, but it may not eliminate deep or extensive root systems permanently. For long-term control, combine vinegar treatments with other methods, such as sealing cracks and applying a weed barrier. Reapply vinegar every few weeks to prevent new growth.
What is the best time of year to kill weeds in my driveway?
The best time to treat weeds is in the spring or early summer, when weeds are actively growing and more susceptible to herbicides. This is also the ideal time to apply pre-emergent herbicides to prevent new weeds from sprouting. Fall is another good time to treat weeds, as they are preparing for winter and may be more vulnerable to treatments.
How do I prevent weeds from growing back after treatment?
To prevent weeds from returning, start by sealing any cracks or gaps in your driveway with an appropriate sealant. Apply a weed barrier, such as landscape fabric or a pre-emergent herbicide, to create a protective layer. Regularly clean your driveway to remove debris and keep it free of organic matter.
Reapply preventive treatments as needed, following the product’s instructions.
Final Thoughts
Keeping your driveway weed-free requires a combination of effective removal methods and proactive prevention. Whether you choose natural solutions like vinegar and boiling water or opt for chemical herbicides, consistency is key. Regular maintenance, such as sealing cracks and cleaning the surface, will help you kill weeds in driveway and enjoy a clean, attractive entrance to your home for years to come.