Last Updated on October 11, 2026 by D. Ruddy
Winterizing a riding lawn mower is the single most effective way to protect your investment and ensure it starts reliably when spring arrives. Skipping this process often leads to clogged carburetors, frozen batteries, and rusted decks that cost hundreds of dollars in repairs.
Simply put, winterizing your mower involves cleaning the deck, stabilizing the fuel, changing the oil, protecting the battery, and storing the machine in a dry environment. These five steps prevent corrosion and mechanical failure during the cold months.
Key Takeaways
- Stabilize the fuel or drain the tank completely to prevent varnish buildup in the carburetor.
- Change the engine oil before storage to remove acidic contaminants that corrode internal parts.
- Clean the mower deck thoroughly to eliminate grass clumps that trap moisture and cause rust.
- Maintain the battery charge using a trickle charger to avoid sulfation and permanent capacity loss.
- Lubricate moving parts like pivot points and cables to prevent seizing during long periods of inactivity.
Why You Must Winterize Your Riding Lawn Mower Now
Leaving your equipment exposed to freezing temperatures without preparation invites significant damage. Moisture condenses inside the engine and under the deck, creating an ideal environment for rapid oxidation. This rust weakens structural integrity and seizes critical components like bearings and bolts.
The American Society of Agricultural Engineers notes that improper storage accounts for nearly 30% of premature equipment failures. Most of these issues stem from fuel degradation and lack of lubrication. Addressing these risks now saves money later.
🍂 The Silent Lawn Killer: Damp Leaves Will Suffocate Your Grass
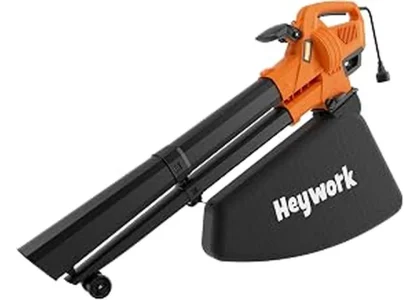
Trapped wet leaves create a breeding ground for destructive snow mold. Clear the yard fast with a high-power cordless blower before the ground freezes.
- Rust forms quickly on steel decks if left wet or dirty.
- Old gasoline turns into gum-like varnish that blocks fuel lines.
- Batteries lose charge rapidly in cold weather, leading to death.
- Dry rot affects rubber hoses and belts over time.
- Pests nest in warm engines, chewing through wiring harnesses.
Step 1: Clean the Deck and Undercarriage Thoroughly
A clean mower is a protected mower. Grass clippings hold water against the metal surface, accelerating rust formation even after the frost melts. Start by removing the spark plug wire to prevent accidental starting.
Then, tilt the mower safely or use a jack stand to access the underside.
Use a stiff brush or plastic scraper to remove caked-on debris. Avoid high-pressure washers near electrical connections or bearings, as they can force water into sealed areas where it causes immediate corrosion. A garden hose with a mild detergent works best for general cleaning.
| Cleaning Tool | Best Use Case |
|---|---|
| Plastic Scraper | Removing hard-packed mud and old grass |
| Stiff Bristle Brush | Loosening light debris around blades |
| Garden Hose | Rinsing off soap and loose dirt |
| Compressed Air | Blowing out crevices (use caution) |
After washing, let the deck dry completely in the sun. Apply a coat of silicone-based rust inhibitor or WD-40 Specialist Corrosion Inhibitor to all bare metal surfaces. This creates a barrier against humidity during storage.
Warning: Never wear gloves made of cotton when handling sharp mower blades. Cut-resistant gloves are essential to prevent serious injury while scraping the deck.
Step 2: Manage Fuel System Before Storage
Fuel management is arguably the most critical part of winterizing a riding lawn mower. Gasoline begins to degrade within 30 days. By the time spring arrives, untreated fuel has likely turned into ethanol sludge and varnish.
🍂 The Silent Lawn Killer: Damp Leaves Will Suffocate Your Grass
Trapped wet leaves create a breeding ground for destructive snow mold. Clear the yard fast with a high-power cordless blower before the ground freezes.
This residue clogs jets, filters, and carburetor passages, making startup impossible.
You have two primary options: add a fuel stabilizer or drain the system entirely. Adding stabilizer is easier and recommended for modern EFI engines. Drainage is safer for older carbureted machines prone to sticking floats.
- Add the correct amount of stabilizer to a full tank of fresh gas.
- Run the engine for ten minutes to circulate treated fuel.
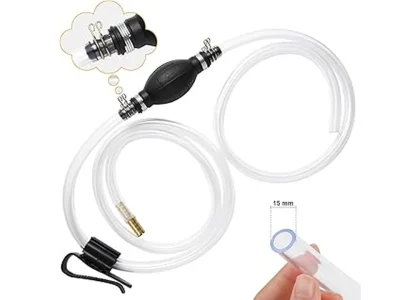
- Alternatively, siphon all fuel from the tank into an approved container.
- Start the engine and let it stall to clear remaining fuel from lines.
- Store empty cans in a well-ventilated area away from heat sources.
If you choose stabilization, ensure the tank is filled to minimize air space. Less oxygen means slower degradation rates. According to Briggs & Stratton technical bulletins, stabilized fuel remains viable for up to 24 months, covering any reasonable winter period.
Step 3: Change Engine Oil and Filter
Used engine oil contains combustion byproducts, acids, and microscopic metal shavings. Leaving this contaminated fluid in the crankcase overnight allows corrosive elements to eat away at bearing surfaces and cylinder walls. Fresh oil protects internal components during idle periods.
Warm the engine slightly before draining to improve flow. Place a catch pan underneath and remove the drain plug. Allow all old oil to exit completely.
Replace the oil filter if your model uses one, ensuring the new gasket is lightly oiled before installation.
🍂 The Silent Lawn Killer: Damp Leaves Will Suffocate Your Grass
Trapped wet leaves create a breeding ground for destructive snow mold. Clear the yard fast with a high-power cordless blower before the ground freezes.
| Oil Type | Recommendation |
|---|---|
| SAE 30 | Good for consistent warm climates |
| 10W-30 | Versatile for varying temperatures |
| Synthetic Blend | Better protection against sludge formation |
| Full Synthetic | Maximum longevity and cold-start ease |
Refill with the manufacturer-specified grade and quantity. Run the engine briefly to build pressure, then shut it off. Check the dipstick level again after waiting five minutes.
Wipe down the exterior to spot potential leaks early.
Important: Dispose of used motor oil responsibly. Many auto parts stores accept waste oil for free recycling. Never dump it on the ground or into storm drains.
Step 4: Protect the Battery from Cold Damage
Lead-acid batteries suffer greatly in freezing conditions. A discharged battery freezes at roughly -10°F, expanding internally and cracking the case. Even a charged battery loses capacity faster in extreme cold.
Proper care ensures reliable ignition next season.
🍂 The Silent Lawn Killer: Damp Leaves Will Suffocate Your Grass
Trapped wet leaves create a breeding ground for destructive snow mold. Clear the yard fast with a high-power cordless blower before the ground freezes.
Remove the battery terminals, starting with the negative cable. Lift the unit out carefully; it weighs more than it looks. Clean both posts and connectors with a baking soda solution to neutralize acid corrosion.
Rinse with water and dry thoroughly.
- Inspect casing for cracks or bulging signs.
- Check electrolyte levels if accessible via caps.
- Top up with distilled water if plates are exposed.
- Apply terminal grease to prevent future oxidation.
- Connect to a smart trickle charger indoors.
Store the battery in a cool, dry place above freezing temperature. If you cannot bring it indoors, keep it connected to a maintainer plugged into a garage outlet. The National Association of Chain Stores reports that battery maintainers extend lifespan by reducing sulfate crystal buildup significantly.
Step 5: Lubricate Moving Parts and Cables
Metal-on-metal friction causes wear even when stationary. Dust and moisture settle on unlubricated pivots, turning them into abrasive paste. Greasing key points prevents seizing and makes adjustments smoother later.
Focus on areas that move during operation.
Locate zerks fittings on lift arms, steering linkages, and pedal assemblies. Pump grease until it purges old lubricant. Spray penetrating oil on throttle and choke cables to ensure smooth actuation.
🍂 The Silent Lawn Killer: Damp Leaves Will Suffocate Your Grass
Trapped wet leaves create a breeding ground for destructive snow mold. Clear the yard fast with a high-power cordless blower before the ground freezes.
Coat blade spindles lightly to displace moisture.
| Component | Lubricant Type |
|---|---|
| Steering Linkage | Multi-purpose Lithium Grease |
| Throttle Cable | Dry PTFE Spray |
| Deck Spindles | High-Temp Bearing Grease |
| Adjustment Bolts | Penetrating Oil (WD-40) |
Do not over-grease seals, as excess pressure can blow out dust caps. Wipe away surplus lubricant to prevent attracting dirt. Pay special attention to height adjustment levers, which often stick due to neglected maintenance.
Step 6: Prepare Tires and Final Storage Location
Tires deform permanently if left flat for months. Flat spots create vibration and uneven wear once driving resumes. Inflate tires to the upper limit specified on the sidewall, typically between 12-15 PSI for residential mowers.
This maintains shape and reduces stress on the carcass.
Select a storage site that is dry, secure, and rodent-proof. Concrete floors are preferable to dirt or gravel, which retain moisture. Cover the entire machine with a breathable canvas tarp.
Plastic sheeting traps condensation underneath, promoting mold and rust growth.
🍂 The Silent Lawn Killer: Damp Leaves Will Suffocate Your Grass
Trapped wet leaves create a breeding ground for destructive snow mold. Clear the yard fast with a high-power cordless blower before the ground freezes.
- Elevate the mower on stands if possible to relieve tire load.
- Place mouse repellent packets inside the seat compartment.
- Ensure ventilation exists around the covered unit.
- Avoid storing near chemicals or flammable materials.
- Lock wheels or engage parking brake to prevent rolling.
Finally, document the condition of the mower. Take photos of serial numbers and current hour meter readings. This record helps track usage patterns and verifies warranty status if claims arise later.
Keeping detailed logs proves valuable for resale value too.
Frequently Asked Questions
Can I store my mower outside in winter?
No, outdoor exposure accelerates rust and UV damage to plastics. Always store your riding mower in a shed, garage, or barn. If absolutely necessary, use a heavy-duty waterproof cover, but expect reduced lifespan compared to indoor storage.
How long does fuel stabilizer last?
Most quality stabilizers protect gasoline for up to 24 months. However, effectiveness diminishes if the fuel was already old when added. Always mix stabilizer with fresh pump gas for maximum protection throughout the winter season.
Do I need to disconnect the battery?
Yes, disconnecting the battery prevents parasitic drains from slowly killing it. Even with a maintainer, physical removal stops accidental short circuits caused by tools or rodents contacting terminals directly on the chassis.
🍂 The Silent Lawn Killer: Damp Leaves Will Suffocate Your Grass
Trapped wet leaves create a breeding ground for destructive snow mold. Clear the yard fast with a high-power cordless blower before the ground freezes.
Should I sharpen blades before winterizing?
It is better to sharpen blades in spring rather than fall. Sharp edges oxidize faster and become brittle in cold weather. Duller blades tolerate minor nicks better during storage and reduce risk of accidental cuts during handling.
What happens if I skip winterization?
Skipping steps often results in a dead battery, clogged carburetor, and rusty deck. Repairs frequently exceed $200-$500 depending on severity. Prevention costs less than $50 in supplies and takes about two hours of labor.
Final Thoughts
Winterizing a riding lawn mower requires minimal effort but delivers substantial returns in reliability and longevity. By following these six core steps—cleaning, fuel management, oil change, battery care, lubrication, and proper storage—you safeguard your equipment against seasonal hazards. Consistent maintenance transforms annual chores into effortless tasks.
Enjoy your downtime knowing your gear is ready for action when snow melts.