Last Updated on October 22, 2026 by D. Ruddy
Spring is the perfect time to dig into gardening, and starting a vegetable patch can be simpler than you think. How to start a vegetable garden in spring begins with choosing the right location, preparing the soil, and selecting crops that thrive in cooler temperatures. This guide covers everything from soil prep to planting schedules so you can grow fresh produce without the guesswork.
Start by picking a sunny spot with at least 6-8 hours of sunlight daily. Test and amend your soil with compost, then plant cool-season crops like lettuce, peas, and carrots. Water consistently and protect young plants from late frosts to ensure a strong start.
What You Need to Start a Spring Vegetable Garden
Before breaking ground, gather the essentials to set your garden up for success. The right tools and materials save time and prevent common mistakes. You don’t need expensive equipment—just the basics to get started.
- Basic Tools: Trowel, garden fork, rake, hand pruners, and a watering can or hose with a gentle spray nozzle.
- Soil Amendments: Compost, aged manure, or organic fertilizer to improve soil fertility.
- Seeds or Seedlings: Choose high-quality, disease-resistant varieties suited for spring planting.
- Mulch: Straw, wood chips, or leaves to retain moisture and suppress weeds.
- Garden Beds: Raised beds, containers, or a well-prepared in-ground plot.
- Support Structures: Trellises or stakes for climbing plants like peas and beans.
- Protection: Row covers or cloches to shield young plants from cold snaps.
According to the University of Minnesota Extension, adding 2-3 inches of compost to your soil can improve its structure and nutrient content by up to 40%. Investing in a soil test kit is also wise—it helps you understand pH levels and nutrient deficiencies.
Tip: If your soil is heavy clay or sandy, consider raised beds. They warm up faster in spring and offer better drainage.
Choosing the Best Location for Your Garden
Sunlight is the most critical factor in garden placement. Most vegetables need full sun, which means at least 6-8 hours of direct sunlight per day. South-facing spots typically get the most light, but east-facing areas can work well for morning sun lovers.
| Sunlight Needs | Vegetables |
|---|---|
| Full Sun (6-8+ hours) | Tomatoes, Peppers, Cucumbers, Squash, Beans |
| Partial Sun (4-6 hours) | Lettuce, Spinach, Kale, Radishes, Carrots |
| Shade Tolerant (2-4 hours) | Leafy Greens, Herbs, Peas |
Avoid low-lying areas where water pools after rain, as this can lead to root rot. Also, steer clear of spots near large trees or shrubs—their roots compete for water and nutrients. If space is limited, containers on a sunny patio or balcony can work just as well.
Proximity to a water source is another key consideration. Lugging water cans across a yard gets old fast, so plan your garden within hose reach.
Preparing Your Soil for Spring Planting
Healthy soil is the foundation of a productive garden. Spring soil prep starts in late winter or early spring, as soon as the ground is workable. Working wet soil can compact it, so wait until it crumbles easily in your hand.
- Clear the Area: Remove weeds, rocks, and debris from your chosen spot. Weeds compete with your vegetables for nutrients and water.
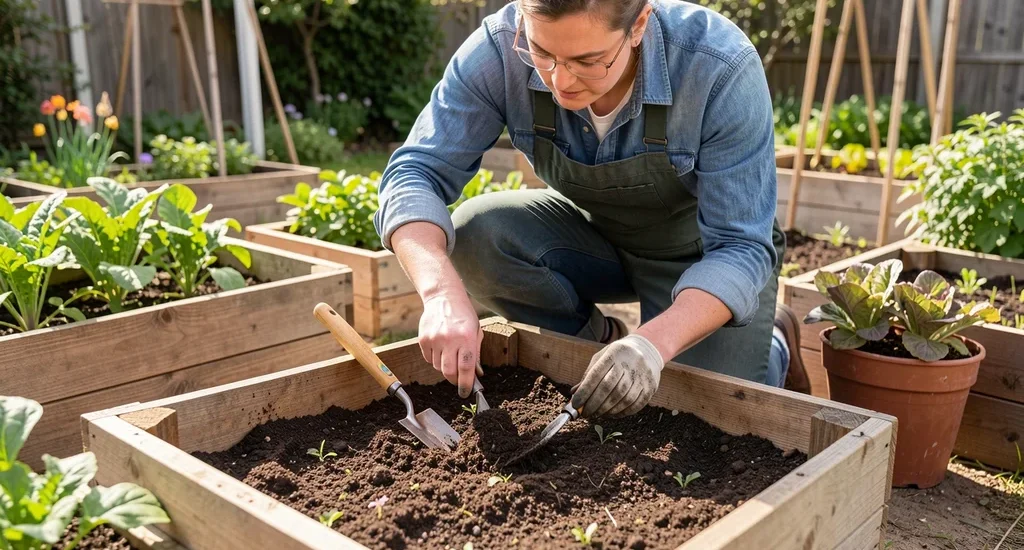
- Loosen the Soil: Use a garden fork or tiller to break up the top 12-18 inches of soil. This improves drainage and allows roots to penetrate easily.
- Add Organic Matter: Mix in 2-3 inches of compost or well-rotted manure. This boosts fertility and improves soil structure.
- Test Soil pH: Most vegetables prefer a pH between 6.0 and 7.0. Home test kits are inexpensive and easy to use.
- Amend as Needed: If your soil is too acidic, add lime. If it’s too alkaline, add sulfur or peat moss.
The Old Farmer’s Almanac reports that improving soil with organic matter can increase vegetable yields by 20-30%. If you’re unsure about your soil’s health, consider sending a sample to your local cooperative extension service for a detailed analysis.
Warning: Avoid using fresh manure—it can burn plants and introduce weeds. Always use aged or composted manure.
Best Vegetables to Plant in Spring
Not all vegetables thrive in spring’s cooler temperatures. Focus on cold-hardy crops that can tolerate light frosts and shorter days. These varieties grow quickly, allowing you to harvest before summer heat sets in.
| Vegetable | Days to Maturity | Planting Method | Cold Tolerance |
|---|---|---|---|
| Lettuce | 30-60 days | Direct Seed or Transplant | High |
| Peas | 60-70 days | Direct Seed | High |
| Radishes | 25-30 days | Direct Seed | Very High |
| Carrots | 60-80 days | Direct Seed | Medium |
| Spinach | 40-50 days | Direct Seed or Transplant | High |
| Kale | 50-65 days | Direct Seed or Transplant | Very High |
| Broccoli | 60-90 days | Transplant | Medium |
For a continuous harvest, practice succession planting. Sow fast-growing crops like radishes and lettuce every 2-3 weeks. This ensures a steady supply of fresh vegetables throughout the season.
Step by Step Planting Guide for Spring Vegetables
Follow these steps to get your spring vegetables off to the best start. Timing is everything—plant too early, and frost may kill your crops; plant too late, and the heat may stunt their growth.
-
Check Your Frost Dates
Find your area’s average last frost date using resources like the USDA Plant Hardiness Zone Map or local agricultural extensions. Spring planting typically begins 2-4 weeks before the last frost for cold-hardy crops.
In warmer climates (Zones 7-10), you may start planting as early as February. Cooler regions (Zones 3-6) usually begin in March or April.
-
Prepare Seedbeds
Rake the soil smooth and remove any remaining debris. Create shallow furrows for seeds, following the depth recommendations on the seed packet—most spring vegetables are planted ¼ to ½ inch deep.
For transplants, dig holes slightly larger than the root ball. Space plants according to the variety’s requirements to ensure proper air circulation and growth.
-
Plant Seeds or Seedlings
Sow seeds thinly to avoid overcrowding. Once seedlings emerge, thin them to the recommended spacing. This can be tough, but crowded plants compete for resources and produce less.
When transplanting seedlings, handle them gently by the leaves to avoid damaging the stems. Water thoroughly after planting to help settle the soil around the roots.
-
Water Wisely
Keep the soil consistently moist but not waterlogged. Use a gentle spray to avoid dislodging seeds or damaging young seedlings. Water in the morning to reduce evaporation and prevent fungal diseases.
Mulching around plants helps retain moisture and keeps soil temperatures steady. Aim for 1-2 inches of water per week, including rainfall.
-
Protect from Late Frosts
Spring weather can be unpredictable. Use row covers, cloches, or old bedsheets to protect young plants if a late frost is forecasted. Remove covers during the day to allow sunlight and air circulation.
Tip: Label your rows or plants with popsicle sticks or plastic tags. It’s easy to forget what you planted where, especially with similar-looking seedlings.
Common Mistakes to Avoid When Starting a Spring Garden
Even experienced gardeners make mistakes in spring. Being aware of these pitfalls can save you time, money, and frustration.
- Planting Too Early: Eager gardeners often plant too soon, only to lose crops to a late frost. Wait until the soil is workable and temperatures are consistently above freezing.
- Over or Under Watering: Seeds need moisture to germinate, but too much water can cause them to rot. Aim for damp soil, not soggy. Use your finger to check moisture levels—if the top inch is dry, it’s time to water.
- Ignoring Soil Temperature: Some seeds, like peas and spinach, germinate in cool soil (40-50°F), while others, like beans, need warmer soil (60-70°F). Use a soil thermometer to check.
- Skipping the Soil Test: Guessing about soil fertility can lead to poor plant growth. A simple test reveals pH and nutrient levels, allowing you to amend the soil properly.
- Overcrowding Plants: It’s tempting to plant seeds closely to maximize space, but crowded plants struggle to thrive. Follow spacing guidelines on seed packets.
- Neglecting Weed Control: Weeds compete with your vegetables for water and nutrients. Mulch and regular weeding keep them in check.
- Not Rotating Crops: Planting the same crops in the same spot year after year depletes nutrients and encourages pests and diseases. Rotate crops annually for healthier plants.
According to a study by the University of California Cooperative Extension, proper crop rotation can reduce pest and disease issues by up to 50%.
Caring for Your Spring Vegetable Garden
Once your garden is planted, consistent care ensures healthy growth and a bountiful harvest. Spring gardens require less maintenance than summer ones but still benefit from regular attention.
Fertilizing
Spring vegetables generally don’t need heavy feeding, but a balanced fertilizer can give them a boost. Use a 10-10-10 or 5-10-5 formula, applying it according to package instructions. Organic options like fish emulsion or compost tea work well too.
Avoid over-fertilizing, which can lead to lush foliage but poor fruit production. Slow-release fertilizers are a good choice for steady nutrient supply.
Thinning Seedlings
When seedlings are 2-3 inches tall, thin them to the recommended spacing. This allows the remaining plants to grow strong and healthy. Use small scissors to snip unwanted seedlings at soil level to avoid disturbing the roots of the ones you keep.
Pest and Disease Management
Spring gardens are less prone to pests than summer ones, but keep an eye out for common issues:
- Aphids: These small green or black insects cluster on new growth. Blast them off with water or use insecticidal soap.
- Slugs and Snails: These pests chew holes in leaves. Use beer traps or diatomaceous earth to control them.
- Fungal Diseases: Cool, wet spring weather can encourage fungal issues. Space plants properly for air circulation and water at the base to keep leaves dry.
Mulching
Apply a 2-3 inch layer of mulch around plants to retain moisture, suppress weeds, and regulate soil temperature. Organic mulches like straw, grass clippings, or shredded leaves also break down over time, adding nutrients to the soil.
Avoid piling mulch directly against plant stems, as this can lead to rot. Keep it a few inches away from the base of each plant.
When and How to Harvest Spring Vegetables
Harvesting at the right time ensures the best flavor and encourages continued production. Most spring vegetables are ready to pick within 30-90 days, depending on the variety.
| Vegetable | Harvest Time | How to Harvest |
|---|---|---|
| Lettuce | 30-60 days | Pick outer leaves or cut entire head at base |
| Peas | 60-70 days | Pick pods when plump but before seeds get too large |
| Radishes | 25-30 days | Pull from soil when roots reach mature size |
| Spinach | 40-50 days | Harvest outer leaves or cut entire plant at base |
| Carrots | 60-80 days | Gently pull from soil when tops are ½-¾ inch in diameter |
Harvest in the morning when vegetables are at their crispiest. Use clean, sharp tools to avoid damaging plants. Regular harvesting encourages more production, especially with leafy greens and peas.
Tip: If you’re not ready to eat your harvest immediately, store leafy greens in the fridge with a paper towel to absorb moisture and keep them fresh longer.
Frequently Asked Questions
What is the best month to start a vegetable garden in spring?
The best month depends on your climate zone. In warmer areas (Zones 7-10), you can start as early as February. In cooler regions (Zones 3-6), wait until March or April when the soil is workable and frost risk has passed.
Always check your local frost dates for the most accurate timing.
Can I plant summer vegetables in spring?
Some summer vegetables, like tomatoes and peppers, can be started indoors in early spring and transplanted outside after the last frost. However, warm-season crops won’t thrive in cool spring temperatures. It’s best to focus on cold-hardy vegetables for spring planting and save heat-loving plants for late spring or early summer.
How often should I water my spring vegetable garden?
Water your garden deeply 1-2 times per week, providing about 1-2 inches of water total. Check soil moisture by sticking your finger an inch into the soil—if it feels dry, it’s time to water. Morning watering is ideal to reduce evaporation and prevent fungal diseases.
Do I need to fertilize my spring vegetables?
If you’ve amended your soil with compost or organic matter, your spring vegetables may not need additional fertilizer. However, a light application of balanced fertilizer can boost growth. Avoid over-fertilizing, which can lead to excessive leafy growth and reduced yields.
How do I protect my spring garden from pests?
Start with healthy soil and strong plants, as they’re less susceptible to pests. Use row covers to keep insects out, and handpick pests like slugs and snails when you see them. Encourage beneficial insects, such as ladybugs and lacewings, by planting companion flowers like marigolds and alyssum.
Final Thoughts
Starting a vegetable garden in spring is a rewarding experience that yields fresh, homegrown produce. Focus on soil preparation, choose the right crops for cool weather, and provide consistent care. With a little planning and effort, you’ll enjoy a bountiful harvest in just a few weeks.
How to start a vegetable garden in spring becomes second nature once you’ve gone through the process, and each year brings new opportunities to expand and improve.