Last Updated on October 22, 2026 by D. Ruddy
Preserving your garden’s bounty doesn’t have to be complicated. Canning tomatoes is a straightforward way to enjoy their fresh flavor all year long. Whether you’re a first-timer or just looking to refine your technique, this guide covers everything you need to know.
From choosing the right tomatoes to storing your jars safely, we’ll walk you through the process step by step.
You can safely can tomatoes at home using a water bath or pressure canner. The best method depends on whether you add acid like lemon juice or vinegar. Always follow tested recipes to prevent spoilage.
Why Can Tomatoes at Home
Home canning tomatoes lets you preserve the peak flavor of summer produce long after the season ends. Unlike store-bought options, your canned tomatoes won’t contain added preservatives or excessive sodium. You control the ingredients, whether you prefer plain tomatoes, seasoned sauces, or spicy salsas.
Canning also reduces food waste. When your garden overflows with ripe tomatoes, you can process them before they spoil. Plus, homemade canned tomatoes make thoughtful gifts for friends and family who appreciate fresh, high-quality ingredients.
- Retains fresh flavor and nutrients better than store-bought
- Cost-effective way to preserve large harvests
- Customizable recipes to suit your taste preferences
- Sustainable practice that reduces reliance on commercial products
- Provides a sense of accomplishment and self-sufficiency
Tip: Use tomatoes at their peak ripeness for the best flavor. Slightly underripe tomatoes work better for sauces, while fully ripe ones are ideal for whole or crushed tomatoes.
Choosing the Right Tomatoes for Canning
Not all tomatoes are created equal when it comes to canning. The best varieties have thick flesh, few seeds, and low water content. Roma tomatoes, also known as paste tomatoes, are the gold standard for canning because of their meaty texture and rich flavor.
San Marzano tomatoes are another excellent choice, especially for sauces.
You can also use beefsteak tomatoes, but they tend to be juicier and may require more cooking time to thicken. Cherry tomatoes work well for whole canning or making salsa. Avoid overripe or bruised tomatoes, as they can affect the quality and safety of your canned products.
| Tomato Variety | Best For | Flesh Type | Water Content |
|---|---|---|---|
| Roma | Sauces, paste, crushed | Meaty, thick | Low |
| San Marzano | Sauces, whole | Firm, sweet | Low |
| Beefsteak | Slices, juice | Juicy, tender | High |
| Cherry | Whole, salsa | Firm, small | Medium |
The right tomato choice depends on your recipe. For thick sauces, Roma or San Marzano are ideal. For whole tomatoes or salsa, cherry or beefsteak varieties work well.
Essential Equipment for Canning Tomatoes
Having the right tools makes canning tomatoes safer and more efficient. At a minimum, you’ll need a canner, jars, lids, and a few basic kitchen tools. A water bath canner is suitable for high-acid foods like tomatoes when acidified, while a pressure canner is required for low-acid recipes.
Investing in quality equipment ensures consistent results and reduces the risk of spoilage. Many of these items, like jars and canners, can be reused for years, making them a worthwhile investment for any home canner.
- Water Bath Canner or Pressure Canner: Essential for processing jars. A water bath canner works for acidified tomatoes, while a pressure canner is needed for non-acidified recipes.
- Canning Jars: Use standard mason jars designed for home canning. Pint and quart sizes are most common for tomatoes.
- Lids and Bands: New lids are required for each canning session to ensure a proper seal. Bands can be reused if they’re in good condition.
- Jar Lifter: Helps safely move hot jars in and out of the canner.
- Canning Funnel: Makes filling jars with tomatoes or sauce easier and less messy.
- Bubble Remover/Headspace Tool: Helps remove air bubbles and measure headspace accurately.
- Lid Magnet: Useful for lifting lids from hot water without touching them.
Warning: Never reuse lids for canning. The sealing compound on used lids may not create a proper vacuum, leading to spoilage.
Preparing Tomatoes for Canning
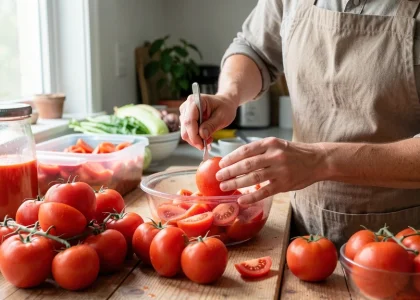
Proper preparation is key to successful canning. Start by washing your tomatoes thoroughly to remove any dirt or debris. For whole tomatoes, you’ll need to peel them first.
Blanching—dipping tomatoes in boiling water followed by an ice bath—makes peeling easier by loosening the skin.
After peeling, core the tomatoes and remove any blemishes. For crushed or sauced tomatoes, you can skip peeling and simply chop or crush them. Adding acid, such as lemon juice or citric acid, is crucial for safe water bath canning, as it lowers the pH and prevents botulism.
- Wash Tomatoes: Rinse tomatoes under cool water to remove dirt. Pat dry with a clean towel.
- Blanch for Peeling (Optional): Cut an “X” on the bottom of each tomato. Boil for 30-60 seconds, then transfer to an ice bath. The skin will slip off easily.
- Core and Trim: Remove the core and any damaged spots. For whole tomatoes, leave them intact. For sauce or crushed tomatoes, chop or crush as desired.
- Add Acid: For water bath canning, add 1 tablespoon of lemon juice or ¼ teaspoon of citric acid per pint jar, or 2 tablespoons of lemon juice or ½ teaspoon of citric acid per quart jar.
- Preheat Jars: Keep jars hot until ready to fill to prevent cracking from temperature changes.
| Preparation Step | Purpose | Time Required |
|---|---|---|
| Washing | Removes dirt and bacteria | 2-3 minutes |
| Blanching | Loosens skin for easy peeling | 5-10 minutes |
| Coring and Trimming | Removes inedible parts | 10-15 minutes |
| Adding Acid | Ensures safe canning | 2 minutes |
Preparing tomatoes properly ensures the best texture and flavor in your canned products. Don’t skip the acid step, as it’s critical for food safety.
Water Bath vs Pressure Canning Tomatoes
Choosing the right canning method depends on your recipe and safety requirements. Water bath canning is simpler and works for high-acid foods, while pressure canning is necessary for low-acid recipes to prevent botulism.
Tomatoes are borderline acid foods, so they must be acidified with lemon juice or citric acid for water bath canning. If you’re canning plain tomatoes without added acid, a pressure canner is required. Always follow tested recipes to ensure safety.
| Method | Best For | Processing Time (Pints) | Processing Time (Quarts) | Equipment Cost |
|---|---|---|---|---|
| Water Bath | Acidified tomatoes, sauces, salsa | 40 minutes | 45-50 minutes | $30-$60 |
| Pressure Canner | Non-acidified tomatoes, low-acid recipes | 15 minutes at 10 lbs | 20 minutes at 10 lbs | $100-$200 |
Water bath canning is more accessible for beginners due to its lower cost and simplicity. However, pressure canning offers more versatility for low-acid recipes and ensures safety without added acid.
Step by Step Canning Tomatoes Process
Follow this tested method for water bath canning acidified tomatoes. The process is straightforward but requires attention to detail to ensure safety and quality.
- Prepare Jars and Lids: Wash jars and lids in hot, soapy water. Keep jars hot by placing them in a warm oven (200°F) or hot water until ready to use. Heat lids in hot (not boiling) water to soften the sealing compound.
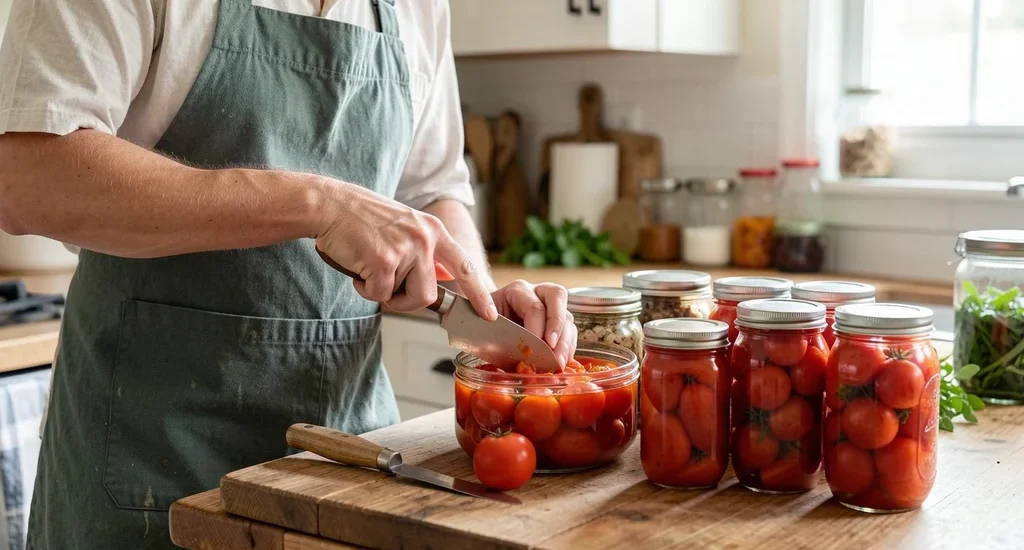
- Prepare Tomatoes: Wash, peel (if desired), and core tomatoes. For whole tomatoes, pack them into jars, leaving ½-inch headspace. For crushed tomatoes, chop or crush them before packing. Add 1 tablespoon of lemon juice or ¼ teaspoon of citric acid per pint jar, or 2 tablespoons of lemon juice or ½ teaspoon of citric acid per quart jar.
- Add Optional Seasonings: You can add ½ teaspoon of salt per pint jar or 1 teaspoon per quart jar for flavor. Other seasonings like garlic, basil, or oregano can be added, but stick to tested recipes to ensure safety.
- Remove Air Bubbles: Use a bubble remover or a clean plastic knife to gently press down on the tomatoes and release any trapped air. This helps prevent spoilage and ensures a proper seal.
- Wipe Rims and Apply Lids: Use a clean, damp cloth to wipe the rims of the jars to remove any residue. Place a lid on each jar and secure it with a band, tightening just until “fingertip tight” (not overly tight).
- Process Jars: Place jars in the canner, ensuring they’re covered by 1-2 inches of water. Bring to a boil and process pints for 40 minutes or quarts for 45-50 minutes. Adjust for altitude if necessary.
- Cool and Check Seals: After processing, remove jars and place them on a towel-lined countertop. Let them cool undisturbed for 12-24 hours. Check seals by pressing down on the center of the lid—if it doesn’t pop back, the jar is sealed.
Important: Always use a tested recipe from a reliable source like the USDA, National Center for Home Food Preservation, or Ball Blue Book. Improper canning methods can lead to spoilage or foodborne illness.
Common Mistakes to Avoid When Canning Tomatoes
Even experienced canners make mistakes that can affect the safety and quality of their preserved foods. Being aware of these common pitfalls helps you avoid them and ensures successful results every time.
- Not Adding Enough Acid: Tomatoes must be acidified for water bath canning. Skipping this step or using too little acid can lead to botulism, a serious and potentially deadly foodborne illness.
- Using Overripe or Spoiled Tomatoes: Only use fresh, high-quality tomatoes. Overripe or moldy tomatoes can introduce bacteria and affect the flavor of your canned products.
- Improper Headspace: Leaving too much or too little headspace can cause sealing failures or spoilage. Always follow the recommended headspace for your recipe (usually ½-inch for tomatoes).
- Not Removing Air Bubbles: Trapped air can lead to Spoilage and poor seals. Always use a bubble remover to release air before sealing jars.
- Reusing Lids: Lids are designed for one-time use. Reusing them can result in improper seals and spoilage.
- Processing for Too Little Time: Underexposing jars can allow bacteria to survive. Always follow the recommended processing times for your altitude and jar size.
- Cooling Jars Too Quickly: Placing hot jars on a cold surface or in a draft can cause them to crack. Always let jars cool slowly on a towel-lined countertop.
Avoiding these mistakes ensures your canned tomatoes are safe, delicious, and shelf-stable. When in doubt, refer to trusted canning resources for guidance.
Storing and Using Your Canned Tomatoes
Proper storage extends the shelf life of your canned tomatoes and preserves their quality. Once cooled and sealed, store jars in a cool, dark, dry place like a pantry or cellar. Avoid areas with temperature fluctuations, such as near appliances or in direct sunlight.
Canned tomatoes can last 12-18 months with proper storage. Over time, the quality may decline, but the tomatoes will remain safe to eat as long as the jars are sealed and show no signs of spoilage. Always check jars before use: discard any with broken seals, bulging lids, or unusual odors.
- Storage Location: Keep jars in a cool (50-70°F), dark place. A pantry, cellar, or basement works well.
- Shelf Life: For best quality, use within 12-18 months. After that, the flavor and texture may decline, but the tomatoes are still safe to eat if properly sealed.
- Checking for Spoilage: Before using, inspect jars for signs of spoilage, such as:
- Broken seals or bulging lids
- Leaking or rusted lids
- Cloudy liquid or mold
- Off odors or unusual colors
- Using Canned Tomatoes: Use your canned tomatoes in a variety of recipes, including:
- Pasta sauces and soups
- Chili and stews
- Salsa and bruschetta
- Casseroles and braises
Tip: Label your jars with the date and contents to keep track of what you have and when it was canned. This helps you use the oldest jars first and avoid waste.
Frequently Asked Questions
Do I need to peel tomatoes before canning?
Peeling tomatoes is optional but recommended for whole tomatoes to improve texture. For crushed or sauced tomatoes, peeling isn’t necessary. Blanching makes peeling easier if you choose to do so.
Can I can tomatoes without adding lemon juice?
For water bath canning, you must add lemon juice or citric acid to ensure the tomatoes are acidic enough to prevent botulism. If you prefer not to add acid, use a pressure canner instead.
How do I know if my canned tomatoes have spoiled?
Signs of spoilage include broken seals, bulging or leaking lids, cloudy liquid, mold, or off odors. If you notice any of these signs, discard the jar and its contents immediately. Do not taste or smell spoiled canned foods.
Can I reuse canning jars and lids?
Jars can be reused as long as they’re in good condition (no cracks or chips). Lids, however, should never be reused, as the sealing compound may not work properly a second time. Bands can be reused if they’re not bent or rusted.
What’s the difference between water bath and pressure canning?
Water bath canning uses boiling water to process high-acid foods, while pressure canning uses steam under pressure to reach higher temperatures for low-acid foods. Tomatoes are borderline acid, so they must be acidified for water bath canning or processed in a pressure canner.
Final Thoughts
Canning tomatoes is a rewarding way to preserve the fresh taste of summer for your family to enjoy year-round. By following tested recipes and proper techniques, you can safely can tomatoes at home with confidence. Start with a simple water bath method, and as you gain experience, explore other recipes like sauces, salsa, or juice.
The key is attention to detail and prioritizing safety at every step.