

Last Updated on October 22, 2026 by D. Ruddy
Drying English walnuts properly preserves their rich flavor and extends shelf life for months. Whether you’ve harvested a fresh crop or bought them in bulk, how to dry english walnuts correctly prevents mold growth and maintains their crunch. This guide covers foolproof methods, from air-drying to oven techniques, along with storage tips to keep your walnuts fresh and delicious.
Dry English walnuts in a single layer in a warm, well-ventilated area for 2-3 weeks or use an oven at 100°F for 24-48 hours. Ensure the kernels reach 4-6% moisture content for safe, long-term storage.
Why Drying English Walnuts Matters
Drying English walnuts is essential to prevent spoilage and maintain their quality. Freshly harvested walnuts contain up to 60% moisture, making them prone to mold and bacterial growth if not dried properly. According to the University of California Agriculture and Natural Resources, walnuts should be dried to a moisture content of 4-6% for safe storage. This process not only preserves the nuts but also enhances their flavor and crunch.
Improperly dried walnuts can develop off-flavors or even become unsafe to eat. The drying process also makes the shells easier to crack, saving you time and effort when you’re ready to enjoy them. Plus, well-dried walnuts retain their nutritional value, including healthy fats, proteins, and antioxidants.
- Prevents mold growth by reducing moisture content
- Extends shelf life to 6-12 months when stored properly
- Improves texture for better cracking and eating
- Preserves nutritional value and flavor
- Reduces risk of spoilage and waste
Important: Walnuts with moisture content above 10% are at high risk of mold growth, which can produce harmful aflatoxins.
When to Harvest English Walnuts for Drying
Timing your harvest correctly is the first step in the drying process. English walnuts are typically ready to harvest in late summer or early fall, usually between August and October, depending on your climate and the specific variety. The best indicator that walnuts are ready is when the green husks begin to split open, revealing the hard shell inside.
You can also check for ripeness by shaking the tree—mature walnuts will fall easily. Another method is to cut open a few husks; the nut inside should be fully formed with a hard shell. Harvesting at the right time ensures the nuts have the best flavor and will dry evenly.
| Harvest Sign | Description |
|---|---|
| Husk splitting | Green outer husk cracks open, exposing the shell |
| Easy detachment | Nuts fall from the tree when shaken or in wind |
| Shell color | Shell turns from green to light brown or tan |
| Kernel development | Kernel is fully formed and separates easily from the husk |
Harvest walnuts promptly once they’re ripe to prevent them from falling to the ground, where they can absorb moisture or become contaminated with dirt and debris. Use a long pole or a mechanical harvester for tall trees, or simply gather fallen nuts daily.
How to Prepare Walnuts for Drying
Proper preparation is key to effective drying. Start by removing the green husks as soon as possible after harvest. The husks contain tannins that can stain your hands and the nuts themselves, so wearing gloves is recommended. You can remove husks by hand or use a husking tool for larger quantities.
After husking, rinse the walnuts in water to remove any remaining husk material, dirt, or sap. This step is crucial because sap and husk residues can lead to mold growth during drying. Once clean, spread the nuts out to air-dry briefly before starting the main drying process.
- Remove husks within 24 hours of harvest to prevent staining
- Wash nuts in clean water to remove sap and debris
- Drain thoroughly and pat dry with a clean towel
- Sort nuts by size and quality for even drying
- Discard damaged nuts with cracks or holes that could harbor mold
- Spread in a single layer to begin the drying process
Tip: If you’re processing a large harvest, consider using a mechanical husker to save time and reduce hand strain.
Best Methods to Dry English Walnuts
There are several effective methods for drying English walnuts, each with its own advantages. The best method for you depends on your climate, the quantity of nuts, and the equipment you have available. Below are the most common and effective drying techniques.
Air Drying (Traditional Method)
Air drying is the simplest and most traditional method, ideal for small batches or in warm, dry climates. Spread the husked and washed walnuts in a single layer on a clean, flat surface such as a screen, tray, or even a clean driveway. Ensure good air circulation by spacing the nuts out so they don’t touch each other.
- Best for: Small quantities in dry, warm climates
- Time required: 2-3 weeks
- Ideal conditions: Temperature of 70-90°F with low humidity
- Equipment needed: Screens, trays, or a clean, flat surface
- Advantages: No special equipment needed, energy-efficient
- Disadvantages: Slow, weather-dependent, requires space
Stir or turn the nuts daily to ensure even drying. Cover them with a breathable material like cheesecloth at night to protect from dew or pests. This method works well in areas with consistent warm, dry weather during the harvest season.
Oven Drying (Fastest Method)
For faster results, especially in humid climates, oven drying is an excellent option. Preheat your oven to its lowest setting, ideally around 100°F (38°C). If your oven doesn’t go that low, set it to the lowest possible temperature and prop the door open slightly to allow moisture to escape.
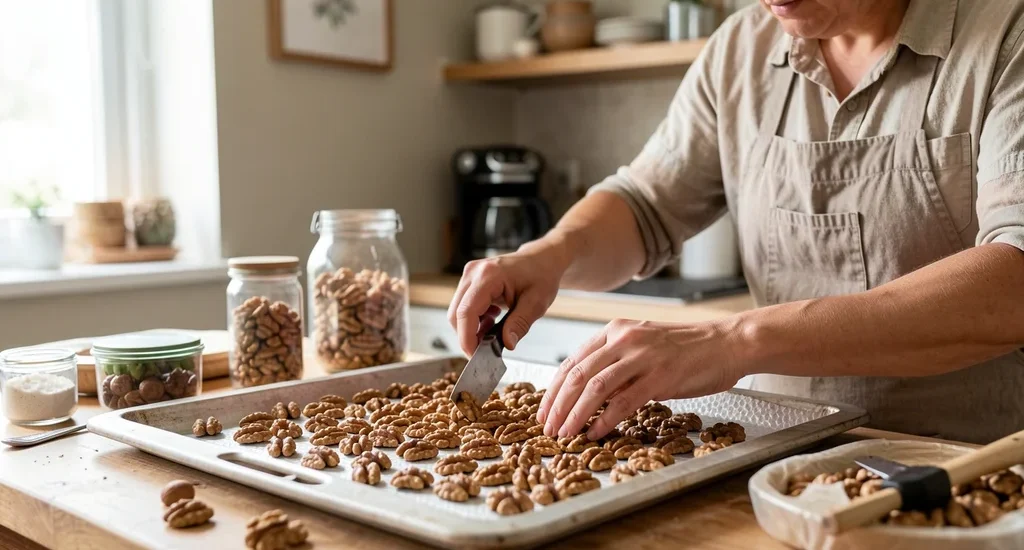
- Spread walnuts in a single layer on baking sheets
- Place in the preheated oven
- Dry for 24-48 hours, stirring every 6-8 hours
- Check moisture content periodically
- Remove when kernels are crisp and shells are dry
| Oven Temperature | Drying Time | Notes |
|---|---|---|
| 100°F (38°C) | 24-48 hours | Ideal temperature, prop door open |
| 120°F (49°C) | 18-24 hours | Faster but risk of over-drying |
| 140°F (60°C) | 12-18 hours | Quick but may affect flavor |
Oven drying allows you to control the environment and speed up the process significantly. However, be cautious not to set the temperature too high, as this can cause the nuts to dry unevenly or develop off-flavors. Always monitor the nuts closely when using this method.
Dehydrator Drying (Most Controlled Method)
A food dehydrator provides the most consistent and controlled drying environment. Set your dehydrator to 95-105°F (35-40°C) and arrange the walnuts in a single layer on the trays, ensuring they don’t touch. This method typically takes 24-36 hours, depending on the humidity level and the quantity of nuts.
- Precise temperature control prevents over-drying
- Even airflow ensures consistent drying
- Energy-efficient for medium-sized batches
- Minimal monitoring required once started
- Preserves flavor better than high-heat methods
Dehydrators are particularly useful in humid climates where air drying might not be effective. They also work well for those who want to dry nuts indoors without using an oven. If you frequently dry nuts or other foods, investing in a good-quality dehydrator can be worthwhile.
Sun Drying (For Warm Climates)
In regions with abundant sunshine and low humidity, sun drying can be an effective method. Spread the walnuts in a single layer on a clean, flat surface in direct sunlight. This method can take 1-2 weeks, depending on the weather conditions.
Warning: Sun drying is not recommended in humid climates or areas with frequent rain, as it can lead to uneven drying and mold growth.
- Choose a clean, flat surface in full sun
- Spread nuts in a single layer, not touching
- Cover with a mesh screen to protect from pests
- Bring nuts indoors at night to prevent dew absorption
- Stir or turn nuts daily for even drying
- Test for dryness after 1 week
While sun drying is the most traditional method, it requires consistent warm, dry weather and protection from pests. It’s also the slowest method, so it’s best suited for those with the time and ideal climate conditions.
How to Test if Walnuts Are Fully Dry
Testing for proper dryness is crucial to ensure your walnuts will store well. There are several reliable methods to check if your walnuts have reached the ideal moisture content of 4-6%.
The simplest at-home method is the “snap test.” Take a few nuts and try to break them open. Properly dried walnuts will have a crisp, snapping sound when broken, and the kernel inside will be firm and brittle, not rubbery or pliable. Another method is to crack open a nut and check the kernel—if it’s dry and crumbly, the nut is ready for storage.
- Snap test: Shells should break with a crisp snap
- Kernel test: Kernels should be brittle and break cleanly
- Moisture meter: Use a grain moisture meter for precise measurement (target: 4-6%)
- Weight test: Dried nuts will be significantly lighter than fresh ones
- Sound test: Shake the nut—dried nuts will rattle inside the shell
| Test Method | How to Do It | Dry If. |
|---|---|---|
| Snap test | Break the shell | Shell snaps crisply |
| Kernel test | Crack open and check kernel | Kernel is brittle, not rubbery |
| Moisture meter | Insert probe into kernel | Reading is 4-6% |
For the most accurate results, especially if you’re drying large quantities, consider using a moisture meter. These devices are inexpensive and provide precise readings. According to the USDA, English walnuts should be dried to a moisture content of 8% or less for safe storage, but 4-6% is ideal for long-term storage.
Step by Step Drying Process for English Walnuts
Follow this comprehensive step-by-step process to ensure your English walnuts are dried correctly, regardless of the method you choose.
Step 1: Harvest at the Right Time
Begin by harvesting your walnuts when they’re fully mature. As mentioned earlier, look for husks that are splitting open and nuts that fall easily from the tree. Harvest in the morning when temperatures are cooler to minimize moisture loss before processing.
- Use a long pole or mechanical shaker for tall trees
- Collect fallen nuts daily to prevent spoilage
- Handle nuts gently to avoid bruising
- Store harvested nuts in a cool, shaded area until ready to process
Step 2: Remove the Husks
Remove the green husks as soon as possible after harvest. This can be done by hand or with a husking tool. Wear gloves to protect your hands from the staining tannins in the husks.
If the husks are stubborn, you can soak the nuts in water for a short time to soften them, but don’t leave them submerged for more than a few hours.
- Work in small batches to process nuts quickly
- Use a knife or husking tool for stubborn husks
- Discard any nuts with damaged or moldy husks
- Rinse nuts after husking to remove sap and debris
Step 3: Wash and Clean the Nuts
After husking, wash the nuts thoroughly in clean water to remove any remaining husk material, sap, or dirt. This step is crucial because any organic material left on the nuts can lead to mold growth during drying. Use a soft brush if needed to remove stubborn debris.
- Use cool, clean water for washing
- Change the water frequently if it becomes dirty
- Inspect nuts for any remaining husk or debris
- Pat nuts dry with a clean towel after washing
Step 4: Sort and Inspect
Before drying, sort through your nuts to remove any that are damaged, cracked, or show signs of mold or disease. Damaged nuts can introduce mold or pests to your entire batch, so it’s important to be thorough. Also, sort nuts by size for more even drying.
- Discard nuts with cracks or holes in the shell
- Remove any nuts with mold or dark spots
- Separate large and small nuts for even drying
- Check for any remaining husk material
Step 5: Choose Your Drying Method
Select the drying method that best suits your situation. Consider factors like your climate, the quantity of nuts, and the equipment you have available. For most home growers, oven drying or dehydrator drying offers the best balance of speed and control.
Step 6: Dry the Nuts
Follow the specific instructions for your chosen drying method. Remember to spread the nuts in a single layer, ensure good air circulation, and monitor the process regularly. Stir or turn the nuts periodically for even drying.
Step 7: Test for Dryness
Once you think the nuts are dry, perform the tests described earlier to confirm they’ve reached the proper moisture content. It’s better to dry a little longer than to stop too soon, as under-dried nuts can mold during storage.
Step 8: Cool and Cure
After drying, allow the nuts to cool completely before storage. This cooling period, often called curing, helps the nuts stabilize and ensures even moisture distribution. Spread the dried nuts in a single layer in a cool, dry place for 24-48 hours before storing.
Common Mistakes to Avoid When Drying Walnuts
Even with the best intentions, it’s easy to make mistakes when drying English walnuts. Being aware of these common pitfalls can help you avoid them and ensure a successful drying process.
- Drying too quickly at high temperatures: Using temperatures above 140°F can cause the outer layers of the nut to dry too fast, trapping moisture inside. This can lead to uneven drying and potential mold growth.
- Overcrowding nuts during drying: Piling nuts on top of each other prevents proper air circulation, leading to uneven drying and increased risk of mold.
- Not testing for dryness: Assuming nuts are dry without testing can result in under-dried nuts that spoil during storage. Always perform the snap test or use a moisture meter.
- Drying in humid conditions: Attempting to air dry or sun dry nuts in humid weather can be counterproductive, as the nuts may absorb moisture from the air rather than losing it.
- Skipping the washing step: Failing to wash nuts after husking can leave sap and husk material on the shells, which can lead to mold growth during drying.
- Storing nuts too soon: Putting nuts into storage before they’re completely dry and cooled can lead to condensation and mold growth in the storage container.
- Using dirty or contaminated surfaces: Drying nuts on dirty surfaces can introduce bacteria or mold spores, contaminating your entire batch.
Warning: Moldy walnuts can produce aflatoxins, which are harmful carcinogens. Always discard any nuts that show signs of mold, and ensure proper drying to prevent mold growth.
Storing Dried English Walnuts
Proper storage is just as important as proper drying when it comes to preserving your English walnuts. Even well-dried nuts can spoil if not stored correctly.
The key to storing dried walnuts is to keep them in a cool, dry, and dark environment. The ideal storage temperature is between 32-50°F (0-10°C), with a humidity level below 65%. A refrigerator or freezer works well for long-term storage, but a cool pantry or basement can also work for shorter storage periods.
- Choose the right container: Use airtight containers like glass jars, plastic containers with tight-fitting lids, or heavy-duty freezer bags. Vacuum-sealed bags are also an excellent option.
- Keep in a cool place: Store containers in a refrigerator, freezer, or a cool, dark pantry.
- Protect from light: Light can cause the oils in walnuts to go rancid, so store them in opaque containers or in a dark place.
- Check regularly: Inspect stored nuts periodically for signs of spoilage or pest infestation.
- Store in-shell: Walnuts store best in their shells. If you’ve already shelled them, they’ll have a shorter shelf life.
| Storage Method | Shelf Life (In-Shell) | Shelf Life (Shelled) |
|---|---|---|
| Room temperature (cool, dark) | 4-6 months | 1-2 months |
| Refrigerator | 6-12 months | 3-6 months |
| Freezer | 12-24 months | 6-12 months |
| Vacuum-sealed at room temp | 8-12 months | 4-6 months |
For the longest shelf life, store your dried walnuts in the freezer. This method can preserve their quality for up to two years. If you prefer to store them at room temperature, choose a cool, dark place like a basement or pantry, and use airtight containers to protect them from moisture and pests.
Tip: To absorb any residual moisture in your storage container, place a food-safe desiccant packet or a small cloth bag of uncooked rice inside.
Frequently Asked Questions
How long does it take to dry English walnuts?
The drying time for English walnuts varies depending on the method used. Air drying typically takes 2-3 weeks in warm, dry conditions. Oven drying at 100°F usually takes 24-48 hours, while dehydrator drying at a similar temperature takes 24-36 hours.
Sun drying can take 1-2 weeks, depending on the weather. Always test for dryness rather than relying solely on time estimates.
Can I dry walnuts in the microwave?
While it’s possible to use a microwave for small batches, it’s not recommended for drying English walnuts. Microwaves can heat unevenly, leading to some nuts being over-dried while others remain moist. Additionally, it’s difficult to control the process and achieve the even, thorough drying needed for safe storage.
Stick to oven, dehydrator, or air drying methods for best results.
What’s the best temperature for drying walnuts?
The ideal temperature for drying English walnuts is between 95-105°F (35-40°C). This range is warm enough to remove moisture efficiently but not so hot that it affects the flavor or quality of the nuts. If using an oven, set it to the lowest temperature and prop the door open slightly to allow moisture to escape and prevent the temperature from getting too high.
How do I know if my walnuts have mold?
Moldy walnuts may have visible dark spots, white or green fuzzy growth, or an off smell. Discard any nuts that show these signs, as mold can produce harmful toxins. To prevent mold, ensure proper drying and storage conditions.
If you find mold in your stored nuts, check the entire batch and discard any affected nuts, then clean the storage container thoroughly before reusing.
Can I dry walnuts with the husks on?
It’s not recommended to dry walnuts with the husks still on. The husks contain moisture and can trap it against the shell, leading to uneven drying and potential mold growth. Additionally, the husks contain tannins that can stain the nuts and affect their flavor.
Always remove husks before drying, and wash the nuts to remove any remaining husk material or sap.
Final Thoughts
Drying English walnuts properly is essential for preserving their flavor, texture, and nutritional value. Whether you choose air drying, oven drying, or a dehydrator, the key is to remove moisture evenly and thoroughly. Remember to test for dryness, store your nuts correctly, and avoid common mistakes that can lead to spoilage.
With the right techniques, your dried English walnuts can last for months, providing a delicious and nutritious snack whenever you need it.








