

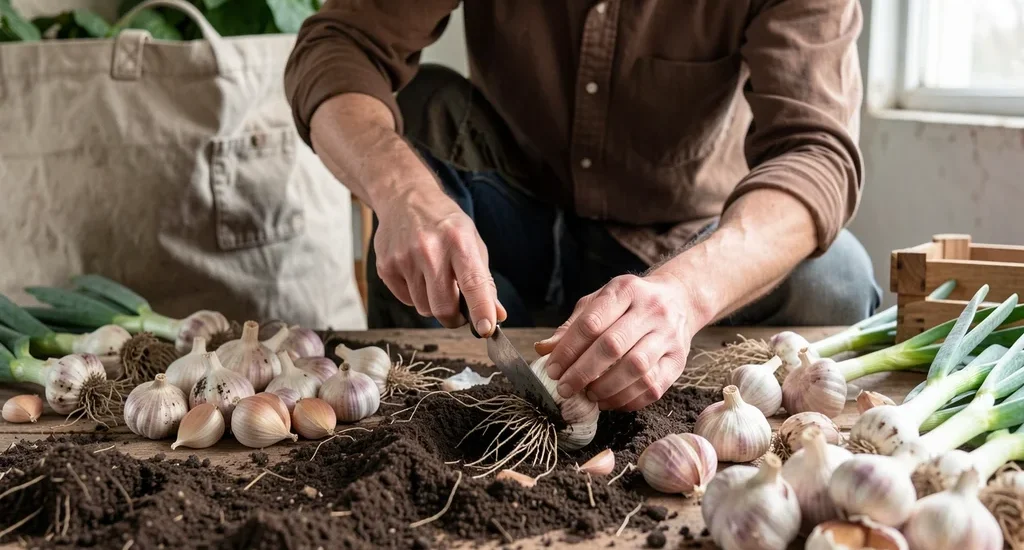
Last Updated on October 22, 2026 by D. Ruddy
Growing your own garlic is simpler than you think and yields fresh, flavorful bulbs that store well for months. Planting garlic at the right time with proper spacing and soil conditions ensures healthy growth and maximum yield. Whether you’re a beginner or looking to refine your technique, this guide covers everything from selecting seed cloves to harvesting mature bulbs.
The best time to plant garlic is in the fall, 4-6 weeks before the ground freezes. This allows roots to establish before winter, leading to stronger plants and larger bulbs the following summer.
When to Plant Garlic for Best Results
Timing is everything when it comes to garlic cultivation. Planting too early can cause premature sprouting, while planting too late may prevent root establishment before winter. The ideal window is when soil temperatures drop below 60°F (15°C) but haven’t frozen yet. This typically occurs in:
- Northern climates: Late September to early November
- Southern climates: October to early December
- Mild coastal areas: As late as January or February
| Climate Zone | Planting Window | Harvest Time |
|---|---|---|
| USDA Zones 3-5 | October | July-August |
| USDA Zones 6-7 | October-November | June-July |
| USDA Zones 8-10 | November-February | May-June |
According to the National Gardening Association, garlic planted at the correct time produces bulbs that are 30-50% larger than those planted at suboptimal times. The cloves need this cold period (vernalization) to trigger bulb formation.
Tip: If you miss the fall planting window, you can try planting in early spring as soon as the soil is workable, though yields may be smaller.
Choosing the Right Garlic Varieties
Not all garlic is created equal. The two main types—hardneck and softneck—have distinct characteristics that affect flavor, storage life, and growing conditions.
Hardneck Garlic
Hardneck varieties produce a stiff central stem (called a scape) and typically have larger cloves arranged in a single ring around the stem. They thrive in colder climates and offer more complex flavors.
- Flavor profile: Bold, spicy, or sweet nuances
- Storage life: 3-6 months
- Clove size: Large, easy to peel
- Scape production: Edible curly stems in early summer
- Cold hardiness: Excellent for northern gardens
Softneck Garlic
Softneck varieties have a flexible stem and multiple layers of small cloves. They’re the type most commonly found in grocery stores and are better suited to warmer climates.
- Flavor profile: Milder, more consistent
- Storage life: 6-12 months
- Clove size: Smaller, more numerous
- Scape production: None
- Adaptability: Better for southern climates
| Variety | Type | Flavor | Storage |
|---|---|---|---|
| Rocambole | Hardneck | Rich, complex | 4-6 months |
| Purple Stripe | Hardneck | Spicy, robust | 5-7 months |
| Silverskin | Softneck | Mild, sweet | 8-12 months |
| Artichoke | Softneck | Mild, versatile | 6-10 months |
The Garlic Seed Foundation reports that hardneck varieties account for about 20% of commercial production but are preferred by 75% of home gardeners due to their superior flavor. For planting garlic successfully, always source seed stock from reputable suppliers rather than grocery store bulbs, which may be treated to prevent sprouting.
Preparing Your Soil for Garlic
Garlic thrives in loose, well-draining soil with plenty of organic matter. The ideal pH range is between 6.0 and 7.0—slightly acidic to neutral. Here’s how to prepare your planting area:
- Test your soil: Use a soil test kit to check pH and nutrient levels. Amend as needed based on results.
- Improve drainage: Add compost or well-rotted manure to heavy clay soils. For sandy soils, incorporate organic matter to improve moisture retention.
- Remove weeds: Clear the area of all weeds, especially perennial varieties that can compete with your garlic.
- Loosen the soil: Work the bed to a depth of at least 12 inches to allow for proper root development.
- Add fertilizer: Mix in a balanced organic fertilizer (10-10-10) or bone meal for phosphorus, which promotes bulb formation.
Warning: Never use fresh manure as it can introduce pathogens and burn young plants. Always use well-aged compost or manure that’s at least 6 months old.
Garlic plants are heavy feeders, requiring consistent moisture and nutrients throughout their growth cycle. A study by the University of Maine Cooperative Extension found that garlic yields increased by 40% when planted in soil with organic matter content above 5%.
Soil Preparation Checklist
| Requirement | Ideal Condition | How to Achieve |
|---|---|---|
| pH Level | 6.0-7.0 | Add lime to raise pH, sulfur to lower |
| Organic Matter | 5%+ | Mix in compost or aged manure |
| Drainage | Well-draining | Add sand or perlite to clay soils |
| Nitrogen | Medium | Add blood meal or feather meal |
| Phosphorus | High | Add bone meal or rock phosphate |
Step by Step Planting Garlic Process
Follow these steps for optimal garlic planting:
Step 1: Break Apart the Bulbs
Gently separate the garlic bulbs into individual cloves just before planting. Be careful not to damage the cloves or their papery coverings, as this can lead to disease or poor growth. Each clove will grow into a new bulb.
- Select the largest, healthiest cloves from each bulb for planting
- Discard any cloves that are soft, moldy, or damaged
- Keep the papery skin intact—it protects the clove
- Use all cloves immediately after breaking apart the bulb
Step 2: Plant the Cloves Correctly
Plant each clove with the pointed end facing upward and the flat end (the basal plate) downward. This orientation is crucial for proper growth.
- Depth: 2 inches deep for most climates (deeper in very cold areas)
- Spacing: 4-6 inches apart in rows
- Row spacing: 12 inches between rows
- Orientation: Pointy end up, flat end down
- Pressure: Gently press soil over each clove to eliminate air pockets
Step 3: Cover and Mulch
After planting, cover the bed with a layer of mulch to protect the cloves and retain moisture. This is especially important in colder climates where winter temperatures can fluctuate dramatically.
- Apply 4-6 inches of organic mulch (straw, leaves, or grass clippings)
- In very cold regions, add an additional insulating layer
- Avoid plastic mulch as it can trap too much moisture
- Remove some mulch in spring if it’s too thick, allowing shoots to emerge
Important: In regions with heavy clay soil, consider planting cloves in raised beds to prevent waterlogging, which can cause bulb rot.
Watering and Fertilizing Garlic
Garlic requires consistent moisture but cannot tolerate waterlogged soil. The key is to maintain even soil moisture throughout the growing season, with some adjustments during different growth stages.
Watering Schedule
Garlic has different water needs at various stages of growth. Proper watering is essential for bulb development and prevents common problems like splitting or small cloves.
- After planting: Water thoroughly to help roots establish before winter. In cold climates, reduce watering as temperatures drop.
- Early spring: Resume watering as growth begins. Aim for 1 inch of water per week.
- Bulb formation: Increase watering slightly during this critical phase (usually May-June).
- Maturity: Reduce watering 2-3 weeks before harvest to help bulbs cure properly.
| Growth Stage | Water Needs | Frequency |
|---|---|---|
| Planting to Winter | Moderate | Once after planting, then minimal |
| Early Spring Growth | High | 1 inch per week |
| Bulb Formation | High | 1-1.5 inches per week |
| Pre-Harvest | Low | Reduce gradually to none |
Fertilizing for Maximum Yield
Garlic benefits from regular feeding throughout its growth cycle. The right nutrients at the right time can significantly increase bulb size and quality.
- At planting: Mix in a balanced organic fertilizer (10-10-10) or add 1-2 inches of compost to the soil
- Early spring: Apply a nitrogen-rich fertilizer (like blood meal) when shoots emerge to promote leaf growth
- Bulb formation: Switch to a fertilizer higher in phosphorus and potassium (5-10-10) to support bulb development
- Avoid: High-nitrogen fertilizers late in the season as they can promote leaf growth at the expense of bulb formation
Research from Cornell University shows that garlic fertilized with compost tea every two weeks produced bulbs that were 25% larger than unfertilized plants. Remember that organic fertilizers release nutrients slowly, providing consistent feeding over time.
Managing Pests and Diseases
While garlic is relatively pest-resistant, it can still fall victim to certain insects and diseases. Prevention is key, as many garlic problems are easier to prevent than to treat.
Common Garlic Pests
- Garlic Mites: Microscopic pests that can infest stored garlic. They thrive in warm, humid conditions and can spread quickly through a stored crop.
- Thrips: Tiny insects that feed on plant sap, causing stunted growth and deformed leaves. They’re most active in hot, dry weather.
- Onion Maggots: The larvae of a small fly that lay eggs in the soil near garlic plants. The maggots then burrow into the bulbs, causing rot.
- Aphids: These can spread viral diseases to garlic plants. They typically congregate on new growth and the undersides of leaves.
- Nematodes: Microscopic worms that can cause stunted growth and yellowing leaves. They’re particularly problematic in warm climates.
Common Garlic Diseases
| Disease | Symptoms | Prevention |
|---|---|---|
| White Rot | Yellowing, wilting, white fungal growth on roots | Rotate crops, use clean seed, improve drainage |
| Purple Blotch | Purple spots on leaves, leaf dieback | Remove infected plants, avoid overhead watering |
| Rust | Orange pustules on leaves | Increase air circulation, remove infected leaves |
| Fusarium Basal Rot | Yellowing, stunting, bulb rot | Use disease-free seed, rotate crops, improve drainage |
Tip: Planting garlic with companion plants like yarrow, chamomile, or summer savory can help deter pests naturally. These plants also attract beneficial insects that prey on garlic pests.
Preventive Measures
Good cultural practices are your best defense against garlic pests and diseases:
- Crop rotation: Don’t plant garlic or other alliums (onions, leeks) in the same spot more than once every 3-4 years
- Sanitation: Remove all plant debris after harvest and clean tools to prevent disease spread
- Proper spacing: Ensure good air circulation by spacing plants appropriately
- Mulching: Use clean straw or grass clippings to suppress weeds and maintain soil moisture
- Inspection: Regularly check plants for signs of pests or disease, especially the undersides of leaves
Harvesting and Curing Garlic
Knowing when and how to harvest your garlic is crucial for getting the best flavor and storage life. Harvest too early, and the bulbs will be small; harvest too late, and the cloves may separate or begin to sprout.
When to Harvest Garlic
The timing of your garlic harvest depends on the variety and your climate, but there are clear visual signs to look for:
- Lower leaves brown: When the lower 2-3 leaves turn brown while the upper leaves remain green, it’s usually time to harvest
- Leaf count: For hardneck varieties, harvest when there are 5-6 green leaves remaining. Each green leaf represents a layer of bulb wrapper
- Softneck varieties: These can be harvested when about half the leaves have turned brown
- Bulb size: The bulbs should be fully sized up with distinct cloves visible through the skin
| Variety | Days to Maturity | Harvest Signs |
|---|---|---|
| Hardneck | 90-120 days | 5-6 green leaves, lower leaves brown |
| Softneck | 120-150 days | Half leaves brown, bulbs fully sized |
| Elephant Garlic | 130-160 days | Lower leaves brown, bulbs very large |
How to Harvest Garlic Properly
Harvesting garlic correctly helps prevent damage to the bulbs and ensures better storage life:
- Choose the right time: Harvest on a dry, sunny day when the soil is dry. This makes digging easier and reduces the risk of rot.
- Loosen the soil: Use a garden fork to gently loosen the soil around the plants. Be careful not to pierce the bulbs.
- Pull the plants: Grasp the leaves near the base and pull the plants out of the ground. For stubborn plants, use the fork to lift them.
- Brush off soil: Gently remove excess soil from the bulbs, but don’t wash them or remove the outer layers of skin.
- Handle with care: Avoid bruising the bulbs as this can lead to rot during storage.
Warning: Never leave harvested garlic in the sun for more than a few hours, as this can cause the bulbs to “cook” and develop a bitter flavor. Also, avoid washing the bulbs with water as this can promote rot.
Curing Garlic for Storage
Proper curing is essential for long-term storage. This process allows the outer skin to dry and tighten around the bulb, protecting it from moisture and disease.
- Bundle the plants: Tie the plants in bundles of 5-10 and hang them in a dry, well-ventilated area out of direct sunlight.
- Alternative method: Lay the plants in a single layer on a screen or mesh surface in a dry, airy location.
- Curing time: Allow the garlic to cure for 2-3 weeks. The leaves and stems will dry completely, and the outer bulb wrappers will become papery.
- Trim the plants: After curing, trim the roots and cut the stems to about 1-2 inches above the bulb, or leave the stems long for braiding.
- Clean the bulbs: Gently brush off any remaining soil and trim away any loose outer layers, but leave the papery skin intact.
According to the University of California Agriculture and Natural Resources, properly cured garlic can store for 3-6 months for hardneck varieties and up to a year for softneck varieties when kept in cool, dry conditions.
Storing Garlic Long Term
Proper storage extends the life of your garlic harvest, allowing you to enjoy your homegrown bulbs for months. The key factors are temperature, humidity, and darkness.
Ideal Storage Conditions
- Temperature: 45-55°F (7-13°C) is ideal. Avoid storing in the refrigerator as the cold can cause sprouting.
- Humidity: 50-60% relative humidity. Too much moisture causes rot; too little causes the bulbs to dry out.
- Darkness: Store in a dark place as light can cause sprouting.
- Ventilation: Good air circulation prevents moisture buildup and mold growth.
- Away from other produce: Garlic can absorb odors and its strong smell can affect other foods.
Storage Methods
| Method | Best For | Storage Life | Pros | Cons |
|---|---|---|---|---|
| Braided | Softneck varieties | 6-12 months | Attractive, space-saving | Time-consuming to braid |
| Mesh bags | All varieties | 5-8 months | Good airflow, easy to check | Less attractive |
| Paper bags | All varieties | 4-6 months | Inexpensive, widely available | Limited airflow |
| Clay pots | All varieties | 5-7 months | Attractive, good airflow | Can be expensive |
Signs of Spoilage
Regularly check your stored garlic for these signs of spoilage:
- Sprouting: Green shoots emerging from the cloves. This indicates the garlic is trying to grow and should be used immediately.
- Softness: Bulbs that feel soft or spongy are beginning to rot and should be discarded.
- Mold: Any visible mold, especially white, green, or black spots, means the bulb is no longer safe to eat.
- Off odors: Garlic should have a strong but pleasant aroma. Any sour or foul smells indicate spoilage.
- Shriveled cloves: Cloves that have become dry and shriveled have lost their moisture and flavor.
Important: If you find one spoiled bulb in your storage, check all nearby bulbs as spoilage can spread quickly. Remove any affected bulbs immediately.
Common Mistakes to Avoid When Planting Garlic
Even experienced gardeners can make mistakes with garlic. Being aware of these common pitfalls can help you avoid them and ensure a successful harvest.
- Planting grocery store garlic: Store-bought garlic is often treated with growth inhibitors to prevent sprouting. It may also carry diseases that can infect your soil. Always use seed garlic from reputable suppliers.
- Planting at the wrong time: Garlic needs a period of cold to develop properly. Planting in spring without this cold period results in small, underdeveloped bulbs.
- Overcrowding: Planting cloves too close together leads to competition for nutrients and water, resulting in small bulbs. Follow spacing recommendations carefully.
- Improper depth: Planting too shallow can cause cloves to heave out of the ground during freeze-thaw cycles. Planting too deep can delay emergence and reduce vigor.
- Ignoring soil conditions: Garlic won’t thrive in poor, compacted, or waterlogged soil. Take the time to prepare your beds properly.
- Overwatering: Garlic needs consistent moisture but can’t tolerate soggy soil. Overwatering leads to rot and fungal diseases.
- Harvesting too early or late: Timing is crucial for garlic harvest. Pulling too early results in small bulbs, while waiting too long can cause cloves to separate or begin sprouting.
Frequently Asked Questions
Can I plant garlic in the spring?
While fall planting is ideal, you can plant garlic in early spring as soon as the soil is workable. However, bulbs may be smaller since they won’t have the benefit of the cold vernalization period. In colder climates, you can also plant in late winter for a fall harvest.
How do I know when garlic is ready to harvest?
The most reliable sign is when the lower 2-3 leaves turn brown while the upper leaves remain green. For hardneck varieties, harvest when there are 5-6 green leaves left. Each green leaf represents a layer of bulb wrapper, so fewer green leaves mean less protection for the bulb.
Why is my garlic not forming bulbs?
Several factors can prevent bulb formation: planting at the wrong time (missing the cold period), overcrowding, poor soil fertility, or extreme weather conditions. Hardneck varieties are more dependent on vernalization than softneck types. Also, planting cloves that are too small may result in weak plants that can’t form proper bulbs.
Can I grow garlic in containers?
Yes, garlic can be grown in containers, but choose large, deep pots (at least 8 inches deep) with good drainage. Use a quality potting mix and ensure the containers receive at least 6-8 hours of sunlight daily. Keep in mind that container-grown garlic may produce smaller bulbs than those grown in the ground.
How do I braid garlic for storage?
To braid garlic, start with 10-15 cured softneck garlic plants. Gather the stems and divide them into three equal sections. Begin braiding as you would with hair, adding a new stem to each section as you go.
Secure the end with a rubber band or string. Hang the braid in a dry, well-ventilated area. Braiding works best with softneck varieties as hardneck stems are too stiff to braid easily.
Final Thoughts
Planting garlic is a rewarding experience that yields flavorful, homegrown bulbs with minimal effort. The key to success lies in proper timing, soil preparation, and variety selection. By following the steps outlined in this guide—from choosing the right seed cloves to proper harvesting and curing techniques—you can enjoy a bountiful garlic harvest that will enhance your cooking for months to come.
Remember that each growing season brings new opportunities to refine your technique and try different varieties.








