Last Updated on June 29, 2026 by D. Ruddy
Converting a sprinkler zone to drip irrigation is one of the smartest water-saving upgrades you can make for your flower beds, shrub borders, and vegetable gardens. Overhead sprinklers waste water through evaporation and wind drift, and they keep leaves wet which promotes fungal diseases. Drip irrigation delivers water directly to the root zone, uses 30 to 50 percent less water, and keeps foliage dry and healthy. The best part? You do not need to install new valves or run new wiring. You can convert an existing sprinkler zone to drip right at the sprinkler head.
In this complete guide, I walk you through every step of converting a sprinkler zone to drip irrigation: identifying which zones to convert, capping unused heads, installing a drip manifold, running distribution tubing, adding emitters for each plant, adjusting your controller for longer run times, and maintaining your new drip system. I also cover the tools and components you need, common mistakes to avoid, and answers to frequently asked questions. Whether you have a single flower bed or an entire yard of planted areas, this conversion saves water, improves plant health, and reduces your weekly yard work.
When to Convert Sprinkler to Drip
Convert a sprinkler zone to drip when: The zone waters flower beds or shrubs, not grass. Overhead water is causing leaf diseases on your plants. You want to reduce water usage in planted areas. The sprinkler spray is blocked by mature plants. You want to add a drip zone without installing new valves.
Do not convert zones that water lawn areas. Grass needs overhead watering. Drip cannot cover large lawn areas efficiently. Keep lawn zones as sprinklers. Convert only the planted beds.
What You Need for the Conversion
A drip conversion kit or individual components: Drip manifold that replaces the existing sprinkler head. Pressure regulator to reduce the pressure from typical sprinkler pressure (30-60 PSI) to drip pressure (15-30 PSI). Filter to prevent debris from clogging drip emitters. 1/2-inch distribution tubing for the main drip line. 1/4-inch drip line for branches to individual plants. Emitters, drippers, or micro bubblers for each plant. Fittings and stakes. A cap or plug for any unused sprinkler heads in the zone.
Step 1: Identify the Zone to Convert
Determine which zone you want to convert. Turn on each zone one at a time. Note which zone feeds the flower beds or shrubs. Count how many sprinkler heads are on that zone. Each head needs to be either converted to a drip manifold or capped off.
Step 2: Cap the Sprinkler Heads You Do Not Need
If the zone has sprinkler heads in the lawn that you want to keep, you cannot convert this zone. Drip and sprinklers cannot share a zone. They water at completely different rates. The sprinklers would soak the lawn while the drip barely wets the soil or vice versa.
If the zone only waters planted beds, plan to cap some heads and convert others. You do not need to convert every head. One drip manifold can supply tubing that covers the entire bed.
To cap a head: Dig it up carefully. Unscrew the sprinkler head from the riser. Screw on a threaded PVC cap. Wrap the threads with Teflon tape first. Bury the capped riser. Mark the location so you can find it later if needed.
Step 3: Install the Drip Manifold
Choose one or two sprinkler head locations to convert. These become the water source for your drip system. Dig up the selected head. Unscrew the sprinkler head. Screw on the drip manifold in its place. The manifold usually threads onto the 1/2-inch riser that the sprinkler was on.
The manifold typically includes the pressure regulator and filter built in. If your manifold does not, install them between the riser and the drip tubing connection. Pressure regulator first. Then filter.
Step 4: Run the Drip Tubing
Connect 1/2-inch distribution tubing to the manifold. Run the tubing along the edge of the bed or through the middle. Use stakes every 3 to 4 feet to hold it in place. Keep the tubing on the surface for now. You will cover it with mulch later.
At the end of the main line, install a flush valve or figure-8 end cap. This lets you flush debris from the system. Drip emitters clog easily. Regular flushing prevents this.
Step 5: Add Emitters and Branch Lines
Punch holes in the 1/2-inch tubing where you need water. Use the proper punch tool. Insert barbed connectors. Run 1/4-inch drip line to each plant. Attach emitters at the plant end. Stake emitters 2 to 4 inches from the plant stem.
Use different emitters for different plants. Half-GPH for small perennials. One-GPH for medium shrubs. Two-GPH for large shrubs and trees. Multiple emitters per plant work better than a single high-flow emitter. Two 1-GPH emitters on opposite sides of a shrub water the root zone more evenly than one 2-GPH emitter.
Step 6: Adjust the Controller
Your old sprinkler zone probably ran 15 to 30 minutes. That is not enough for drip. Drip waters slowly. The zone needs to run longer.
Change the run time for the converted zone to 45 to 90 minutes. Start with 60 minutes. Check the soil moisture after watering. Dig down 6 to 8 inches. The soil should be damp but not muddy. Adjust the run time up or down.
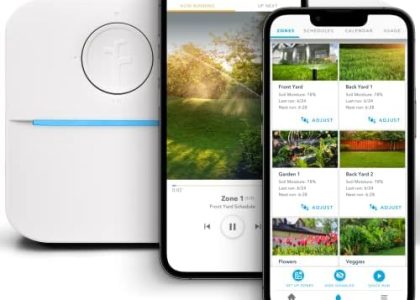
If your controller allows, change the zone type from sprinkler to drip. Smart controllers like the Rachio adjust watering algorithms based on zone type. If you cannot change the zone type, just adjust the run time manually.
Step 7: Test and Cover
Turn on the zone. Walk the entire drip layout. Check every connection for leaks. Check every emitter. Water should drip, not stream. Clean or replace any emitter that is not working. Let the system run for the full cycle. Check for pooling water which indicates a leak or too high a flow rate.
Once everything works, cover the tubing with 2 to 3 inches of mulch. The mulch hides the tubing and reduces evaporation from the soil. Keep the emitters barely visible so you can check them.
Best Drip Conversion Products
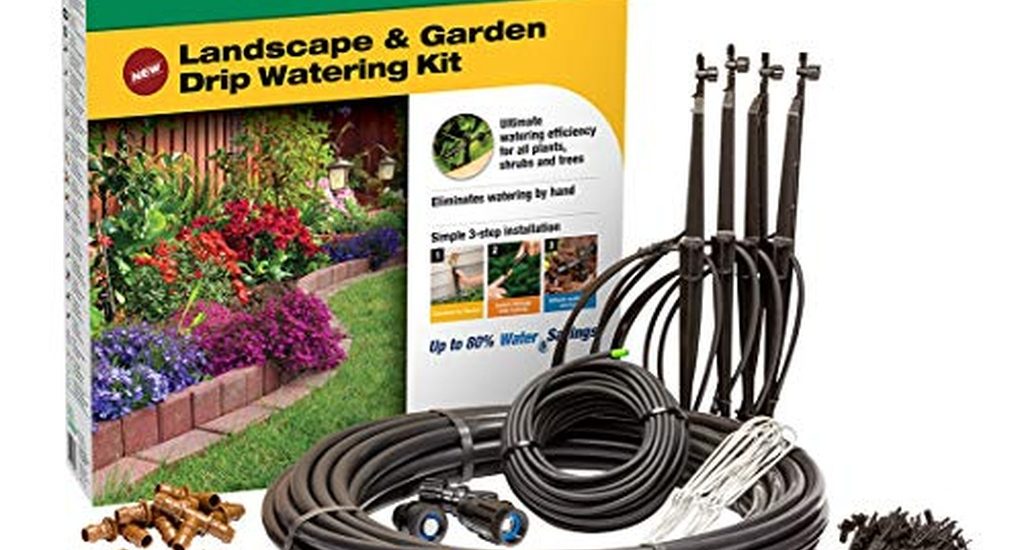
Rain Bird Drip Irrigation Conversion Kit
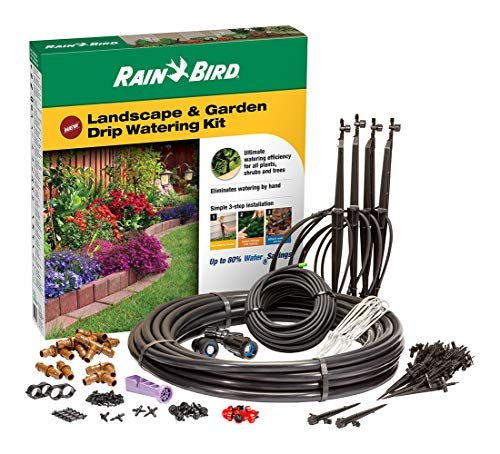
The Rain Bird Drip Irrigation Conversion Kit is the easiest way to convert an existing sprinkler head to drip. It includes the manifold that threads onto your existing riser, a pressure regulator, a filter, 25 feet of 1/2-inch distribution tubing, and multiple emitters and fittings. Everything you need to convert one sprinkler zone to drip is in the box. The kit is designed for up to 200 square feet of garden or flower bed coverage.
⭐ What Users Say on Amazon: “This kit made the conversion incredibly simple. I was able to convert a sprinkler zone that watered my front flower bed in about 2 hours. The instructions are clear and the components are good quality. The pressure regulator and filter are essential for drip – glad they are included. Saved me from buying parts individually and I had enough tubing and fittings to cover the entire bed.”
✅ Pros
- Complete kit includes everything needed for one zone
- Easy installation – threads onto existing sprinkler riser
- Includes pressure regulator and filter for reliable operation
- Covers up to 200 sq ft of garden beds
- Rain Bird quality at a reasonable price point
❌ Cons
- Only 25 ft of tubing – larger beds need an extension kit
- Plastic fittings can crack if over-tightened
- Emitters may clog without regular filter cleaning
- Not suitable for large gardens over 300 sq ft without expansion
🎯 Best For: Homeowners converting their first sprinkler zone to drip who want an all-in-one solution. Ideal for small to medium flower beds and shrub borders up to 200 sq ft.
Maintenance Tips
Flush the system monthly. Open the end cap and let water run for a minute. This clears sediment. Check emitters regularly. A clogged emitter is a dead plant if you do not catch it. Clean the filter monthly. Replace it annually. Before winter, drain the system if you live in a freezing climate. Open the end caps. Let gravity drain the lines.
Disclosure: As an Amazon Associate I earn from qualifying purchases. Prices and availability were checked on June 17, 2026 and may change.
Affiliate Disclosure: As an Amazon Associate, grassblogger.com earns from qualifying purchases. When you buy through our links, we may earn a commission at no extra cost to you.