Last Updated on June 29, 2026 by D. Ruddy
Designing a sprinkler system from scratch sounds overwhelming, but it is actually a straightforward process once you understand the fundamentals. Whether you are tired of dragging hoses around your yard or want to boost your home value with a professional-grade irrigation system, a well-designed sprinkler system saves water, time, and money. I designed my own system two years ago and it transformed my lawn from patchy to perfect. The key is following a methodical approach: measure, plan, choose the right components, and lay everything out before you dig a single trench.
In this complete guide, I walk you through 7 essential steps to design a sprinkler system that delivers even coverage, avoids dry spots, and works with your home’s water pressure and flow rate. You will learn how to measure your yard, calculate your water flow, choose between rotor and spray heads, plan head-to-head coverage, divide your lawn into zones, and create a detailed pipe layout. I also cover common mistakes that DIYers make and answer the most frequently asked questions about permits, costs, and materials. By the end of this guide, you will have a complete, ready-to-install sprinkler system design tailored to your specific lawn.
Step 1: Measure Your Yard
Grab a 100-foot measuring tape and a piece of graph paper. Walk your entire yard and sketch the shape. Include everything. The house. The driveway. The sidewalk. Trees. Flower beds. Garden areas. Anything that should not get sprayed with water.
Mark the dimensions in feet. A standard suburban front yard might be 40 feet wide and 50 feet deep. Backyards vary more. Write down every measurement. Take photos from different angles. You will reference these during the design.
Step 2: Find Your Water Source and Measure Flow Rate
Your sprinkler system needs enough water to run all the heads in a zone at once. You need to know your available gallons per minute.
Get a 5-gallon bucket and a stopwatch. Find the spigot closest to where you will connect the system. Turn it on full blast. Time how many seconds it takes to fill the bucket. Divide 300 by that number. That is your gallons per minute.
Example: If the bucket fills in 30 seconds, your flow rate is 10 GPM. That is very good. If it fills in 60 seconds, you have 5 GPM. That is workable but limits how many heads you can run per zone.
Also measure your water pressure with a pressure gauge. Screw it onto the spigot and turn on the water. Residential systems work best at 30 to 60 PSI. Write down both numbers. Flow rate in GPM. Pressure in PSI.
Step 3: Choose Your Sprinkler Heads
Two main types. Rotors and spray heads. Pick the right one for each area.
Rotors rotate in a circle and throw water 20 to 50 feet. Use them for large open lawn areas. Common choices: Rain Bird 32SA, Hunter PGP-Ultra, Rain Bird 5004. Spray heads stay in one position and throw a fan of water 10 to 15 feet. Use them for small lawns, narrow strips, and areas near the house. Common choice: Rain Bird 1804VAN.
The rule: rotors for big areas, spray heads for small areas. Never mix rotors and spray heads on the same zone. They water at different rates.
Step 4: Plan Head-to-Head Coverage
This is the most important rule in sprinkler design. Every sprinkler head must spray all the way to the next sprinkler head. This is called head-to-head coverage. Without it, you get dry spots between the heads.
For rotors that spray 30 feet, space them 25 to 30 feet apart. For spray heads that spray 15 feet, space them 12 to 14 feet apart. Draw circles on your graph paper to represent each head’s spray pattern. Overlap the circles. The overlaps are where you get complete coverage.
Place heads in a grid pattern for square areas. Place them in a triangle pattern for irregular areas. Heads along the edges should spray inward, not onto the sidewalk or street.
Step 5: Divide Into Zones
One zone is one group of sprinkler heads that run at the same time. Your available flow rate limits how many heads per zone.
Add up the GPM of each head in a proposed zone. Each rotor uses about 2 to 5 GPM depending on the nozzle. Each spray head uses about 1 to 2.5 GPM. The total must be less than your available flow rate. Leave about 10 percent buffer.
Example: You have 10 GPM available. Each rotor uses 3 GPM. You can put 3 rotors on a zone. 3 rotors times 3 GPM equals 9 GPM. Under 10 GPM. Good.
Group heads by sun exposure. Sunny areas need more water than shady areas. Put sunny zones on different valves than shady zones so you can run them for different times.
Step 6: Draw the Pipe Layout
Now draw where the pipes go. The main line runs from the water source to the valve manifold. Lateral lines run from each valve to the sprinkler heads in that zone.
Use PVC pipe for the main line and laterals. 1-inch for the main line. 3/4-inch for lateral lines with 3 or fewer heads. 1-inch for lateral lines with 4 plus heads. Use shorter pipe runs where possible. Every foot of pipe adds friction and reduces pressure.
Mark where each valve goes. The valve manifold should be in an accessible spot near the water source. Mark where the controller will be mounted. Usually in the garage or on an exterior wall.
Step 7: Create Your Parts List
From your design, count everything. Number of sprinkler heads by type and pattern. Total feet of pipe by size. Number of zone valves. Number of valve boxes. Wire length from controller to valves. Fittings. PVC glue and primer. Pressure regulator. Backflow preventer. Controller.
Add 10 percent extra for fittings, mistakes, and changes during installation. Buy it all at once. Hardware store trips mid-project are frustrating.
Common Design Mistakes to Avoid
Mixing rotors and spray heads on the same zone. Rotors water slowly over time. Spray heads dump water fast. Mix them and half the zone gets overwatered while the other half is dry.
Spacing heads too far apart. If your rotor throws 30 feet, spacing them 35 feet apart creates huge dry spots. Head-to-head coverage is not optional. Not accounting for slopes. Water runs downhill. On a slope, put more heads at the top and run shorter cycles to prevent runoff. Using too many heads per zone. Exceeding your flow rate kills pressure and ruins coverage. When in doubt, add another zone.
Shop Sprinkler System Components on Amazon
Top Product Recommendations for Your DIY System
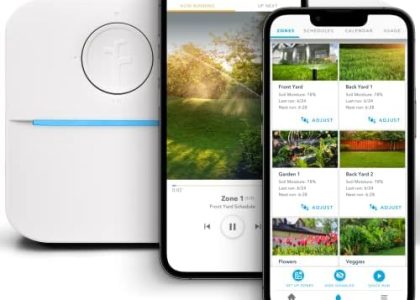
Best Controller: Rachio 3 Smart Sprinkler Controller
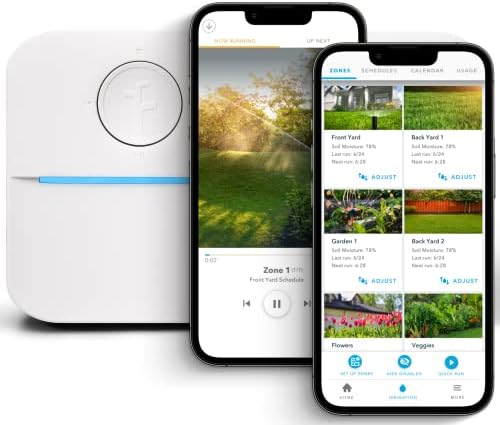
The Rachio 3 is the gold standard for smart sprinkler controllers. It connects to WiFi, uses local weather data to automatically adjust watering schedules, and integrates with Alexa and Google Home. The 8-zone model covers most residential systems. The app is intuitive and the hyperlocal weather intelligence actually saves water by skipping watering when rain is forecast. For a DIY system, the Rachio 3 makes setup and scheduling effortless.
⭐ What Users Say on Amazon: “This controller completely changed my watering habits. I installed it myself in about 20 minutes. The weather intelligence feature is amazing – it actually skipped watering during a surprise rainstorm while my neighbor’s timer ran through the whole downpour. The app is easy to use and the monthly water reports help me track usage. Best upgrade I have made to my sprinkler system.”
✅ Pros
- Weather intelligence auto-adjusts for rain, wind, and humidity
- Easy DIY installation replaces most standard controllers
- Intuitive app with monthly water usage reports
- Works with Alexa, Google Home, and Apple HomeKit
- 8, 12, or 16-zone models to fit any system size
❌ Cons
- Requires WiFi connection for smart features
- Premium price at $200-$250 for 8-zone
- No physical buttons – phone-dependent for adjustments
- Some users report WiFi connectivity issues with distant routers
🎯 Best For: DIY homeowners installing a new sprinkler system who want the most advanced smart features, automatic weather adjustment, and the best app experience available.
Best Rotor Heads: Rain Bird 32SA Gear-Drive Rotor
For most DIY systems, the Rain Bird 32SA rotors offer the best balance of price, performance, and reliability. Each rotor covers 19 to 32 feet and costs around $12. The gear-drive mechanism is smooth and the top-adjustment feature lets you fine-tune coverage while the system is running. For a 5,000 to 10,000 square foot lawn, you will need about 8 to 15 rotors depending on your layout.
⭐ What Users Say on Amazon: “Installed 14 of these in my front and back yard. At $12 each they are an incredible value. The top adjustment is genius – I could dial in each head arc and distance without digging anything up. Two seasons in and zero issues. Coverage is even when spaced properly at 25-28 feet apart. Highly recommend for DIY installations.”
✅ Pros
- Excellent value at around $12 per rotor
- Tool-less top adjustment for arc and distance
- Gear-drive mechanism is smooth and reliable
- Available in multiple models for different throw distances
- Easy DIY installation with standard PVC fittings
❌ Cons
- Requires proper head-to-head spacing calculation
- Not compatible with very low water pressure (below 25 PSI)
- Plastic construction can crack if over-tightened
- Stainless steel adjustment screw can strip if forced
🎯 Best For: DIY homeowners building a new in-ground system who need reliable, affordable rotor heads for even lawn coverage. Perfect for rectangular and square lawns of 5,000-15,000 sq ft.
Best Spray Heads: Rain Bird 1804VAN Pop-Up Spray Head
For flower beds, narrow strips, and small lawn areas, the Rain Bird 1804VAN pop-up spray heads are the standard choice. The 4-inch pop-up height clears most grass types. The VAN (variable arc nozzle) adjusts from a 25-degree narrow strip to a full 360-degree circle. Each head covers 12 to 15 feet. At around $8 each, they make small-area coverage affordable and precise.
⭐ What Users Say on Amazon: “The VAN nozzles are amazing for small odd-shaped areas. I have one adjusted to a 45-degree wedge for a corner flower bed and another at 180 degrees for a side strip. The pop-up mechanism disappears completely when not in use. Installation is straightforward – just trench, pipe, and screw them onto risers. Great value for the precision you get.”
✅ Pros
- Variable arc nozzle adjusts from 25 to 360 degrees
- 4-inch pop-up height clears most grass
- Affordable at around $8 per head
- Disappears below grass when not in use
- Professional finished look for any yard
❌ Cons
- Requires trenching and plumbing work to install
- Limited to 12-15 ft throw distance
- Plastic construction can be brittle in freezing temps
- Needs at least 25 PSI for proper operation
🎯 Best For: Homeowners who want a professional invisible irrigation system for flower beds, narrow lawn strips, and small yard areas. Ideal for those willing to do a weekend DIY install.
Frequently Asked Questions
Do I need a permit to install a sprinkler system?
Check with your local building department. Most areas require a permit for in-ground sprinkler systems. The plumbing inspector will check the backflow preventer installation. Skipping the permit can cause problems when you sell the house.
How much does a DIY sprinkler system cost?
For a typical 5,000 to 10,000 square foot lawn, expect to spend $500 to $1,500 on materials. Professional installation adds $2,000 to $4,000. The biggest cost items are the controller, backflow preventer, and zone valves.
Can I use a garden hose for my sprinkler system?
No. Garden hoses are not designed for constant pressure. They burst. Use PVC or polyethylene pipe rated for constant pressure. Schedule 40 PVC is the standard for residential systems.
What is the best controller for a DIY system?
The Rachio 3 if you want smart WiFi control. The Rain Bird SST series for a simple reliable timer. The Orbit B-hyve for good smart features at a lower price. Match the number of zones on the controller to the number of zones in your design.

Shop In-Ground Sprinkler Heads
Disclosure: As an Amazon Associate I earn from qualifying purchases. Prices and availability were checked on June 17, 2026 and may change.
Affiliate Disclosure: As an Amazon Associate, grassblogger.com earns from qualifying purchases. When you buy through our links, we may earn a commission at no extra cost to you.