
A sprinkler timer only works as well as the schedule you program into it. The wrong schedule wastes water and leaves your lawn patchy. The right schedule gives you a green lawn with less water. Here is how to program your sprinkler timer the right way.
Understand Your Timer Type
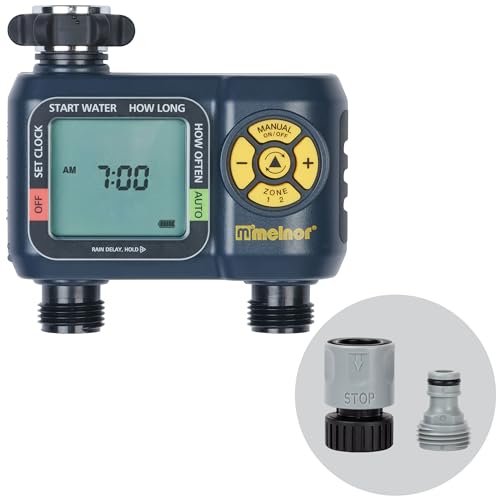
There are three types of sprinkler timers. Mechanical timers: You twist a dial to set duration. No programming. No scheduling. Simple and limited. Digital hose timers: Like the Melnor AquaTimer. LCD screen. Multiple programs per day. Battery powered. Screws onto a spigot. In-ground controllers: Like the Rachio 3 or Rain Bird series. Mounted on the wall. Controls multiple zones. Some are WiFi-enabled.
The programming concepts are similar across types. The buttons and menus differ. Read your manual for the specific button sequence. Here is the logic that applies to all of them.
Step 1: Set the Current Time and Date
This sounds obvious but skipping it messes everything up. Your timer needs to know what time it is right now. Otherwise it waters at the wrong time. Set the clock on your timer. If it is a smart controller, it usually sets the time automatically from the internet.
Step 2: Set Watering Days
This is where most people get it wrong. They set the timer to water every day. That is almost always too much.
For established lawns, water 2 to 3 times per week. Not every day. Daily watering creates shallow roots. Shallow roots make the lawn weak and prone to drying out. Less frequent deep watering encourages deep root growth.
For new lawns from seed, water lightly 2 to 3 times per day for the first two weeks. Then gradually reduce frequency and increase duration. For gardens and flower beds, water 2 to 4 times per week depending on plant types and weather.
Select specific days. Monday, Wednesday, Friday is a good schedule for most lawns. Or use the interval setting if your timer has one: water every 3 days.
Step 3: Set Watering Start Times
Water early in the morning. 4 AM to 8 AM is the ideal window. Early watering reduces evaporation. The water soaks into the soil before the sun gets hot. The grass leaves dry during the day which prevents fungus.
Do not water in the evening. Wet grass at night promotes fungal diseases. Do not water in the middle of the day. You lose 30 percent or more to evaporation.
Set one start time per watering day. Some timers allow multiple start times. For lawns, one start time is enough. For new seed or container plants, you might use two or three start times at 6 AM, 12 PM, and 4 PM.
Step 4: Set Zone Run Times
How long each zone runs depends on the type of sprinkler heads in that zone.
Spray head zones: 10 to 20 minutes per cycle. Spray heads put out water fast. Short cycles prevent runoff. If you need more water, run multiple short cycles with a soak period in between rather than one long cycle. Rotor zones: 30 to 60 minutes per cycle. Rotors put out water slowly. They need longer run times to deliver enough water. Drip zones: 30 to 90 minutes per cycle. Drip emitters water very slowly. Longer run times are needed to soak the root zone.
These are starting points. Adjust based on how your lawn and plants respond. Dig down after watering. The soil should be moist 6 to 8 inches deep for lawns. Adjust run time up or down to achieve this.
Step 5: Set Seasonal Adjustments
Your lawn needs different amounts of water in different seasons. Many digital timers have a seasonal adjust or water budget feature. This lets you increase or decrease all run times by a percentage without reprogramming each zone.
Spring: Set to 50 to 70 percent. Cool weather and spring rains mean less water is needed. Summer: Set to 100 percent. Hot weather means maximum water use. Fall: Set to 50 to 70 percent. Cooler weather again. Winter: Set to 0 percent or off. Most lawns go dormant and need zero supplemental water. Smart controllers like the Rachio do this automatically based on weather data.
Step 6: Use Rain Delay When Needed
After a good rain, skip the next watering cycle. Most digital timers have a rain delay button. Press it and choose 1 to 7 days of delay. The timer resumes its normal schedule after the delay period.
Smart controllers with WiFi skip rain days automatically. This is their biggest water-saving feature. If your timer is manual, you have to remember to press the button or turn the timer off. Write yourself a reminder.
Sample Schedule for a Typical Lawn
Here is what my timer is set to for my 6-zone system in the summer:
Watering Days: Monday, Wednesday, Friday. Start Time: 5:00 AM. Zone durations: Zone 1 front lawn rotors: 45 minutes. Zone 2 side yard spray heads: 15 minutes. Zone 3 backyard rotors: 50 minutes. Zone 4 flower bed drip: 60 minutes. Zone 5 backyard spray: 18 minutes. Zone 6 garden drip: 45 minutes. Seasonal Adjust: 100 percent in July-August, 60 percent in May-September, 0 percent November-March.
Shop Sprinkler Timers on Amazon
Disclosure: As an Amazon Associate I earn from qualifying purchases. Prices and availability were checked on June 17, 2026 and may change.
Affiliate Disclosure: As an Amazon Associate, grassblogger.com earns from qualifying purchases. When you buy through our links, we may earn a commission at no extra cost to you.